How to Tar a Flat Roof: Complete Guide for Homeowners
Look, after 23 years doing flat roofs across Queens, I can tell you that tarring a flat roof isn't something most homeowners should tackle themselves. But I get it - sometimes you need to understand the process, whether you're hiring a contractor or dealing with an emergency patch job until the pros arrive.
When Tarring Makes Sense (And When It Doesn't)
First things first - not every flat roof needs tar. Here in Queens, I see homeowners throwing black tar on everything from EPDM rubber roofs to TPO membranes, and that's just creating bigger problems down the road.
Tar works best on built-up roofing (BUR) systems - those old-school gravel and felt roofs you see on a lot of the pre-war buildings in Astoria and Long Island City. If you've got one of those modern single-ply membranes, tar might actually void your warranty.
My crew just finished a job on 31st Street last month where the homeowner had slapped roofing cement all over their TPO roof trying to stop leaks. Cost them an extra $3,200 because we had to strip and replace sections that were perfectly fine underneath all that unnecessary tar.
Understanding Your Flat Roof System
So what's covered on your roof right now? Walk up there (safely - more on that in a minute) and take a look. You've got three main types in Queens:
- Built-up roofing (BUR): Multiple layers of felt with hot tar between them, usually topped with gravel
- Modified bitumen: Torch-applied or cold-adhesive membranes that look like thick black rubber
- Single-ply membranes: EPDM, TPO, or PVC - these look like one continuous sheet
Only that first one - the BUR system - should really get tar applied to it by a homeowner. The others need specific repair methods that tar won't help with.
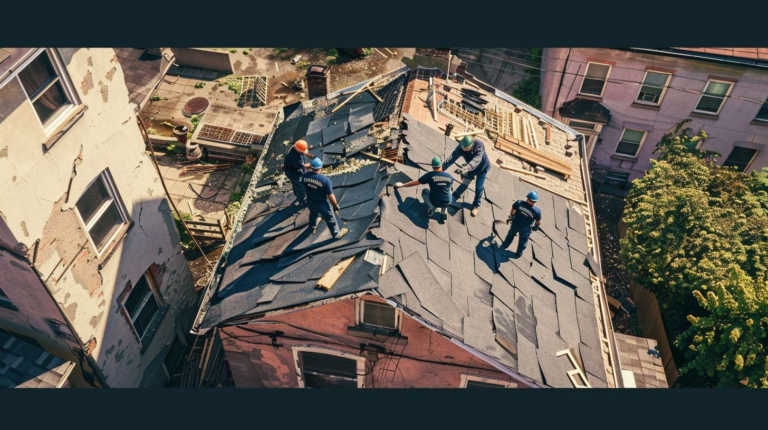
Safety First - This Isn't Negotiable
I can't tell you how many times I've gotten calls from homeowners who've fallen through a flat roof or gotten seriously hurt trying to tar it themselves. Just last year, a guy in Elmhurst went right through his roof trying to patch a small leak on a rainy day.
Here's what you need before you even think about getting up there:
- Proper ladder rated for your weight plus materials
- Non-slip shoes (not sneakers - get work boots)
- Someone else on the ground who knows you're up there
- Dry weather - wet flat roofs are skating rinks
- Tool belt or bucket to keep your hands free for climbing
And here's the thing - if your roof feels spongy anywhere, get off immediately. That means the decking underneath is rotted, and you could fall through.
Materials You'll Actually Need
Don't just grab whatever's cheapest at Home Depot. Quality materials matter, especially with the temperature swings we get here in New York. I get most of my materials from Beacon Supply on Northern Boulevard - they know what works in this climate.
For a basic tar application, you need:
- Roofing cement or plastic roof cement: Not the thin liquid stuff - get the thick, fibered cement
- Mesh fabric or fiberglass cloth: For reinforcement over larger areas
- Putty knife or trowel: 4-inch wide works best
- Wire brush: To clean the area first
- Broom: Remove all loose debris
Hot tar is a whole different animal that requires special equipment and training. Stick with cold-applied roofing cement for DIY work.
The Actual Process: How to Tar a Flat Roof
Alright, so you've determined you have a BUR roof that can actually benefit from tar, you've got your safety gear, and the weather's been dry for at least 24 hours. Here's how to do it right:
Step 1: Clean Everything
This is where most people cut corners, and it shows in the results. Use that broom to sweep away all the loose gravel, leaves, and debris. Then get aggressive with the wire brush on any areas where you're applying tar. You want to see clean, dry roofing material - not dirt, moss, or loose bits of old cement.
If there's standing water anywhere, figure out why before you start tarring. Water means drainage issues, and tar won't fix drainage issues.
Step 2: Find the Real Problem
Don't just tar where you see stains on your ceiling inside. Water travels, especially on flat roofs. The actual leak might be 10 feet away from where you're seeing damage inside.
Look for these signs of actual damage:
- Cracks in the roofing surface
- Areas where the gravel has worn away completely
- Bubbles or blisters in the roofing membrane
- Open seams where different sections meet
- Damage around penetrations like vents or HVAC units
Step 3: Apply the Tar Properly
Now here's where technique matters. You're not just slapping cement on there and calling it done. Start with a thin layer - about 1/8 inch thick - and work it into the surface with your putty knife. Press down hard enough to make sure it's bonding, but don't go crazy and create ridges that'll trap water.
For cracks longer than about 6 inches, lay down that fiberglass mesh first, then work the cement through it. This gives you reinforcement that'll last longer than just cement alone.
Oh, and another thing about application - work in manageable sections. Roofing cement starts to skin over pretty quickly in hot weather, so don't open more buckets than you can use in about 30 minutes.
What About Hot Tar?
Look, I don't care what your neighbor's cousin's friend told you about heating up tar in a bucket - don't do it. Hot tar application requires specialized equipment, training, and commercial-grade safety gear. The propane torches and electric kettles you can rent aren't designed for homeowner use, and the fire department in Queens responds to enough roof fires already.
If your roof needs hot tar, call a professional. We've got the proper kettles, pumps, and most importantly, the insurance to cover things if something goes wrong.
Common Mistakes That'll Cost You Later
After two decades of fixing other people's "repairs," I've seen every mistake in the book. Here are the big ones:
Over-application: More isn't always better. Thick globs of tar create water dams and actually make drainage worse. Keep it thin and even.
Wrong weather: Don't tar in rain, obviously, but also avoid really hot days (over 85°F) when the cement gets too soft to work with, and really cold days (under 50°F) when it won't flow properly.
Ignoring the real cause: If you're constantly patching the same area, you've got a bigger problem. Maybe it's poor drainage, maybe the roof structure is settling, maybe the original installation was wrong. Tar is a Band-Aid, not a cure.
Using the wrong type: Plastic roof cement for permanent repairs, aluminum-based coatings for temporary patches. Don't mix them up.
When to Call Flat Masters NY Instead
Sometimes the best DIY advice is knowing when not to DIY. If you're dealing with any of these situations, save yourself the headache and call us:
- Multiple leaks or widespread cracking
- Any area larger than about 4 square feet that needs attention
- Leaks around HVAC equipment or other roof penetrations
- Standing water that won't drain within 48 hours of rain
- Soft spots that feel spongy underfoot
We're licensed ( WC-32847-H15) and insured, which means when we work on your roof, you're protected if something goes wrong. Plus, we know the building codes here in Queens - some of these older buildings have specific requirements that affect how repairs need to be done.
The Real Cost of DIY vs Professional
Here's something most contractors won't tell you straight - sometimes DIY makes sense, sometimes it doesn't. A small patch job with roofing cement might cost you $30 in materials and save you a $200 service call. But if you mess up a larger repair and we have to come fix it later, you're looking at paying twice - once for your materials and again for us to do it right.
My foreman Carlos always says, "Cheap repairs aren't cheap if they don't work." And he's right - I've seen $50 in roofing cement turn into $2,500 in repairs when homeowners tried to fix problems beyond their skill level.
Maintenance After Tarring
So you've successfully applied tar to your flat roof. Good job. But you're not done yet. Roofing cement typically needs to cure for 24-48 hours depending on weather conditions. During that time, stay off the roof and keep pets away too.
After it's cured, get up there every few months and check your work. Look for cracks, separation at the edges, or any signs that water is getting under the patch. The salt air from the East River and Long Island Sound is tough on roofing materials, so what looks good in Manhattan might not hold up as well here in Queens.
Keep some extra cement on hand for touch-ups. Small maintenance now prevents big repairs later.
Understanding Flat Roof Drainage
While we're talking about tar application, let's address the elephant in the room - drainage. No amount of tar will fix a roof that doesn't drain properly. Every flat roof needs at least a 1/4 inch per foot slope toward drains or scuppers. If water sits on your roof for more than 48 hours after rain, you've got drainage issues that need professional attention.
I see this all the time in the older neighborhoods like Woodside and Jackson Heights. Those buildings were often constructed without proper drainage planning, and now we're dealing with 70-year-old problems that can't be fixed with tar alone.
When you're up there applying roofing cement, pay attention to how water flows (or doesn't flow) across your roof. If you see areas where debris consistently collects, or where water obviously pools, make note of them. These are the spots that'll need attention again soon.
Final Thoughts on DIY Roof Tarring
Look, I'm not trying to talk you out of maintaining your own roof. Property ownership means taking care of what you own, and small repairs are part of that. But be honest about your abilities and the scope of the problem.
If you do decide to tar your flat roof yourself, take your time, use quality materials, and don't cut corners on safety. And remember - a good patch job should last several years, not several months. If you're up there with roofing cement every spring, something else is wrong.
For anything beyond basic maintenance, give us a call at Flat Masters NY. We've been keeping Queens roofs watertight since 2001, and we know these buildings inside and out. Sometimes the best DIY decision is knowing when to call the professionals.
