Flat Tar Roof Leaking? We Repair It Fast - Free Estimate
Usually, the ceiling stain is the last stop on the route - not the first. On a flat tar roof in Queens, water enters somewhere along a failed seam or compromised flashing, travels sideways through wet insulation, and finally drops through your ceiling three rooms away from where the real problem lives. At Flat Masters, we trace that path, fix the actual source, and give you a free estimate before a single tool comes out.
Where Flat Tar Leaks Actually Begin
Think of a flat tar roof leak like a subway line: there's the entry stop, the travel line, and the final stop where everyone finally notices the problem. The drip hitting your bucket? That's Times Square. The real failure might be somewhere on the Queens Boulevard stretch - a split seam near the parapet, a failed pitch pocket, a tarred-over conduit flashing that gave up quietly during the last heavy rain. And the roof is, as always, lying to your ceiling again.
The visible stain doesn't tell the whole story - it tells the end of it. I'm Marcus, and I've spent 17 years in flat roofing, specifically tracking down stubborn flat tar roof leak repair problems in Queens buildings that other crews have patched in the wrong spot twice already. The real diagnostic starting points on Queens flat tar roofs are parapet edges, base flashing where walls meet the membrane, seam transitions over older patches, drains that have backed up through winter, and conduit or HVAC penetrations where tar has cracked away from the sleeve. That's where the investigation starts, not at the stain.
Signals That Point to the Real Failure
What People Think Is the Problem
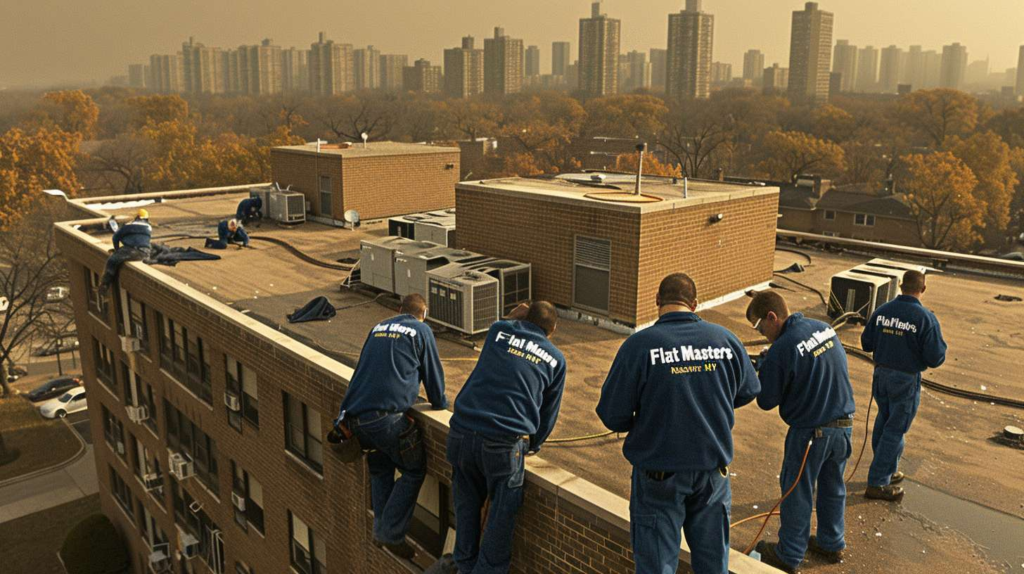
Three feet from the parapet is where I start looking, not in the middle where the stain makes everybody nervous. I remember being on a tar roof in Sunnyside at 6:10 in the morning, fog still hanging low over the rooftops, and the landlord kept insisting the leak had to be above the kitchen stain. I pulled up one split seam near the parapet about twelve feet away and found wet insulation that had been channeling water sideways all night. That's a flat tar roof specific leak repair situation where the roof looks completely intact until you press with your boot and feel the sponge underneath. Queens buildings - especially the older mixed-use stock you see packed along the side streets in Astoria, Ridgewood, and Jackson Heights - carry decades of patched penetrations, parapet-heavy rooflines, and tar surfaces worn flat by foot traffic and weather cycles. The failure is rarely where the ceiling says it is.
What the Roof Is Really Doing
What people think is that the center stain marks the leak. What the roof is really doing is feeding water laterally - under felt layers, along base flashing angles, through the path of least resistance until gravity finally wins somewhere in your living room. Water moving sideways through saturated insulation can travel six, eight, even twelve feet before it drops. That's not a mystery; that's just physics on a low-slope roof.
There are specific field signs that point toward targeted tar roof specific leak repair rather than guesswork. Soft spots underfoot are a giveaway - if the membrane sinks when you walk on it, the insulation beneath is already compromised. Alligatoring across open field areas, lifted seam edges, blister formations telegraphing through silver coating, cracked pitch pockets around penetrations, and the same interior drip coming back after every wind-driven rainstorm - those are the real signals worth reading carefully.
| Myth | Real Answer |
|---|---|
| The stain on the ceiling is directly below the hole in the roof | Water travels laterally through insulation and felt layers on flat tar roofs. The entry point can be feet - or rooms - away from where it finally drips. |
| More roof cement always helps seal a leak | Roof cement applied over a wet surface doesn't bond - it covers. It traps moisture underneath, accelerates deterioration, and makes the eventual proper repair more invasive. |
| Silver reflective coating fixes an active leak | Silver coating is a reflective maintenance product. It bridges nothing, seals no open seam, and will split along existing cracks within one freeze-thaw cycle on a Queens rooftop. |
| If it stopped dripping, it sealed itself | Insulation absorbs and holds water between storms. The drip stopping means the storage capacity filled - not that the entry point closed. The next rain will confirm this. |
| A small blister in the membrane can be ignored | Blisters hold trapped moisture and expand under summer heat. Once the membrane over a blister cracks, you have a direct entry point - and a soft, wet substrate already underneath it. |
- ✅Split seam near the parapet wall - usually the first failure point on aging tar roofs
- ✅Failed base flashing at a wall or curb - where vertical meets horizontal is where tar loses the fight first
- ✅Soft insulation under the membrane - spongy underfoot means water has been living there a while
- ✅Blister telegraphing through coating - the surface looks bumpy or raised; trapped moisture is pushing out
- ✅Cracked or open pitch pocket - around HVAC units, conduits, or pipe stacks that have been tarred over and re-tarred
- ✅Recurring leak after a temporary patch - the same drip after two or three repairs means the real failure zone was never opened
How We Open, Dry, and Rebuild the Leaking Area
What a Proper Tar Roof Specific Leak Repair Includes
Here's the blunt part: tar doesn't forgive lazy prep - and I say that having stood on a Jackson Heights rooftop one August afternoon at 3:30 p.m. where a handyman had smeared silver coating over everything like he was frosting a sheet cake. The roof was hot enough by that point to soften the old patchwork underneath, and every trapped blister was starting to telegraph through the surface in slow motion. I had to explain, pretty calmly but with some effort, that how to repair a flat tar roof leak is not "cover the evidence until sunset." Covering evidence isn't repair. It's just a more expensive problem scheduled for later.
Real repair means isolating the failure zone, removing compromised patch material, cutting out wet or unstable sections when the insulation is already saturated, drying the substrate properly before anything goes back on top, rebuilding the plies with compatible tar roofing materials, reinforcing all flashing details at walls and penetrations, sealing every transition point, and verifying the drainage path before packing up. The insider detail that separates a durable patch from another callback: the repair material has to land on dry, stable membrane well beyond the visible crack or split - not just directly over the stain mark. If your overlap doesn't extend onto sound material, you've drawn a frame around the problem without solving it.
- Traps moisture under the patch - sealed-in water has nowhere to go except deeper into insulation and deck, expanding the damaged zone before anyone realizes it.
- Hides the actual split seam or open flashing - the failure looks cosmetically covered, making it harder to locate during the real repair and requiring more material removal.
- Summer heat softens soft patches - on a Queens tar roof in August, a cement patch applied over an existing blister can re-open, buckle, or create new trapped air pockets under the membrane.
- Makes tear-out harder and more expensive - every layer of cement applied over a failed area is another layer that has to come off cleanly before new material can bond. Stacked temporary repairs compound the final cost.
Repair Scope and Timing in Queens
Last winter in Elmhurst, I peeled back a patch that looked decent from the ladder - smooth surface, no obvious cracking, neatly cut edges - and the insulation underneath had the consistency of wet bread. The original problem was a flashing failure at a low parapet corner, probably small when it started, but the water had been sitting under that neat-looking patch through two or three storms before anyone called. Time and price on a flat tar roof leak repair depend entirely on what's underneath: a simple seam split near a parapet might take a few hours and minimal material; a base flashing failure at a wall transition takes longer because the detail work has to be done right; a saturated section that needs cutting open, drying, and rebuilding is a different scope altogether. Inspection is what determines which category you're actually in.
If the patch looks neat but the insulation underneath feels like a soaked sponge, the roof is not repaired.
| Leak Scenario | Typical Repair Approach | Usual Visit Length | Complexity |
|---|---|---|---|
| Minor seam split near parapet | Open seam, clean and dry substrate, rebuild with reinforced tar plies and seal transition | 2-4 hours | Low |
| Base flashing failure at wall | Remove failed flashing, prep wall and membrane contact area, install new base flashing with proper overlap and seal | 3-5 hours | Medium |
| Blister and soft patch zone | Cut and remove blistered membrane, inspect insulation condition, rebuild plies and surface - scope depends on how far moisture has spread | 4-6 hours | Medium |
| Drain-area leak with debris backup | Clear drain, inspect collar and surrounding membrane, repair or replace drain flashing detail and ponding-edge membrane as needed | 2-5 hours | Low-Medium |
| Saturated section requiring cut-out and rebuild | Full section removal down to dry deck or insulation, allow drying, install new insulation if needed, rebuild full ply sequence with all perimeter detail work | Full day or multi-day | High |
Inspection determines final scope and pricing on every job. These are general reference ranges, not guarantees.
Questions Homeowners Usually Ask After the Bucket Comes Out
During a cold November rain in Maspeth, a retired piano teacher stood in her hallway with a mixing bowl under a drip and apologized to me for the mess - as if she'd caused it. I traced that whole leak to a tiny failure at the base flashing behind a tarred-over conduit stub, nowhere near the main field of the roof. She thought about it for a second and said, "So the roof leaked in cursive," and honestly that's not a bad description of how water actually moves on a flat tar build. It curves through insulation, redirects along flashing angles, slides down conduit sleeves, and finds the path of least resistance to your ceiling. That's why diagnosis isn't an add-on here - it's the core of the repair. When Flat Masters shows up, figuring out where the leak actually entered is the first job, not a separate consultation.
If your flat tar roof is leaking in Queens - whether it's been dripping since last Tuesday or you just noticed a stain that wasn't there before - Flat Masters can trace the real source, walk you through exactly what the repair involves, and get you a free estimate by phone or onsite. Call us and let's find where that leak actually starts.
