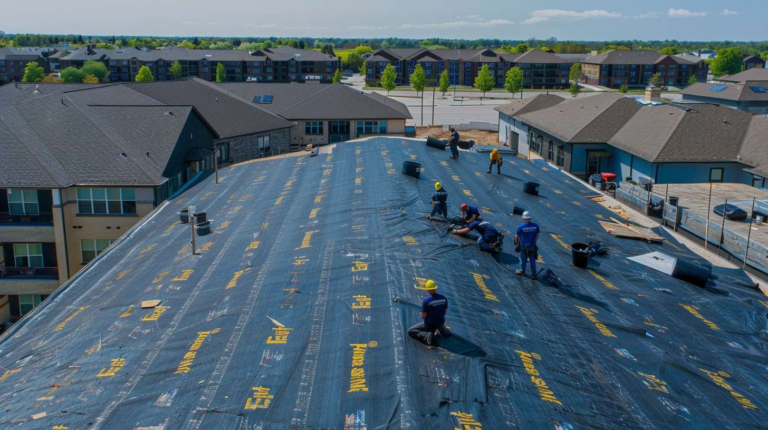
Professional Flat Roof Edge Trim Installation & Repair Services
Look, after twenty-three years fixing flat roofs across Queens, I can tell you that flat roof edge trim is probably the most overlooked component until it starts causing problems. And when it does? You're looking at water damage that'll cost you thousands more than just doing the trim right from the start.
Here's the thing about flat roofing edge trim - it's not just decorative. This stuff is your roof's first line of defense against wind uplift, water infiltration, and the kind of ice dam situations we get here in Queens every winter. I've seen too many buildings on Northern Boulevard with water stains running down their walls because someone cut corners on the edge details.
What Exactly Is Flat Roof Edge Trim?
Flat roof edge trim, sometimes called flat roof kerb edge trim or parapet coping, is the metal flashing system that caps and protects the perimeter of your flat roof. Think of it as a protective cap that sits on top of your roof's edge wall, directing water away from the building while creating a finished, professional appearance.
But here's what most property owners don't realize - there are actually several different types of flat roof trim edge components working together:
- Coping caps that cover the top of parapet walls
- Fascia trim that covers the roof edge face
- Drip edges that direct water away from the building
- Corner pieces and end caps for proper sealing
- Expansion joints for thermal movement
Each piece has to be precisely fabricated and installed. Last month we did a building on Astoria Boulevard where the previous contractor had used standard residential guttering as edge trim. Can you believe that? The whole system failed within eighteen months.
The Critical Role of Drip Trim for Flat Roofs
Drip trim for flat roof applications isn't optional - it's essential. Without proper drip edge detailing, water runs back under the roofing membrane instead of falling cleanly off the building. I've pulled back roofing on buildings where water had been wicking back for years, rotting out the entire roof deck structure.
The drip edge needs to extend at least 1.5 inches beyond the roof deck and include a proper drip groove on the underside. Sounds simple, but you'd be amazed how many contractors skip this detail. We use 24-gauge galvanized steel minimum, though I prefer 22-gauge for better durability against our Queens weather.
Material Selection and Performance
After doing over 1,800 flat roof projects in Queens, I've worked with every edge trim material available. Here's what actually holds up:
Aluminum: Good corrosion resistance, lightweight, but can get brittle in cold weather. Fine for most residential applications, though I've seen issues with expansion and contraction on longer runs.
Galvanized Steel: My go-to for most commercial jobs. Stronger than aluminum, takes paint well, and handles thermal movement better. The galvanized coating typically lasts 15-20 years in our coastal environment before needing refinishing.
Stainless Steel: Premium option that'll outlast the roof itself. I specify this for high-end residential and critical commercial buildings. Yes, it costs more upfront, but you'll never replace it.
Copper: Beautiful and permanent, but requires specialized soldering techniques. I only recommend copper for historic buildings or where aesthetics are paramount. Plus, thieves love copper - learned that lesson the hard way on a job in Flushing.
Installation Process and Critical Details
Proper flat roof side trim installation starts before the roofing membrane goes down. The substrate has to be perfectly level and solid - any deviation will telegraph through the trim and create leak points. We use a transit level to check every inch of the perimeter.
The membrane attachment is critical. I see contractors trying to save time by just adhering the membrane to the vertical wall, but that's a guaranteed failure point. The membrane needs to extend up the wall at least 8 inches, then we install a termination bar with proper sealant before the trim goes on.
Here's where most jobs go wrong - the corner details. You can't just bend flat stock around a corner and call it good. Each corner needs a properly fabricated corner piece with sealed joints. We pre-fab all corners in our shop using a brake press for perfect angles.
Fastening is another critical detail. We use stainless steel screws with neoprene washers, spaced maximum 12 inches on center. The screws go through the trim, through the membrane, and into solid substrate - never just into insulation.
Common Problems We Fix
I can't tell you how many times I've been called to fix edge trim that's failing because the original installer didn't understand the basics. Water infiltration around the perimeter is probably 60% of our repair calls.
Wind uplift damage is huge in Queens, especially on taller buildings. That wind coming off the East River can generate serious uplift forces at roof edges. We had a job on Northern Boulevard where 200 feet of edge trim peeled right off during a storm because it wasn't properly mechanically fastened.
Thermal movement cracks are common too. Metal expands and contracts with temperature changes, and if you don't account for that movement, something's going to crack. We install expansion joints every 30 feet maximum on long runs.
Cost Factors and Investment Value
Quality flat roof edge trim installation typically runs $18-35 per linear foot depending on the complexity and materials. Simple straight runs with aluminum trim are on the low end, while complex geometries with stainless steel can push $45+ per foot.
Don't focus just on the upfront cost though. I've seen building owners spend $12,000 replacing water-damaged ceiling tiles and drywall because they saved $800 on trim installation. Good edge trim should last 20-30 years minimum with proper maintenance.
The investment value is substantial. Buildings with proper edge detailing have fewer maintenance issues, better curb appeal, and higher property values. Insurance companies are starting to look at these details too - proper edge trim can actually reduce your premiums.
Maintenance and Inspection
Even the best edge trim needs regular attention. We recommend annual inspections, checking for loose fasteners, sealant failure, and any signs of water infiltration. Pay special attention after major storms - wind-driven debris can damage trim that looked perfect the day before.
Sealant maintenance is critical. We use high-grade polyurethane sealants that typically need refreshing every 5-7 years. It's a small cost compared to water damage repair.
Keep the drains clear too. Backed-up roof drains can cause water to pool against edge trim, creating hydrostatic pressure that can force water through even good sealing.
Why Choose Flat Masters NY
We've been protecting Queens buildings with quality edge trim systems since 2001. Our fabrication shop on Northern Boulevard produces custom trim pieces for every job - no generic solutions that almost fit.
Every installation comes with a 10-year workmanship warranty, and we use only materials that meet or exceed local building codes. Our crews are trained specifically on flat roof details - this isn't something we do on the side.
Call us at (917) 994-7618 for a thorough evaluation of your flat roof edge trim needs. We provide detailed written estimates and can usually start work within two weeks of contract signing.
Your building deserves edge trim that'll protect your investment for decades, not just until the next big storm.


