Understanding How to Torch On Felt Flat Roof Guide for Homeowners
Look, I'm going to be straight with you about how to torch on felt a flat roof - this isn't a weekend DIY project for most homeowners. In my 20+ years working flat roofs across Queens, I've seen too many disasters from well-meaning property owners who thought they could handle a torch and some felt. But I'll walk you through the process anyway because understanding what's involved helps you make better decisions about your roof.
Essential Safety Considerations Before You Begin
First thing - and I can't stress this enough - torching felt is dangerous work. We're talking about open flames, hot bitumen that can reach 400°F, and working on a roof where one wrong step could be your last. My crew and I have been doing this for decades, and we still treat every torch job with serious respect.
Here's what you absolutely need: proper insurance (liability at minimum), fire extinguisher on site, someone else present for safety, and permission from your insurance company. Most policies specifically exclude torch work done by non-professionals. I learned this the hard way when a customer in Astoria tried to file a claim after their DIY torch job went sideways.
Understanding Torch-On Felt Materials
When people ask me how to put torch on felt on a flat roof, the first thing I explain is material selection. Not all torch-on felt is created equal, especially here in Queens where we deal with everything from brutal summer heat reflecting off those high-rise buildings to winter freeze-thaw cycles that would make your head spin.
You've got your basic polyester-based felts, your glass fiber varieties, and your premium modified bitumen membranes. For most residential flat roofs in our area, I recommend a minimum 4mm base layer with a 5.2mm cap sheet. The salt air from the East River and the temperature swings we get mean you need quality materials or you'll be calling someone like us in three years instead of fifteen.
We source most of our materials from Beacon on Northern Boulevard - they know what works in this climate and what doesn't. I've tried cheaper alternatives over the years, and trust me, they're not worth the headaches.
Step-by-Step Torch Application Process
The actual process of how to felt a flat roof torch on starts long before you light that torch. Surface preparation is everything - and I mean everything. Your existing roof needs to be completely clean, dry, and structurally sound. Any moisture trapped underneath will turn to steam when you apply heat, creating bubbles that'll compromise your entire installation.
Here's how we do it: Start by rolling out your felt but don't remove the backing yet. Position everything first, making sure your overlaps are correct - 75mm on side laps, 150mm on end laps minimum. In windy conditions like we often get here in Queens, you might need to weight everything down with sandbags.
When you're ready to torch, work systematically. Roll back half the felt, remove the backing from that section, and begin heating both the substrate and the underside of the felt. The key is even heat distribution - too much and you'll burn through the membrane, too little and you won't get proper adhesion.
Common Mistakes That Cost Homeowners
Oh, and another thing about torch work - timing is critical. I can't tell you how many times I've been called to fix jobs where someone got impatient and tried to work too fast. You need to see that bitumen starting to flow and create a small wave ahead of your roller. If you're not seeing that telltale shine, you're not applying enough heat.
The biggest mistake I see? People trying to do this in less-than-ideal weather. Last month we had a homeowner in Forest Hills who tried torching felt during a humid August afternoon. The condensation kept interfering with adhesion, and the whole installation failed within six months.
Here's what doesn't work: trying to torch over wet surfaces, working in temperatures below 45°F or above 85°F, using the wrong type of torch (you need a roofing torch, not a hardware store propane torch), and rushing the cooling process.
Professional Equipment and Tools Required
Let's talk equipment because this is where most DIY attempts fall apart. You need a proper roofing torch connected to a large propane cylinder - those little camping bottles won't cut it. The torch head should be designed specifically for roofing work, with proper flame control and a wide heating pattern.
Beyond the torch, you'll need a heavy steel roller (minimum 50 pounds), sharp utility knives that you replace frequently, a seaming iron for detail work, and proper safety gear including fire-resistant clothing. My crew goes through knife blades like crazy because dull blades cause more problems than they solve in felt work.
Weather Conditions and Timing
In Queens, weather timing is everything for torch work. Spring and fall are ideal - moderate temperatures, lower humidity, and less wind. Summer can be brutal because the existing roof surface gets so hot that controlling your torch becomes nearly impossible. I've measured roof temperatures over 140°F on July afternoons in Astoria.
Winter work is possible but tricky. The felt becomes stiff and harder to handle, and you need extra heat to get proper adhesion. Plus, shorter daylight hours mean less working time, and nobody wants to be torching felt with artificial lighting.
Cost Considerations and When to Call Professionals
Here's the reality check: professional torch-on felt installation typically runs $6-12 per square foot in Queens, depending on roof complexity and material quality. A typical 1,000 square foot flat roof might cost $8,000-$15,000 installed properly.
That might seem expensive until you consider what goes wrong with DIY attempts. I've seen insurance claims denied, structural damage from improper installation, and complete re-roofing needed within two years. Carlos, my foreman, always says the most expensive roof is the one you have to do twice.
The equipment rental alone - proper torch, cylinders, rollers, safety gear - easily runs $300-500 per day. Add materials at retail prices (we get contractor discounts you can't access), your time, and the risk factor, and professional installation starts looking pretty reasonable.
Local Building Codes and Permits
Don't forget about permits. Most torch work in NYC requires permits, especially if you're doing more than minor repairs. The Department of Buildings has specific requirements for torch applications, and they're getting stricter every year after some high-profile incidents.
Our license ( WC-31847-H25) covers all the permit requirements, but as a homeowner doing your own work, you'll need to navigate that bureaucracy yourself. Trust me, it's not fun.
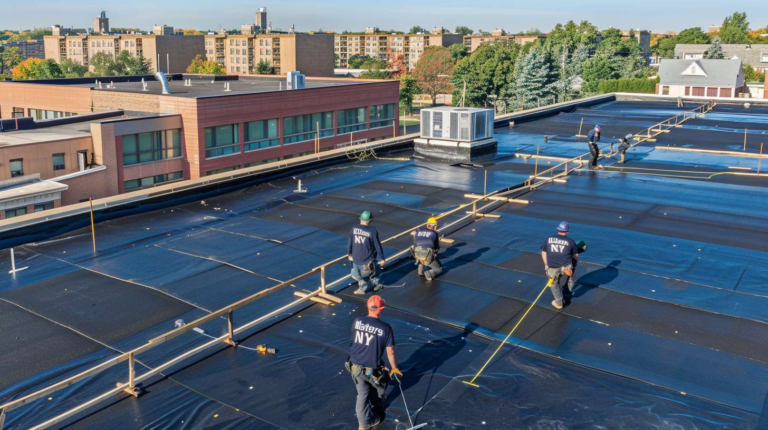
Why Flat Masters NY Recommends Professional Installation
Look, I'm not just trying to drum up business here. We've been fixing DIY torch jobs for over two decades, and the pattern is always the same: initial savings followed by expensive problems. Proper torch-on felt installation requires experience, specialized equipment, and knowledge of local conditions that you can't get from a YouTube video.
Our team has installed torch-on felt on everything from small residential roofs in Elmhurst to large commercial buildings in Long Island City. We understand how Queens weather affects these installations, where the tricky details are, and how to ensure your roof lasts.
When you're ready to discuss your flat roof project professionally, give us a call at (917) 994-7618. We provide free estimates and can often spot potential problems before they become expensive repairs. Sometimes the best DIY advice is knowing when not to DIY.
