Stripping Off an Old Tar Flat Roof Is Hard Work - Here's What It Actually Involves
You're not wrong, removing a flat tar roof looks like one job from the sidewalk-but the moment a shovel breaks the surface, you're actually managing several dirty, heavy, and genuinely risky jobs stacked on top of each other. This article is a reality check on what the tar roof removal process actually involves on Queens buildings, from the first scrape to the moment a new system can even be considered.
What gets stripped away before anyone can even talk about a new roof
At 7 a.m., the tear-off shovel tells me more than the customer's story does. What people think is one rip-off job is actually a layered situation-the roof has been hiding things. Embedded gravel pressed into hot-mopped tar. Multiple felt layers fused together by decades of summer heat. Flashing tie-ins at the parapet that nobody touched since the Nixon administration. Soaked sections that look solid until your heel breaks through. Oversimplifying tar roof tear-off is exactly how people underestimate the cost, the mess, and the danger before work even starts.
I remember peeling back an old tar roof in Ridgewood at 6:40 in the morning, coffee still too hot to drink, and finding three separate roofing systems stacked on each other like somebody had been hiding bad decisions by the decade. The owner kept saying, "I thought they just recoated it," and I had to walk him through it layer by layer-each one a different era, a different crew, a different failure mode. Every layer, residue patch, old repair scar, and trapped soft spot is evidence. The roof isn't just old material; it's a record of every shortcut taken above your head. That's not demolition work. That's roofing archaeology.
| Layer or Component | What It Looks Like During Tear-Off | How It Usually Comes Off | Why It Slows the Job | What It May Reveal Underneath |
|---|---|---|---|---|
| Surface gravel ballast | Loose and embedded stone pressed into mopped tar | Shovel and blower; never in one clean sweep | Clogs drains, adds dead weight to debris loads | Saturated first felt layer or original flood coat |
| Built-up felt layers (BUR) | Dark, brittle sheets-sometimes 3-5 plies thick | Tear-off shovels and flat bars in section chunks | Crumbles instead of lifting; asbestos risk in pre-1980 buildings | Deteriorated insulation board or bare deck |
| Hot-mopped tar layers | Black, gummy residue between plies; sticky in heat | Comes off in chunks or smears depending on temp | Bonds felt to insulation, making clean separation impossible | Torn insulation boards or old wood nailers |
| Perimeter flashing and cants | Metal or tar-embedded fabric at parapet base | Cut free carefully; can't be ripped without damage | Penetrations, gas lines, and AC units tie into this zone | Cracked masonry, rusted metal, failed caulk at parapet base |
| Insulation boards (ISO/fiberboard) | Compressed, waterlogged slabs-sometimes black with mold | Pried up if not adhered; cut out if bonded to deck | Heavy when wet; disposal volume adds haul cost | Deck rot, ponding evidence, buried fasteners |
| Drain bowls and sumps | Clogged or buried under multiple layers of new flashing | Carefully uncovered-cutting wrong here causes leaks | Old drain collars are often corroded or undersized | Standing water trapped under insulation; structural drain failure |
⚠ Don't Assume You're Only Removing One Layer
Queens buildings-especially rowhouses and mixed-use structures-frequently have multiple full roofing systems installed on top of each other, sometimes without removal of prior layers. This means buried fasteners you won't see until your tool catches them, brittle felts that shatter instead of lift, and hot-weather tar that turns removal into a slow, sticky, dangerous grind. Parapet edges and penetrations are the highest-risk zones: unstable material near a drop edge or a gas line penetration is not a DIY moment. Don't assume the top is the only layer-and don't assume what's below it is sound.
Why old built-up roofs almost never come apart cleanly
Where tar, gravel, and felts fight back
Here's the blunt version. Old tar roofing does not lift in tidy sheets. It breaks. It sticks to the insulation below it. It crumbles into dusty fragments and pulls wet insulation board up with it. Sometimes it bonds so hard to the deck that you're not removing roofing anymore-you're grinding. I'm Doreen Velez, and I've spent 27 years in flat roofing with a specialty in diagnosing over-patched flat roofs across Queens, and I still find something new every time a shovel breaks an old BUR surface. The ones that look the most uniform from above are often the ones hiding the worst-stacked systems underneath.
I once opened a roof in Sunnyside and found what should have been a clean cap sheet sitting over patch mounds four inches high, buried mesh that hadn't adhered properly, and a soft perimeter edge that looked absolutely stable from above. You could walk on it. You'd never know. But once we lifted the material near the parapet, the edge had been failing in slow motion for years-the felts were delaminating, and the flashing below was corroded loose. Nobody patched that. They just coated over it and called it maintained.
How water damage changes the removal plan
One August afternoon in Astoria, the blacktop was giving off that syrupy heat shimmer, and my scraper kept catching on a section near the drain. We opened it up and found wet insulation that smelled like a basement after a storm-because the previous crew had packed debris around the drain bowl and simply roofed right over it. That's the kind of tar roof removal process people never picture. They think it's just muscle. What it actually is, is detective work. Moisture paths have to be traced. Drain obstructions have to be uncovered and cleared. Insulation failure zones change how much substrate work is needed before any new material goes down. You can't just pull and go.
| Myth | What the roof is actually doing |
|---|---|
| It peels up in one layer, like a membrane | Multiple plies are fused together-sometimes with different materials from different eras-and they break apart unevenly under any tool |
| Labor is the only real challenge | Every layer removed triggers a new decision: what's underneath, is it sound, does the plan change-the mental work is as demanding as the physical |
| If the surface looks dry, the roof is dry underneath | Tar is an effective seal-until it isn't. Insulation below can hold water for years while the cap sheet above looks perfectly intact |
| You can tell how many times it's been patched from a visual walk | Old coatings and flood coats hide patch mounds, embedded mesh, and prior repair edges that only show up once material starts coming off |
| Removal speed is predictable-you can schedule it to the hour | Hidden layers, saturated insulation, and failed substrate sections can double the tear-off time with zero warning once work begins |
How the tar roof removal process actually unfolds on a real Queens job
If I'm standing on your roof, the first question I'm asking is: how many roofs are we really removing? That question drives everything else. What people think is a clear path to immediate replacement is actually a sequence of decisions that have to happen in order-inspection, access and neighbor protection, controlled test openings at drains and edges, sectional tear-off with continuous debris removal, deck review, and only then a prep plan for new roofing. Skipping a stage doesn't save time. It just means you find out about the problem later, when it costs more to fix.
-
1
Surface Walk and Layer CountWalk the full roof surface. Probe soft spots, check parapet edges, and estimate how many systems are stacked. This is your evidence baseline before the first shovel goes in.
-
2
Protect Access Points, Windows, and Adjacent PropertiesCover roof hatches and bulkheads. Protect neighbor-facing sides with debris netting. On Queens rowhouses, the property line can be three feet from the parapet-loose gravel and brittle felt have nowhere to go but next door.
-
3
Open Test Areas at Drains, Edges, and PenetrationsThese are the highest-risk zones. Cut small sections first. You'll learn whether insulation is wet, whether the drain collar is corroded, and whether flashing can be saved-before committing to full tear-off.
-
4
Tear Off Roofing in Controlled SectionsWork in manageable zones using flat bar shovels, roofing forks, and electric tear-off machines where the deck allows. Section-by-section control prevents the pry-and-guess method from damaging the substrate underneath.
-
5
Bag and Load Debris ContinuouslyDebris control isn't cosmetic-it's structural. Piled material adds dead load to a roof that's already been compromised. Keep the dumpster rotation moving and never let removed material sit in large piles on the deck.
-
6
Inspect the Substrate for Rot, Cracks, and Trapped MoistureOnce material is off, the deck tells its own story. Wood shows soft spots and stain lines. Concrete shows crack patterns and ponding impressions. This review determines what repairs are needed before new roofing can even be discussed.
-
7
Decide on Repairs or Full Deck Work Before New Roofing BeginsThis is the checkpoint most people don't plan for. If the deck needs patching, leveling, or replacement sections, that work happens now-not after the new roof goes on. Skipping this step is how you end up with a new roof on a broken foundation.
When a tear-off turns from messy to dangerous
Bad roofs lie. A surface you can walk across with confidence can have weak edges you'd never detect without probing, loose penetration collars one tug away from opening, and old repair sections that are holding shape through friction alone. I had a Sunday emergency in Woodside after a landlord tried to have his handyman start removing a flat tar roof with a pry bar and a utility knife because "it's only the top layer." By 9 a.m., they had torn into flashing at the parapet, opened a seam near a gas line penetration, and scattered brittle felts across the neighbor's yard. I spent more time making that site safe than actually tearing off roofing. The tools were wrong. The sequence was wrong. And nobody had checked what was tied into what before they started pulling.
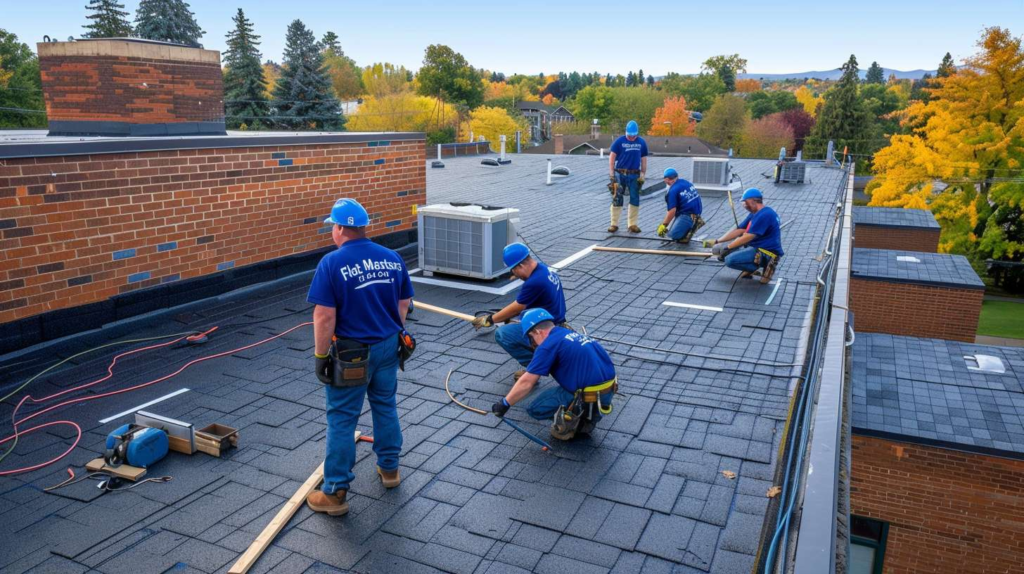
Taking off old tar roofing is a lot like scraping burnt lasagna out of a deep pan-you don't get the whole mess in one clean lift. Controlled sections are the only approach that works safely, especially on Queens roofs where neighboring properties are right there, parapet edges face open drops, and a gust off the Jamaica Bay corridor can turn a sheet of loose felt into a projectile. Work one section at a time near drains, parapets, and penetrations. Don't try to pry up large panels. Let the material tell you where it's releasing and where it's still bonded. Aggressive lifting near a soft edge or an unknown penetration is where the job goes from hard to hazardous, fast.
Knowing this information before you call Flat Masters saves time and gets you a more accurate assessment on the first visit.
- ☑ Approximate building footprint (width × length)
- ☑ Leak history: where, when, how often, and what repairs were done
- ☑ Number of known prior coatings, overlays, or patching rounds (even a rough guess)
- ☑ Access type: roof hatch, interior bulkhead stair, exterior ladder only
- ☑ How close neighboring buildings are-specifically whether shared setbacks exist
- ☑ What's on the roof: drains, HVAC units, skylights, solar panels, gas stacks, or satellite equipment
Questions smart owners ask before approving removal work
Do you want a roof ripped off fast, or do you want the evidence read correctly before the next roof goes on?
Good tear-off planning isn't dramatic-it's just about knowing what the plan is if the crew opens the roof and finds extra layers, saturated insulation, a deteriorated deck section, or flashing that can't be salvaged. Those aren't rare surprises. They're common finds on Queens buildings that have been managed, patched, and handed down without full documentation. Having a clear next-step for each scenario is what separates a smooth job from a stalled one.
If your Queens roof looks like it's been patched, coated, and buried under someone else's guesswork for the last twenty years, Flat Masters should inspect it before anyone starts tearing. Call us for a proper tear-off assessment-we'll tell you what's actually up there before the work begins, not after.
