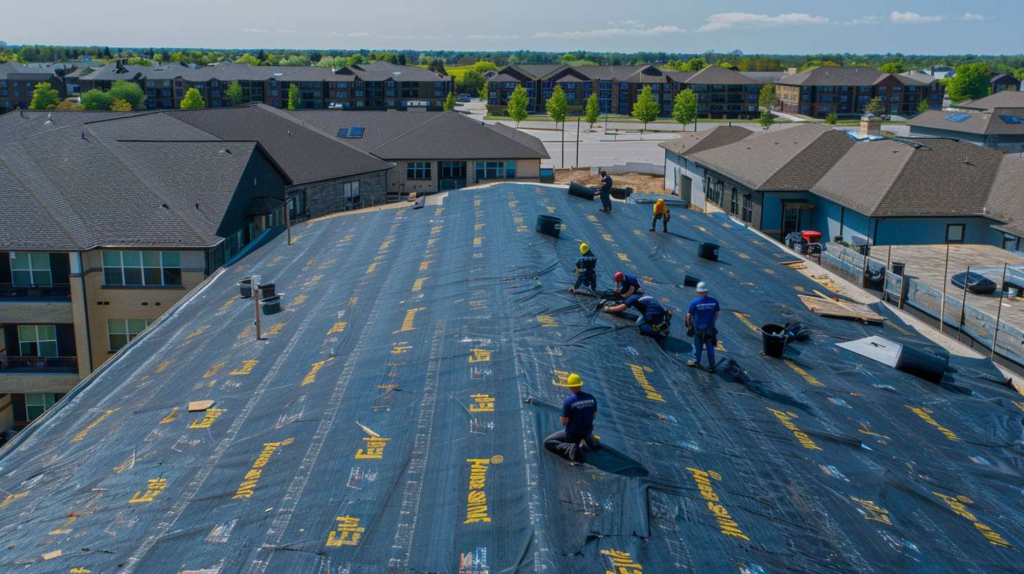
Fascia Board Installation on a Flat Roof Is More Involved Than Most People Expect
Let's get you a real answer instead of a qualified one. The first real mistake people make is treating fascia on a flat roof like decoration - a finish touch you slap on at the end - when it's actually a load-bearing piece of the roof edge system, and everything upstream of it depends on it being right.
The first failure happens before the board goes up
Picture where the water sits at 4:17 on a cold Thursday - not moving, not draining, just sitting at the roof edge while the temperature drops another two degrees. That's the moment flat roof fascia installation either proves itself or starts its slow failure. On a flat roof, there's no slope to rescue a bad edge detail. Treating the fascia board like a trim piece means you're solving the wrong problem while the real one gets wetter.
At the roof edge, everything tells on you. Fascia performance on a flat roof depends on four things working together: the condition of the substrate behind it, where and how the membrane terminates, the relationship between the board and the edge metal, and whether water has a clean exit path off the edge. I don't consider fascia a trim item on flat roofs - I never have. It's the visible front of the edge system, and if the system isn't right, the board is just a prettier way to hide the problem until it's a bigger one.
⚠ What Goes Wrong When You Skip the Edge Assembly Check
- Moisture gets trapped behind the board - with no vapor path and no air gap, the wood on both sides begins to break down within one freeze-thaw cycle.
- Fasteners go into rotten nailers - the board may look attached for a season, but there's nothing solid holding it. It flexes, it loosens, and eventually it moves.
- The drip edge gets blocked - when fascia is installed without accounting for drip edge geometry, water pools at the board face instead of shedding away from the structure.
- Ice and staining follow - water sitting at a tight, blocked edge refreezes in winter and leaves dark staining on the fascia face by spring. Both are symptoms of the same drainage failure.
What has to be checked on the roof edge before fitting begins
Backer condition comes before finish material
Here's the part people rush, and it's the part that leaks. Before a single piece of new fascia goes anywhere near that edge, you need to work through a sequence: probe the nailer or backing board for softness, splits, and flex; verify that the edge metal is correctly lapped over the membrane termination; check that the membrane isn't just loose or bridged at the edge; and look at staining patterns - because water tells you exactly where it's been traveling, if you look. As Doreen Valdez, with 19 years in flat roofing and a reputation across Queens for fixing failed roof perimeters that other crews called "done," puts it: the inspection isn't a formality, it's the work.
A straight line means nothing if the fastening line is weak
I remember one drizzly Tuesday in Maspeth, just after 7 a.m., standing on a two-family garage roof with a homeowner in house slippers pointing proudly at the new fascia he'd had installed the week before. I pressed one thumb into the lower edge and the whole painted face flexed because they'd trapped moisture behind it with no proper backing and no thought for the drip edge. He got quiet fast when I showed him the water stain line sitting exactly where I said it would sit. That's the kind of thing that happens constantly on small garage roofs, rear kitchen extensions, and the open parapet-less edges you see all over Queens - especially where wind-driven rain hits from the southeast and the edge takes the full exposure with nothing behind it to resist it.
I had a small flat roof in Astoria where the fascia looked fine from the sidewalk, but at sunset - literally that orange 6:40 p.m. light - you could see a wave running across the whole front edge. That sounds logical when a crew says they "corrected" a crooked line during installation, but here's where it goes wrong: the previous installer had fastened into soft, split wood and compensated by overdriving nails to pull the board tight. The board was fighting itself the full width of the roof. Overdriven fasteners don't hold - they pull through, especially in compromised wood - so the "straight" line they thought they'd achieved was already working loose. That job is still the one I think about when somebody tells me fitting fascia boards on a flat roof is mostly cosmetic.
How the board actually gets installed without creating a future leak path
Two screws and a prayer is not an installation method. When everything checks out on the inspection - or after the backing and edge assembly have been rebuilt - the actual install follows a sequence that doesn't skip steps: rebuild or confirm backing is solid, establish a straight reference line and commit to it, dry-fit the board and look for gaps or forced curves before a single fastener goes in, confirm the board's relationship to the drip edge and edge metal so water will shed forward and down, then fasten into solid structure at consistent spacing without overdriving. And the honest insider tip, especially on small flat roof fascia runs: after you dry-fit, sight the line from two angles - standing height at the roof edge, and then walk to the sidewalk and look again. The eye catches waves at sidewalk angle late in the day that you will completely miss standing directly above the board. Don't skip that walk.
If you cannot explain where the water goes, you are not ready to fasten the board.
Non-Negotiables During Installation
- ✅ Solid fastening base - every fastener goes into confirmed, dry, structurally sound backing
- ✅ Consistent fastener pattern - even spacing along the full run, not clustered where it was easy to reach
- ✅ Board aligned to edge metal - the relationship between fascia and drip edge determines shedding behavior, not aesthetics
- ❌ Do not trap the lower edge tight against the wall or membrane - that gap is where moisture needs to escape, not collect
- ❌ Do not fasten into split or punky backing - no matter how many fasteners you use, there's nothing there to hold them
- ✅ Confirm water exit path before final fastening - walk to the sidewalk, look at the drip angle, then finish the job
Picture the water before you picture the paint
Small roof edges fail fast when water has nowhere to leave
Think of the fascia like the hem on a coat in slush - it's the part that gets hit first, holds the most, and fails the earliest if it's not built right. One February afternoon in Ridgewood, with sleet hitting sideways off Myrtle Avenue, I was called to look at ice forming in thick teeth off a tiny back addition. The fascia board itself wasn't even the original mistake - the real issue was that the edge detail had been built too tight, with nowhere for water to shed cleanly forward and down, so everything refroze along the face through every freeze-thaw cycle. I ended up sketching the whole edge assembly on the back of a bakery box in the customer's kitchen because that was the fastest way to explain why "install fascia board on flat roof" is not the same thing as "screw a board to the front." Splashback, runoff pooling at a tight lower edge, and even the slow capillary staining from freeze-thaw - they all start with the same root cause: water had nowhere to leave.
I had a woman in Woodside ask me, "If the board looks straight, why does anything else matter?" And honestly, I get why that sounds reasonable. That sounds logical, but here's where it goes wrong: appearance is the last thing you judge on a flat roof edge, not the first. A crisp paint line tells you nothing about drainage clearance. It tells you nothing about whether the lower edge is wicking, whether the drip relationship is correct, or whether you'll have ice teeth again by January. The water doesn't care what the board looks like. It goes where the edge assembly sends it - and if nobody planned that, it goes into your wall.
Decision Tree: Do You Need Fascia Replacement or Roof-Edge Rebuild First?
NO → Rebuild edge assembly before installing any fascia. Stop here.
YES → Is drip edge and membrane termination correct?
NO → Rebuild edge assembly before installing any fascia. Stop here.
YES → Does water shed cleanly off the edge - no pooling, no tight-edge refreezing?
NO → Rebuild edge assembly before installing any fascia. Stop here.
YES → Proceed with fascia board installation.
Skip straight to rebuild recommendation. These conditions on small roofs almost always indicate the edge assembly was never built correctly, not just that the fascia board is worn.
What Different Symptoms Usually Mean at the Fascia Line
Queens owners usually ask the same practical questions
On a 12-foot run, a crooked eighth of an inch turns into an argument - with your neighbor, with the contractor, or with yourself six months later when the staining starts. The questions I hear most from homeowners in Queens are the practical ones: Can I just replace the board without touching anything else? Are small flat roofs simpler because there's less of them? And if it looks neat and straight, isn't the edge fixed? The answer to all three is usually "it depends on what the inspection shows," and on small rowhouse extensions, rear kitchen additions, and detached garage roofs - which are everywhere out here - the inspection almost always finds something that a board swap alone won't solve. Flat Masters has seen this pattern enough times to say it plainly: the board is the last thing that goes on, not the first thing you deal with.
Before You Call About Fascia Work - 5 Things to Note First
- ☐ Note your roof type and approximate size - flat membrane, built-up, or modified bitumen, and whether it's a garage, addition, or main house roof
- ☐ Note whether staining or ice forms at the edge - and roughly when it started. First winter? Multiple winters? After a repair?
- ☐ Take two photos: one close-up of the fascia face and one from the sidewalk - the sidewalk shot often shows the wave or sag that the close shot misses
- ☐ Check whether paint is peeling at the lower edge only - that pattern is a specific symptom worth mentioning, not just general weathering
- ☐ Note whether the roof edge was worked on recently - and if so, whether the fascia was replaced at that time or left in place
If the fascia line on your flat roof is wavy, soft under pressure, icing in winter, or was recently "redone" and still doesn't look right - call Flat Masters. We'll tell you what's actually happening at that edge, and we won't guess.
