How to Install Shingles on Flat Roof: 5 Essential Steps
Look, I'm going to be straight with you about how to install shingles on flat roof systems - it's not your typical weekend DIY project. After 22 years working flat roofs across Queens, from Astoria to Jamaica, I've seen enough botched shingle installations to know this job requires serious preparation and the right approach.
Here's the thing about laying shingles on a flat roof - the process is fundamentally different from sloped installations. You're dealing with minimal drainage, different membrane requirements, and specific techniques that most homeowners aren't familiar with. But when done correctly, a properly shingled flat roof can provide excellent protection for decades.
Understanding Flat Roof Shingle Installation Basics
First thing you need to understand - when we talk about how to shingle a flat roof, we're usually dealing with low-slope applications rather than completely flat surfaces. True flat roofs typically use EPDM, TPO, or modified bitumen systems. But many Queens buildings have low-slope sections where asphalt shingles can work effectively with proper installation techniques.
The key difference in how to lay shingles on a flat roof versus a steep slope is the overlap requirements and sealing methods. On flat applications, we need increased overlap - typically 4 inches minimum compared to the standard 2 inches on steep slopes. Why? Because water moves slower and has more time to work its way under shingles when gravity isn't pulling it down quickly.
Step 1: Proper Surface Preparation and Decking Assessment
Before you even think about how to put shingles on a flat roof, you need a solid foundation. I can't tell you how many times I've been called to fix installations where contractors skipped this critical step. The decking needs to be completely clean, dry, and structurally sound.
Check every square inch for loose nails, protruding fasteners, or soft spots that indicate moisture damage. In Queens, with our humid summers and freeze-thaw cycles, deck deterioration happens faster than you'd expect. Replace any damaged sections with exterior-grade plywood or OSB - minimum 5/8" thickness for flat roof applications.
The surface must be perfectly smooth. Any irregularities will telegraph through the shingles and create vulnerable spots where water can pool. I use a 4-foot level to check for dips or high spots that need attention.
Step 2: Installing the Critical Underlayment System
This is where most flat roof shingle installations go wrong. The underlayment system for flat applications requires synthetic underlayment or modified bitumen - never use standard felt paper. We install it with a minimum 6-inch overlap on all seams, running parallel to the roof edge.
Start at the lowest point of the roof and work upward. Each row should overlap the previous by at least 6 inches, with all seams sealed using roofing cement or self-adhering tape. At penetrations like vents or chimneys, the underlayment needs to extend up the vertical surface at least 8 inches.
Here's something most DIY guides won't tell you - in flat roof applications, I always install a double layer of underlayment. The first layer goes down with standard overlap, then a second layer with offset seams for maximum protection. It adds cost but prevents 90% of the callback issues I used to deal with.
Step 3: Modified Shingle Installation Technique
Now we get to the actual shingle installation, and this is where understanding how to shingle flat roof systems becomes crucial. Start with a starter course along the lowest edge, but unlike steep-slope installations, you need to use roofing cement under every tab of the starter course.
The first full course goes over the starter with standard alignment, but here's the key difference - every shingle gets a continuous bead of roofing cement along the bottom edge before installation. This creates a weather seal that gravity alone can't provide on flat applications.
Work your way up the roof, maintaining straight lines and proper overlap. Each course should cover the nails of the previous course by at least 1 inch, and on flat applications, I recommend hand-sealing every tab with a small dab of roofing cement. Takes longer, but it's the difference between a 15-year roof and a 30-year roof.
Step 4: Critical Flashing and Edge Details
The edge work separates professional installations from amateur attempts. All perimeter edges need drip edge flashing installed over the underlayment but under the shingles. On flat roofs, I use wider drip edge - minimum 4 inches - to handle the slower water movement.
At penetrations, the flashing details are absolutely critical. Each vent, pipe, or other protrusion needs step flashing that extends under the shingles at least 4 inches in all directions. The top edge of each piece of step flashing gets sealed with roofing cement before the next course of shingles goes down.
Don't forget about expansion joints if your flat roof spans more than 150 feet in any direction. Queens buildings often have these long roof runs, and without proper expansion accommodation, you'll get cracking within a few years.
Step 5: Final Sealing and Quality Control
The last step in laying shingles on a flat roof is comprehensive sealing and inspection. Every exposed nail head gets a dab of roofing cement. Every shingle tab gets checked to ensure it's properly adhered. All flashing joints get a final bead of sealant.
Walk the entire roof with a checklist. Look for any shingles that aren't laying flat, any exposed fasteners, any gaps in the coverage. On flat applications, these small details matter more because water has time to find every weakness.
Test the installation by running a garden hose over different sections and checking for any water infiltration from below. Better to find problems now than during the next heavy rain.
Why Professional Installation Usually Makes Sense
Look, I've walked you through how to put shingles on a flat roof, but I'll be honest - this isn't a job for most homeowners. The tools alone - proper ladders, safety equipment, roofing nailers, and specialty flashing materials - can cost more than hiring a professional crew.
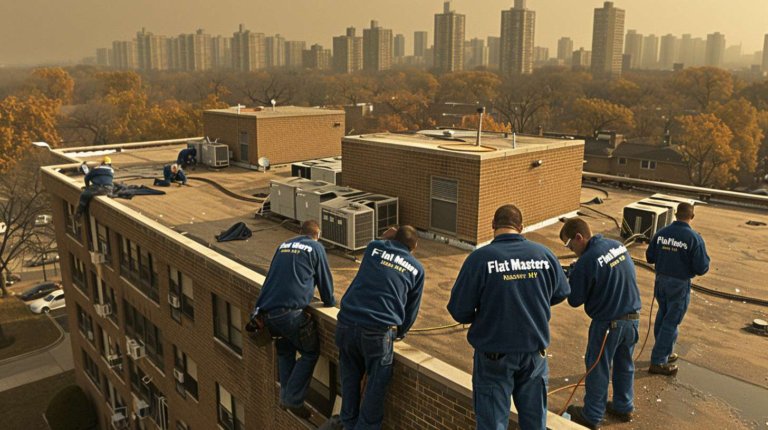
At Flat Masters NY, we've perfected these techniques over thousands of Queens installations. We know which materials work best in our climate, we have relationships with suppliers like Beacon Building Products on Northern Boulevard for quality materials, and we warranty our work.
More importantly, we carry full insurance and handle all the permit requirements that many DIY installers overlook. The Building Department in Queens requires permits for most roofing work, and insurance companies are getting pickier about covering damage from unpermitted installations.
If you're dealing with a flat roof shingle project in Queens, give us a call at (917) 994-7618. We'll come out, assess your specific situation, and give you a straight answer about whether shingles are the right solution for your building. Sometimes they are, sometimes a membrane system makes more sense - but we'll tell you honestly what we think will work best for your situation and budget.
Because at the end of the day, a roof is only as good as its installation. And in Queens weather, you need it done right the first time.
