Designing a Flat Roof Drainage System That Works Under Heavy Rainfall
Trust your instincts here - if something about a flat roof's water behavior feels off, it usually is. The whole premise of how to design flat roof drainage comes down to one practical truth: the roof has to be built to move water on purpose, not left to figure it out on its own. "Flat" does not mean level, and the moment you treat it that way, the design is already behind. This article follows one raindrop across the roof - from where it lands to where it needs to go - so you can see exactly where good design helps it along and where bad design stops it cold.
Why "Flat" Is the Wrong Mental Picture
Trust starts with correcting the most expensive misunderstanding in flat roofing: that a flat roof is supposed to be perfectly level. It isn't. A roof that sits completely flat will hold water, and held water finds its way into the building. The whole job of flat roof design and drainage is to keep that raindrop moving - follow the raindrop from field to drain, and you'll find every problem before the rain does.
A quarter-inch per foot is where I start the conversation, not where I end it. That minimum slope gets the water moving under normal conditions, but it doesn't account for deck deflection over time, parapet walls that interrupt the edge, penetrations that break the flow path, or the way a Queens cloudburst dumps two inches in forty minutes and overwhelms a system designed for a slow drizzle. Minimum slope is a floor, not a finish line.
| Myth | Fact |
|---|---|
| Flat roofs should be completely level | They need intentional slope built toward specific collection points - level roofs hold water by design |
| One drain anywhere on the roof is enough | Drain location has to match the true low areas - a drain in the wrong spot will sit dry while water pools twenty feet away |
| Membrane leaks always mean membrane failure | Poor drainage is the more common culprit - water sitting long enough will find seams, flashings, and penetrations that would otherwise hold fine |
| Overflow drains are optional extras | Overflow protection is a mandatory safety backup - when primary drains clog or get overwhelmed, the overflow route is what keeps water off the structural deck |
| If water disappears within a day, the design is fine | Persistent ponding - even if it eventually evaporates - signals a slope, structural, or outlet problem that's quietly shortening the roof's life |
Mapping the Raindrop Before You Choose Drains
If I asked you where this raindrop goes next, could you point to it without guessing? That question isn't rhetorical - it's the actual design test. You trace one raindrop from the field of the roof to the nearest low point, then to a drain bowl, scupper throat, or edge collection point. If you can't trace that path on a drawing without lifting your finger or losing the line, the design has a gap. As Rina Solis, with 17 years in flat roofing and a specialty in solving repeat drainage failures on Queens buildings, puts it: if the drawing doesn't show you where the water goes, the water will show you instead - and it picks the worst possible moment to do it.
Here's the part people don't love hearing: a drain can be perfectly installed and still be perfectly useless. I remember standing on a six-family building in Elmhurst at 6:10 in the morning, coffee still too hot to drink, after an overnight summer storm. The super kept insisting the drain was there - and it was. But it sat three inches upslope from the actual low spot, which meant the water wasn't about to travel uphill to use it, any more than a subway rider walks two extra blocks past their stop. Drain placement logic means spacing by square footage of roof area, locating the true low points first, avoiding dead zones created by curbs and rooftop equipment, and matching outlet type to whether or not there's a parapet wall to work with.
| System Type | Best Used When | Main Design Advantage | Common Failure If Designed Poorly |
|---|---|---|---|
| Interior Roof Drains | Parapet walls are present and interior piping can be run through the building | Handles large roof areas; keeps drainage interior and protected from freeze damage | Placed at a non-low point, leaving a permanent pond between the drain and the real low spot |
| Through-Wall Scuppers | Parapet walls exist but routing interior piping is impractical or too disruptive | Visible, inspectable, no internal piping to clog or freeze inside a chase | Set too high above the deck - acts as a dam rather than a drain until water reaches the sill elevation |
| Edge Gutters | No parapet, open edge on low sides, smaller roof area with predictable runoff path | Captures sheet flow off the entire edge; straightforward to inspect and clean | Installed without adequate pitch - gutters pond instead of flow, adding weight and causing fascia rot |
| Tapered Insulation System | Existing deck has insufficient or inconsistent slope and full structural correction isn't feasible | Creates designed slope without touching the structural deck; solves low spots without reconstruction | Drainage outlets not relocated to match new low points - the slope is corrected but the drain still sits in the wrong place |
Obstacles That Quietly Turn a Roof Into a Bathtub
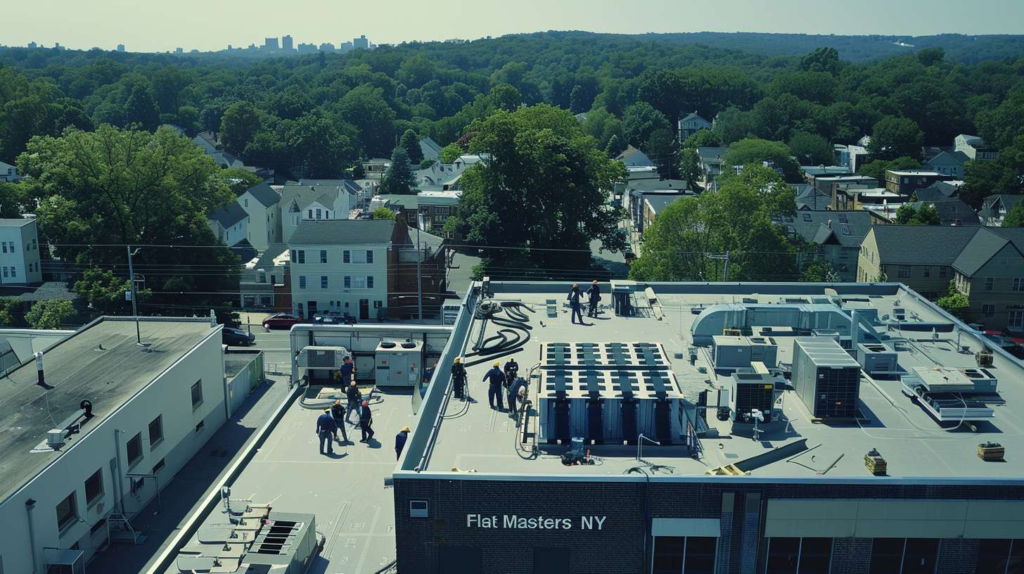
Last July in Queens, I watched a puddle tell me more truth than the blueprint did. I was on a Rego Park building when a storm rolled in fast - the client was refreshing radar every thirty seconds - and a rooftop HVAC curb became the whole story. The installer had set it without thinking about flow: curb on three sides, parapet return on the fourth, and suddenly the roof behind that unit had nowhere to drain. The water didn't care that the main drain was only twelve feet away. The equipment had created a bathtub inside the roof, and the rain was filling it right in front of us. Sleepers, pipe supports, and raised equipment curbs all do the same thing when they're placed without a drainage plan.
Think of the roof like a school hallway between classes - if you narrow the path, everything bunches up where it shouldn't. Design has to preserve open flow lanes around every piece of equipment, and where a curb or transition can't be avoided, tapered saddles or crickets need to redirect the water rather than let it collect. And here's the insider move worth keeping: after you've drafted the layout, mentally run a hose test. Look for every low spot where grit, leaves, and gravel would settle before water reaches an outlet - because that debris settles exactly where blockages will form in six months, and catching it on paper is a lot cheaper than clearing it off a roof after a storm.
HVAC curbs, conduit racks, solar panel mounts, and parapet returns can all act as hidden dams. They don't have to be large to cause problems - even a 4-inch curb set at the wrong angle can redirect hundreds of gallons onto an unplanned section of roof during a heavy storm.
If the drawing does not show a clear, unobstructed flow path around each obstruction and toward a designated outlet, heavy rain will find the trapped zone first. Every piece of rooftop equipment needs to be on the drainage plan, not just the mechanical plan.
Overflow Planning Is the Part That Saves the Building
Blunt truth: water does not care about your intentions, only your low spots. Primary drains get overwhelmed. They get blocked by leaves, grit, and the inch of debris that accumulates on a Queens roof between fall cleanings. In winter, ice ridges can dam a scupper throat completely. When that happens, rising water needs a pre-planned relief path - an overflow scupper or overflow drain set independently, at a level above the primary outlet but below the point where structural loading becomes dangerous. That separation matters. If your overflow device shares the same bowl, the same pipe, or the same failure point as the primary drain, it's not a backup - it's just a second label on the same problem.
If there is no obvious backup route off this roof, the roof is being asked to store rainwater instead of drain it.
▸ How high should overflow protection sit above the main drain level?
▸ Why visible wall scuppers can reveal a hidden blockage faster than interior drains
▸ What parapet height changes in drainage planning
Queens-Specific Checks Before the Design Is Called Finished
I got called to a Fresh Meadows row building after a Sunday cloudburst around 4 p.m., and the owner was certain the membrane had failed. It hadn't. The scuppers were set just a touch too high - maybe an inch and a half above where they should have been - and a gritty dam of leaf matter and roofing granules had built up across the throat. The water line on the parapet looked exactly like the ring a kid leaves in a bathtub. That building is typical of what you see across Queens: attached row buildings where the original scuppers were put in decades ago, then rooftop HVAC units got added later, debris patterns shifted, and nobody revisited the drainage design to see if it still matched the actual conditions. Six-family and eight-family buildings along streets like 164th Road in Jamaica or the low-slope rooftops off Northern Boulevard all share this pattern - wind-blown grit, leaf accumulation after fall storms, and retrofitted equipment that nobody mapped against the original drainage plan.
The drainage design shouldn't be filed away after the roof is built - it needs to function as a maintenance guide. My personal take, after working on these buildings for years with Flat Masters: the best flat roof drainage design is the one a building super can walk, understand, inspect, and keep clear without guessing. If the drain locations aren't obvious, if the overflow scuppers aren't labeled, if debris has to travel six feet past a curb before it even reaches an outlet - the design is already asking for problems. Simple, visible, and cleanable beats technically perfect every time.
On a small roof with a consistent slope directing everything to a single low point, one outlet can be adequate - but it's the exception, not the rule. A single outlet also means a single point of failure. If that drain clogs during a storm, there's no fallback. Most roofs over 1,000 square feet benefit from at least two outlets plus independent overflow protection.
No. Tapered insulation corrects slope across the field of the roof, which helps direct water toward outlets - but it doesn't fix outlets that are in the wrong location. If the drain bowl is still sitting upslope from the actual low point, the taper just moves the pond from one spot to another. Outlet placement has to be re-evaluated when tapered insulation is spec'd in.
A design issue means the slope was never adequate for that section of roof. A structural sag means the deck has deflected over time, creating a low spot that didn't exist originally. The practical test: check whether the ponding location lines up with a span between joists or beams - mid-span sagging is a structural signal. Either way, the fix is different, and misidentifying which one you have leads to work that doesn't solve the actual problem.
They shouldn't. Connecting overflow drainage into the same line as primary drainage means a single blockage - a clogged trap, a frozen section, a collapsed pipe - disables both systems simultaneously. Overflow drains need their own independent path to the exterior so they can function when the primary system can't.
If you're not certain where the water on your roof actually goes during a heavy storm, that's exactly the conversation worth having before the next one hits. Call Flat Masters for a drainage-focused inspection or design consultation in Queens - we'll trace the raindrop with you, find where the system works and where it doesn't, and give you a straight answer on what it takes to fix it.
