Where Your Flat Roof Meets the Wall Is Almost Always Where the Trouble Starts
Trust your instincts here, because the big open field of a flat roof is rarely the first thing to betray you. The trouble usually begins where the roof has to stop, rise, or meet a wall-where geometry changes and water is suddenly asked to change direction along with it.
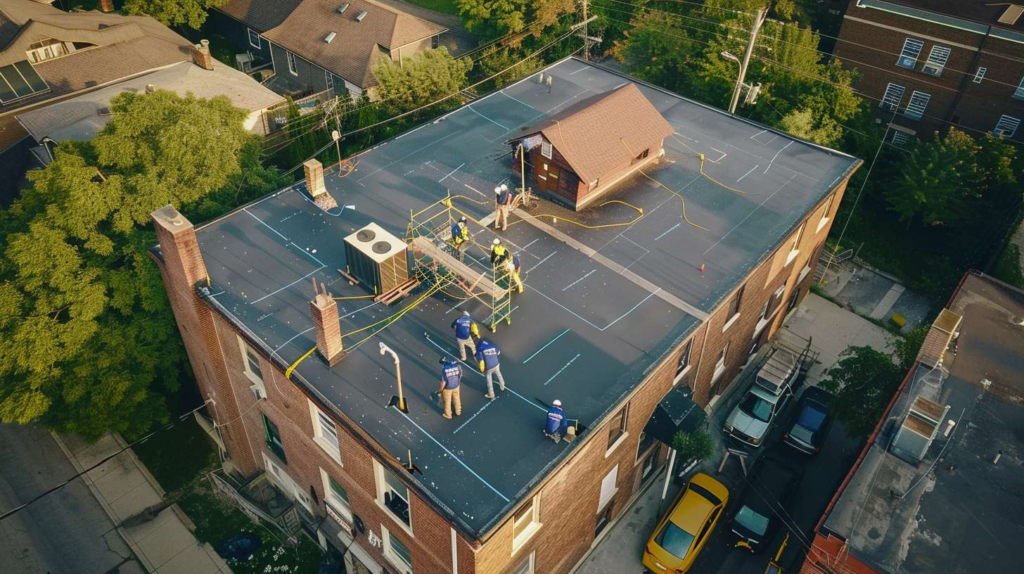
Junction Details Decide More Leaks Than the Open Field Ever Does
Before we discuss a flat roof wall plate detail, what is the water being asked to do at that turn? Think of it like folding a piece of paper-if that fold is crisp and deliberate, the crease holds. If it's lazy, the paper opens back up and the seam becomes a gap. At a roof-to-wall junction, the roof surface, upstand, wall face, and cap must hand water from one plane to the next without leaving a single path inward. I'm Sister Agnes Doyle, with 33 years diagnosing roof-to-wall failures on Queens homes where one lazy junction detail can undo a whole roof-and I'll tell you plainly, the fold is everything.
How to Think Through a Flat Roof to Wall Connection Detail
-
1
Identify the water approach - determine the direction and volume of water reaching the roof-to-wall junction before evaluating anything else. -
2
Read the roof surface into the upstand - confirm that the membrane turns up the wall face with a full, unbroken transition from the horizontal plane into the vertical one. -
3
Confirm the wall-face handoff - verify that the upstand delivers water to the wall face in a way that channels it outward rather than pulling it inward at the plane change. -
4
Inspect the termination or chase - examine where the membrane or flashing is actually terminated, because a poorly cut or unsecured chase line is where the wall interface breaks down first. -
5
Verify the cap or upper protection detail - check that the top edge of the detail-coping, cap flashing, or parapet crown-shelters every layer beneath it from becoming the next entry point.
What a Roof-to-Wall Detail Has to Accomplish
Turn Water Upward Safely
The membrane must rise the full required height on the wall face-not just an inch or two-so gravity can't pull water back behind the detail.
Keep It Out of the Wall
The handoff from membrane to wall face must create a clear outward path-any gap in the wall interface specification becomes a direct route into the structure.
Terminate the Membrane Credibly
A termination bar, chase, or counter-flashing that's merely tidy-looking is not the same as one that's mechanically sound and fully sealed above the membrane line.
Protect the Top Edge
The cap, coping, or parapet crown must overhang correctly and drain away from the wall-because the very top of the detail is always the next candidate for water entry once everything below it is compromised.
Parapets, Party Walls, and Cavity Details Become Leak Routes When Sequencing Gets Casual
The Ceiling Stain Is Usually the End of the Story, Not the Beginning
I still remember using a grocery receipt to explain that leak path. One sleeting morning in Sunnyside-not far from Skillman Avenue where those rear extensions run right up to the party wall line-I stood on a roof while the homeowner insisted the problem was in the middle of the field because that's where the ceiling stain was biggest. I checked the field carefully. Nothing meaningful. I went straight to the flat roof to wall connection detail along the party wall and found exactly what I expected: tired termination, a weak chase detail, and water entering high before traveling low and staging its little performance under the ceiling. I folded the grocery receipt in half and held it at an angle. "It entered here," I said, pointing to the top edge, "not there." He got it immediately.
At the wall line, roofs confess. I had a contractor in Ridgewood ask me to review a cavity wall flat roof detail before they closed things in-which was a wise and, honestly, unusually humble move. It was bright and cold, about 8 a.m., coffee steaming, and we stood there while I pointed to the one missing piece of sequencing that would have invited future trouble right into the cavity interface. Queens homes-older rowhouses, rear additions, buildings with genuine cavity walls and shared party walls running three stories up-demand exact sequencing at every plane change. The parapet conditions on these structures are not forgiving of guesswork. That Ridgewood job stays with me because prevention at the wall is so much cheaper than investigation after the leak has already traveled six feet to make its dramatic entrance through a ceiling tile.
| Connection Detail | What It Should Do | What Lazy Sequencing Usually Causes |
|---|---|---|
| Wall Plate Detail | Anchor the membrane at the base of the wall and create a clean transition from horizontal to vertical without bridging or lifting | Membrane lifts or splits at the bend; water channels directly behind the upstand and into the wall base |
| Party Wall / Upstand | Carry the membrane up the shared wall at the correct height, fully bonded and sealed against the face | Water enters high at the upstand seam, travels along the party wall interior, and surfaces as a stain far from its entry point |
| Cavity Wall Interface | Manage the cavity correctly so water that enters the outer leaf is drained out, not directed inward toward the roof plane | Missing cavity tray or incorrect DPC placement turns the cavity into a funnel that deposits water directly onto the roof-to-wall junction |
| Parapet Wall Detail | Shelter both the roof face of the parapet and the back of the coping so water is expelled outward rather than trapped at the parapet base | Water ponds at the parapet base, degrades the upstand termination over time, and migrates into the roof substrate slowly and silently |
| Chase / Termination Line | Lock the top edge of the membrane or flashing into the wall so wind and thermal movement can't open the seal | Termination lifts or separates at the chase; sealant alone bridges the gap for a season before failing and creating an open entry point |
| Top Cap / Coping Condition | Cover the full thickness of the parapet and drain water away from the wall face on both sides with an adequate overhang | Rainwater soaks down through the parapet core, saturates the upstand behind it, and the entire top section of the roof-to-wall connection fails from above |
⚠ Why "We'll Seal It at the End" Is Such Expensive Logic
Treating roof-to-wall transitions like final trim work is one of the most reliable ways to manufacture a future leak. Wall junctions are not finishing touches. They are sequenced systems where cavity logic, upstand height, termination position, and upper-edge protection must all be set in the correct order-before anything above them is closed in. When a contractor plans to "tidy it up at the end," they're usually planning to rely on sealant to compensate for steps that were skipped in sequence. Sealant fails. Sequence doesn't.
A Wall Connection Only Works When Every Layer Agrees on Who Shelters the Next One
A roof meeting a wall is like a folded sleeve-if the seam is wrong, the wet finds it immediately. Flat roof wall connection details are not decorative edges tacked onto the perimeter of a finished system. They are layered water-management sequences where the roof surface hands off to the upstand, the upstand hands off to the wall face, the wall face hands off to the termination, and the termination hands off to whatever caps the whole arrangement from above. Every layer either shelters the one beneath it or it betrays it. There's no neutral outcome at a plane change.
Here's the blunt truth: a roof-to-wall detail is not a decorative edge. A Forest Hills garage project still makes me smile quietly for all the wrong reasons. The customer kept calling the flat roof parapet wall detail "just a little border"-and I've heard worse descriptions, honestly, but few as expensive. Once I got a proper look at that parapet, it was obvious the border had been acting as a leak incubator for years. Bad cap condition, poor termination, no real respect for how water lingers and accumulates at a change in plane. The parapet wasn't decorative. It was doing active damage. He stopped calling it a border after I showed him the saturated core.
My opinion? Junctions fail more from carelessness than age. A 20-year-old detail that was sequenced correctly will still be doing its job. A 3-year-old detail that was slapped in with optimism will already be confessing at the wall line. And here's the insider test worth doing before you approve any roof-to-wall work: ask your contractor to explain which layer shelters the next one, from the roof surface all the way to the top of the wall. Ask them to walk you through it, plane by plane. If they can narrate that sequence clearly and without hesitation, they own the detail. If they pause, wave their hand at the general area, and say "it's all sealed up," you do not have someone who owns the detail. You have someone who owns a caulk gun.
Respectful Sequencing vs. Hope-Based Sequencing
| Sheltered Handoff Detail | Hope-for-the-Best Detail | |
|---|---|---|
| Membrane Turn-Up Logic | Full upstand height, fully bonded, with a proper fillet or cant at the angle change to prevent bridging | Membrane folded up an inch or two and sealant pressed into the gap where the angle should be supported |
| Cavity or Chase Handling | Cavity tray or DPC correctly positioned; chase cut cleanly and mechanically fixed before sealant is applied over it | Cavity ignored or assumed to be sealed; chase filled with sealant and called finished without mechanical fixing |
| Termination Credibility | Termination bar fixed at correct height, flashing lapped properly, sealant applied as a secondary line of defense-not the only one | Flashing pressed against the wall and sealant applied generously on the assumption that it will hold indefinitely |
| Top-Edge Protection | Coping or cap flashing overhangs both faces, drips clear of the wall, and is fully sealed at joints so it protects the parapet core | Coping bedded flat with no drip edge; joints left open or sealant-only, relying on luck for the parapet core to stay dry |
| Water Movement Through the Detail | Water directed outward at every plane change; no lingering, no ponding against a vertical surface, no inward path | Water reaches the detail, slows at the plane change, finds the weak handoff, and starts working inward over weeks or months |
| Long-Term Confidence After Weather | Detail performs through thermal movement, freeze-thaw cycling, and heavy rain because the sequence held at every layer | First hard winter exposes the sealant dependency; crack opens, water enters, and the remediation cost exceeds the original saving |
What Homeowners Misunderstand About Flat Roof Wall Connection Details
| Myth | Fact |
|---|---|
| "The field is where most leaks begin." | The open field rarely fails first. Leaks begin at edges, transitions, and junctions-where geometry changes and water is asked to change direction. |
| "A parapet is just a border." | A parapet is a multi-layer water-management detail. Its cap, core, upstand, and termination all need to work together or it becomes a concentrated leak source. |
| "If the sealant looks fresh, the wall detail is probably fine." | Fresh sealant often means someone recently discovered a problem and patched the symptom. It tells you nothing about the sequencing underneath or whether the termination is mechanically sound. |
| "A cavity wall detail is mostly hidden, so small shortcuts don't matter." | Shortcuts inside a cavity wall flat roof detail are the most expensive kind because they're invisible until water has traveled through the structure for months. Hidden failures are the worst kind. |
| "Wall junction leaks are random." | Wall junction leaks are not random-they are predictable. They follow the exact point where a sequencing step was skipped, a handoff was incomplete, or a layer was asked to do the work of two. |
The Best Wall Detail Work Is So Orderly It Disappears Into the Building Until You Need to Trust It
Invisible Discipline Is the Whole Point
At the wall line, roofs confess-and when the workmanship is genuinely disciplined, there's nothing to confess. Good roof-to-wall work should look calm and almost unremarkable from the outside, not because the detail was simplified or cut short, but because every layer underneath it is doing exactly what it was sequenced to do. That visual calm is earned, not accidental. It means the membrane turned up correctly, the cavity was respected, the termination was mechanically fixed before sealant touched it, and the cap was set to drain both faces cleanly. When Flat Masters details a wall junction on a Queens home, that's the standard the work is held to-quiet on the surface, exacting underneath.
Questions About Flat Roof Wall Connection Details
Every roof-to-wall junction is a sequence of commitments, and each one either holds or it doesn't. Call Flat Masters when you want the wall connection detailed like a real seam-not treated like the roof's decorative afterthought.
