How to Install Rubber Flat Roof: 5 Essential Steps for Success
Look, I'll be straight with you - installing a rubber flat roof isn't a weekend DIY project. After 23 years working on Queens rooftops, I've seen what happens when homeowners try to tackle this themselves. But if you're determined to understand the process or you're a contractor looking for some insights, here's how we do it right at Flat Masters NY.
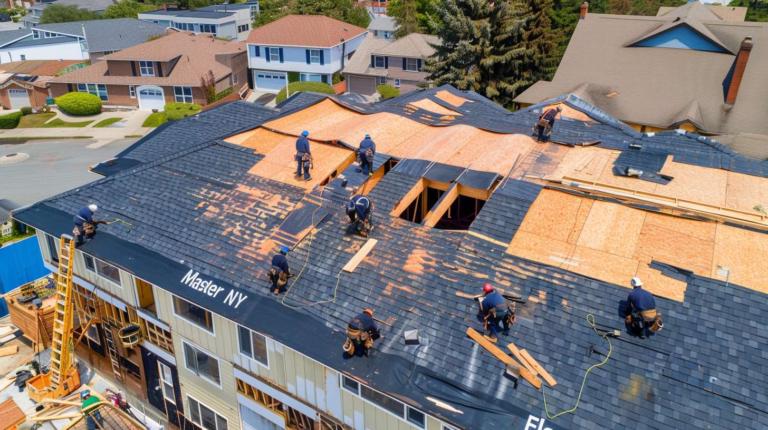
Step 1: Prepare Your Deck Like Your Life Depends On It
The foundation is everything. I can't tell you how many times I've been called to fix a rubber roof that failed because someone skipped the prep work. Your roof deck needs to be completely clean, dry, and structurally sound. We're talking about removing every piece of old roofing material, checking for soft spots, and making sure the surface is smooth as glass.
Here in Queens, with all the salt air coming off the East River and the temperature swings we get, moisture trapped under your new membrane will destroy everything. I remember this job on 31st Street in Astoria where the previous contractor left old felt paper under the new EPDM. Three years later, we were ripping everything off because water got trapped and rotted the entire deck.
You'll need a power washer, scrapers, and patience. Lots of patience. The deck has to be bone dry before you even think about laying rubber.
Step 2: Install Your Insulation and Cover Board
Most people skip this step or do it wrong. Don't. Your insulation board goes down first - we typically use polyiso or EPS foam boards. These need to be mechanically fastened, not just glued down. The fastening pattern depends on your wind zone, but here in NYC we're in a high wind area, so we use more fasteners than you might think.
The cover board goes over the insulation. This protects your insulation from damage during installation and gives you a smooth, stable surface for your rubber membrane. We use half-inch DensDeck or similar gypsum boards. They cost more upfront but save you headaches later.
Temperature matters here. If it's below 45 degrees, don't even start. The adhesives won't work properly, and you'll end up with a mess. I learned this the hard way on a December job in Flushing about fifteen years ago.
Step 3: Rolling Out the EPDM Membrane
This is where things get interesting. EPDM rubber comes in big rolls - usually 10, 15, or 20 feet wide. The key is minimizing seams. More seams mean more potential leak points, and trust me, every seam will try to leak at some point.
Let the membrane relax in the sun for at least 30 minutes before you start working with it. Cold rubber is stiff and wants to fight you. Warm rubber is flexible and cooperative. We roll it out, position it carefully, then let it sit while we prep our adhesives.
Here's something most guides won't tell you - wind is your enemy. Even a 10 mph breeze can turn a manageable installation into a nightmare. We've had jobs where we had to stop and come back the next day because the wind kept lifting the membrane.
Step 4: Adhesive Application - The Make or Break Moment
This is where most DIY jobs go wrong. You've got two surfaces that need adhesive - the substrate and the back of the membrane. Both surfaces get coated, and timing is critical. Too wet and it won't bond. Too dry and it won't stick.
We use contact cement specifically designed for EPDM. Apply it with a three-quarter inch nap roller, not a brush. The coverage needs to be even - no puddles, no thin spots. You'll know it's ready when you can touch it lightly with your finger and it feels slightly tacky but doesn't transfer to your finger.
Temperature and humidity affect drying time. On a hot July day in Queens, you might have five minutes. On a cool October morning with high humidity, you might have thirty minutes. Experience teaches you to read the conditions.
Once both surfaces are ready, you get one shot. When that rubber touches the adhesive, it's stuck. No repositioning, no second chances. We use a technique where we fold the membrane back on itself, then roll it down gradually, using a steel roller to eliminate air bubbles.
Step 5: Seaming and Finishing Details
If you need seams - and most roofs do - this is the most critical part. Clean both edges with EPDM primer, apply seam tape, then seal with lap sealant. The seam needs to be perfectly clean and dry. Any dirt, moisture, or old adhesive will cause the seam to fail.
Penetrations are where most leaks happen. Pipes, vents, HVAC units - each one needs special attention. We cut the membrane to fit around the penetration, then seal it with EPDM flashing and plenty of sealant. Don't skimp on sealant around penetrations. It's cheap insurance.
The edges get terminated with termination bar and sealant. This mechanical attachment is crucial because it's holding your entire roof membrane in place.
Why Most People Should Hire Professionals
I've been doing this since 1999, and I still learn something new on difficult jobs. The tools alone cost more than most people want to spend - steel rollers, seaming irons, hot air welders for TPO, specialty adhesives that have shelf lives.
But here's the real issue - when you mess up a rubber roof installation, it's not just a small repair. Water damage from a failed roof membrane can cost tens of thousands in structural repairs, mold remediation, and interior damage. I've seen homeowners spend $3,000 trying to do it themselves, then pay us $12,000 to fix the water damage and install a new roof properly.
The warranty is another factor. Material manufacturers won't warranty DIY installations, and your homeowner's insurance might not cover damage from improperly installed roofing.
Local Considerations for Queens Installations
Living here, you deal with specific challenges other areas don't face. The freeze-thaw cycles are brutal on roofing materials. Salt air accelerates deterioration of fasteners and flashing. The urban heat island effect means your roof gets hotter than the weather report says.
Building codes in NYC are stricter than most places. You need permits for most roofing work, and the inspections are thorough. The Fire Department has specific requirements for roof access and structural modifications.
Wind loads are higher here too. We're not just dealing with regular weather - we get nor'easters, occasional hurricanes, and those sudden wind shears that come off the water. Your attachment methods need to account for this.
The bottom line? Understanding how to install a rubber flat roof and actually doing it successfully are two different things. If you're in Queens and need professional installation, Flat Masters NY has been handling these installations properly for over two decades. We know the local conditions, the code requirements, and how to make these roofs last in our challenging climate.
Call us at (917) 994-7618 if you want it done right the first time.
