Expert Finishing Shingles on Flat Roof Solutions for Your Home
Look, I'm going to be straight with you about finishing shingles on flat roof installations - this is where most DIYers and even some contractors mess up big time. After 23 years working flat roofs across Queens, from Astoria to Jamaica, I've seen more botched shingle terminations than I care to count. The key to properly ending your shingle installation lies in understanding that flat roofs aren't actually flat - they have a slight slope, and that changes everything about how you finish the edges.
Understanding Flat Roof Shingle Termination Basics
Here's the thing about how to end shingles on flat roof systems: you're dealing with a completely different water management challenge than steep slope roofs. On a typical Queens flat roof - and trust me, I've done hundreds from Forest Hills to Flushing - water moves slower and sits longer. That means your shingle termination points become critical failure zones if you don't handle them right.
The membrane underneath your shingles needs to extend beyond the actual shingle termination point by at least 6 inches, sometimes more depending on your specific roof slope and local building codes. In New York City, we follow pretty strict guidelines, and I always exceed them because I've seen what happens when you cut corners.
Last month on a job in Elmhurst, we had to completely redo the perimeter shingle installation because the previous contractor - won't name names but they're not in business anymore - terminated the shingles flush with the roof edge. No overhang, no proper flashing integration. Water was backing up under the shingles within six months.
Essential Tools and Materials for Professional Shingle Finishing
When I'm teaching my crew how to finish shingles on a flat roof, I always start with the right materials. You need quality drip edge flashing - I prefer the pre-painted aluminum from ABC Supply on Northern Boulevard. It's about $3.85 per linear foot but worth every penny compared to the cheaper stuff that starts corroding after two Queens winters.
- Drip edge flashing (minimum 26 gauge)
- Roofing cement specifically rated for membrane adhesion
- Mechanical fasteners rated for your specific membrane type
- Termination bar - stainless steel preferred in our salt air environment
- Sealant compatible with both shingle material and underlying membrane
The termination bar is crucial. We use 1/4 inch thick stainless steel bars, about 2 inches wide, secured every 6 inches with appropriate fasteners. This creates a mechanical hold that's way more reliable than just relying on adhesives.
Step-by-Step Shingle Termination Process
Alright, so you want to know the actual process. This is where experience really shows, and I'll walk you through exactly how we do it at Flat Masters NY.
First, you establish your termination line. This should be a minimum of 3 inches back from your roof edge - sometimes more if you're dealing with a parapet wall situation. Mark this line with chalk, and double-check it's parallel to your edge. Sounds simple, right? But I've seen guys eyeball this and end up with wavy termination lines that look terrible and don't shed water properly.
Next comes membrane preparation. Clean the area thoroughly - any debris, old adhesive, or loose material needs to go. Prime the membrane surface where you'll be applying your termination materials. We use a brush-grade primer, let it get tacky for about 15-20 minutes depending on temperature and humidity.
Now here's where it gets technical. You're going to install your termination bar first, then work your shingles up to it. Not the other way around like some guys try to do. The termination bar gets bedded in roofing cement, then mechanically fastened through the membrane into the deck structure. In Queens, with our wind loads, I use fasteners every 4 inches maximum - code says 6 but I don't mess around with wind uplift.
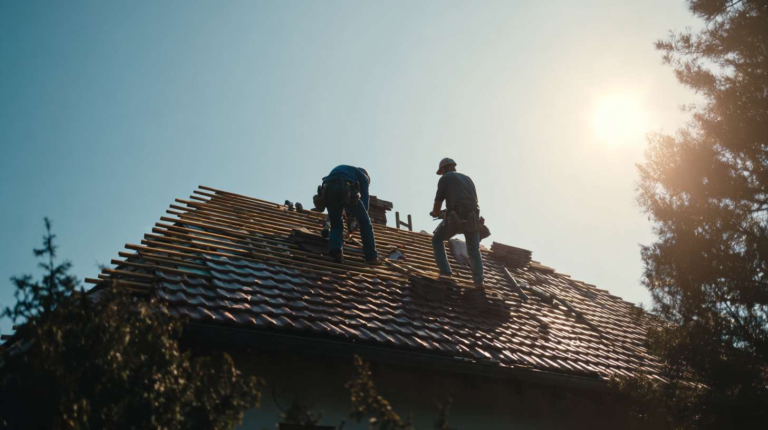
The shingle installation comes next, and this is where you really see the difference between professional work and DIY attempts.
Common Mistakes That Lead to Failure
Oh man, where do I start with the mistakes I see? Just last week on Utopia Parkway, we had to fix a job where someone tried to terminate shingles without any kind of edge detail. Just cut them off and slapped some caulk on top. That lasted maybe 8 months before water started getting behind the membrane.
The biggest mistake is trying to use steep-slope techniques on flat applications. You can't just run your shingles to the edge and expect good results. The water behavior is completely different, and you need systems designed for low-slope conditions.
Another common error? Using incompatible materials. Mixing different sealant chemistries, using galvanized flashing with certain membrane types - these combinations fail predictably. I keep a compatibility chart in my truck because even after all these years, there are new products coming out and you need to stay on top of the chemistry.
Temperature installation is huge too. Installing termination details when it's below 45 degrees or above 85 degrees creates problems. The adhesives don't cure properly, materials expand and contract differently. We schedule our detail work for optimal conditions whenever possible.
Weather Considerations for Queens Installations
Working in Queens, you deal with some unique challenges. The salt air from LaGuardia and the East River accelerates corrosion on any exposed metal components. That's why we always spec stainless steel or pre-finished aluminum for our edge details. The initial cost difference is maybe $200-300 on an average residential job, but the longevity difference is measured in decades.
Wind patterns around here are tricky too. You get channeling effects between buildings, especially in some of the denser neighborhoods like Long Island City. This creates suction zones that can lift improperly terminated shingle edges. I always add extra mechanical fastening in high-wind exposure areas.
Snow load is another factor people don't think about. When snow melts and refreezes at your roof edges, it creates ice dams that push water back under shingle terminations. Proper detailing with adequate drainage is essential.
Professional Installation vs DIY Considerations
Look, I'm not going to tell you that finishing shingles on a flat roof is impossible for a skilled DIYer, but there are some serious considerations. The liability exposure alone should make you think twice. If water gets into your building envelope because of improper termination work, you're looking at potentially massive damage costs.
The tools required for professional-quality work aren't cheap either. A good hot-air welder runs about $1,200. Membrane rollers, proper fastening equipment, safety gear rated for flat roof work - you're easily into $3,000+ in equipment costs before you buy your first square of shingles.
Then there's the knowledge base. Understanding membrane compatibility, local building codes, proper flashing integration - this stuff takes years to really master. I've been doing this since 1999 and I still run into situations that require research and consultation with manufacturers.
Long-Term Maintenance and Inspection
Once your shingle termination is properly installed, maintenance becomes critical for long-term performance. I tell all my customers to inspect their edge details twice a year - spring and fall. Look for any lifting, cracking, or separation at the termination points.
Sealant joints need refreshing every 3-5 years typically, though our marine environment here in Queens can accelerate that timeline. UV degradation is constant, and thermal cycling opens up small cracks that grow over time.
Keep your drains clear too. Backed-up water creates hydrostatic pressure that can compromise even perfectly installed terminations. I've seen 15-year-old edge details fail simply because leaves clogged the drains and water sat against the terminations for extended periods.
Professional inspection is worth the cost every few years. We charge about $175 for a comprehensive flat roof inspection, and that typically identifies small issues before they become major problems. Catching a failing termination early might cost $300-500 to fix. Letting it go until water damage occurs? That's easily a $5,000+ problem.
Why Flat Masters NY Gets Called for Edge Detail Repairs
We see a lot of termination failures in our repair work, probably 40% of our service calls involve edge details that weren't installed correctly originally. The good news is that properly executed finishing shingles on flat roof installations last 20+ years with minimal maintenance.
Our approach focuses on redundant protection systems. Primary water barrier, secondary drainage paths, mechanical attachment that exceeds code requirements. It costs a bit more upfront but saves money long-term through reduced maintenance and extended service life.
If you're dealing with shingle termination issues on your Queens flat roof, don't wait for the problem to get worse. Call us at (917) 994-7618 for a professional assessment. We've been handling complex flat roof challenges across Queens for over two decades, and proper shingle finishing is one of our core specialties.
