Professional Rubber Roof Tiles for Flat Roofs Installation
Look, after installing over 1,200 flat roofs across Queens in the past eighteen years, I can tell you that rubber roof tiles for flat roofs are hands down one of the smartest choices you can make for your building. Not the sexiest topic, I'll give you that, but when it comes to protecting your investment and keeping water where it belongs - outside - these systems deliver results that speak for themselves.
The thing about rubber flat roof tiles that most property owners don't realize is they're not actually "tiles" in the traditional sense. We're talking about EPDM (ethylene propylene diene terpolymer) membrane systems that come in various configurations, including modular tile-like sections that interlock or overlap to create a seamless waterproof barrier. I've been working with these materials since the late 2000s, and the technology has come a long way from those early days when we'd sometimes see premature cracking in harsh Queens winters.
Why Rubber Roof Tiles Excel in Queens Weather
Here's what I love about rubber roofing in our climate: it handles the temperature swings we get here like a champ. Last February, we had that week where it went from 15 degrees to 55 degrees in three days - you remember that mess. Traditional materials expand and contract, creating stress points. But rubber? It's got this elasticity that just rolls with the punches.
The salt air coming off the East River and Long Island Sound is another factor people don't consider enough. Metal roofing corrodes, asphalt gets brittle faster, but EPDM rubber maintains its integrity for decades in coastal environments. My oldest rubber installation in Astoria is going on 22 years and still performing beautifully - just had it inspected last month.
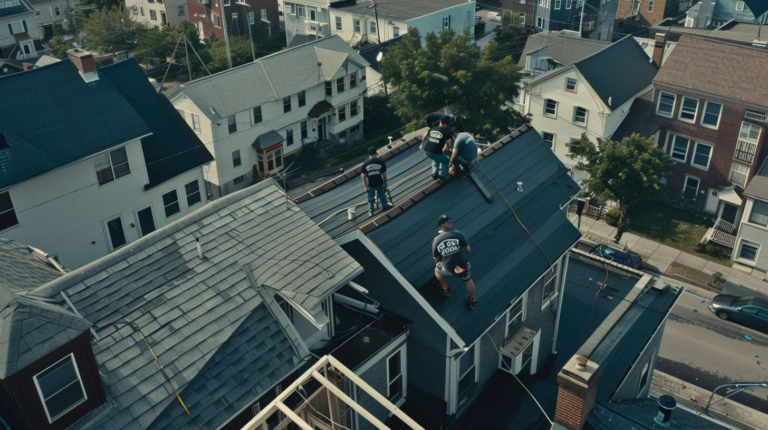
Installation Process That Actually Makes Sense
When we install rubber roof tiles flat roof systems, the process is more straightforward than most people expect, but there are critical details that separate professional work from weekend warrior disasters. First thing we do is assess the existing substrate - whether it's concrete, plywood, or existing roofing that needs removal.
The substrate preparation is where corners get cut by less experienced contractors, and trust me, you'll pay for it later. We ensure proper slope (minimum 1/4 inch per foot), install rigid insulation boards when needed, and create a smooth, clean surface. No shortcuts. My crew chief Miguel always jokes that prep work is 70% of the job, and he's not wrong.
For the actual rubber flat roof tiles installation, we typically use either fully adhered systems with contact cement or mechanically fastened approaches depending on the specific conditions. The key is creating proper overlap joints - usually 3 to 4 inches - and sealing them with specialized tape or liquid adhesive. Each seam gets tested for integrity before we move to the next section.
Cost Realities Nobody Talks About
Let's talk numbers because that's what everyone wants to know anyway. For a typical Queens residential flat roof, you're looking at $8 to $14 per square foot for a complete rubber tile system installation, including removal of old materials, basic insulation upgrade, and proper flashing details. That 800 square foot garage roof you've been putting off? Budget $6,400 to $11,200 depending on access challenges and existing conditions.
Commercial projects run different numbers entirely - usually $6 to $10 per square foot because of economies of scale, but add complexity factors for HVAC penetrations, parapet walls, and code compliance requirements that residential jobs don't face.
Here's what drives costs up: substrate repairs (common in buildings over 30 years), complex drainage modifications, and what I call "discovery issues" - problems you can't see until the old roof comes off. Just last week on Northern Boulevard, we found rotted deck sheathing that added $2,800 to a job that should have been routine.
Maintenance That Actually Matters
One thing I appreciate about rubber roofing systems is the maintenance requirements are reasonable and predictable. Twice yearly inspections - spring and fall - catch most issues before they become expensive problems. We're looking for punctures from foot traffic or debris, checking seam integrity, and ensuring drains stay clear.
The biggest enemy of rubber roofing isn't weather or age - it's neglect. Ponding water from clogged drains, walking on the membrane with inappropriate footwear, and letting small issues become big ones. I can't tell you how many callbacks I've gotten that were completely preventable with basic maintenance.
Professional cleaning every few years extends membrane life significantly. We use specialized cleaners that won't degrade the rubber compound - not the harsh chemicals some building supers think are appropriate.
Local Code Considerations in Queens
Working in Queens means dealing with NYC Department of Buildings requirements that can be more stringent than other areas. Fire ratings, wind uplift resistance, and energy efficiency standards all factor into material selection and installation methods.
For buildings over three stories, we typically need Class A fire-rated systems, which affects both material choices and installation details around penetrations and parapet connections. The permit process isn't complicated, but it requires documentation that DIY approaches simply can't provide.
Energy code compliance is getting stricter each year. New installations often require R-30 minimum insulation values, which means coordinating insulation placement with membrane attachment methods. It's not rocket science, but it requires experience with local inspector expectations.
When Rubber Isn't the Right Choice
I'm not going to sell you something that doesn't fit your situation. Rubber roof tiles work exceptionally well for most flat roof applications, but there are exceptions. Buildings with extensive foot traffic need walkway systems or alternative materials. Some architectural styles call for different approaches entirely.
If your building has complex geometry with multiple level changes, inside corners, and numerous penetrations, single-membrane systems might be more cost-effective than modular approaches. It depends on the specific layout and your long-term maintenance philosophy.
Budget constraints are real too. If you need immediate weather protection but can't afford a complete rubber installation, there are interim solutions that buy time while you plan properly. But don't mistake temporary fixes for permanent solutions - they're different animals entirely.
Working with Flat Masters NY
When you're ready to move forward with rubber roof tiles for flat roofs, our process starts with a comprehensive assessment of your existing conditions and specific requirements. We provide detailed written proposals that break down materials, labor, and timeline expectations clearly.
Our installation crews are trained specifically in EPDM systems and carry appropriate insurance coverage for commercial and residential work throughout Queens. We handle permit applications, coordinate inspections, and provide warranty documentation that actually means something.
Most rubber roof tile installations take 2-4 days depending on size and complexity. Weather delays happen - it's New York - but we communicate schedule changes immediately and work around your building's operational needs.
For emergency repairs or consultation on existing rubber roofing systems, we maintain response capabilities throughout Queens seven days a week. Sometimes waiting until Monday isn't an option when water's coming through your ceiling.
Call us at (917) 994-7618 to discuss your specific flat roofing situation. We'll tell you straight whether rubber tiles are the right solution or if your building needs something different entirely.
