Building a Flat Roof on a Home? Here's What the Build Sequence Looks Like
Walk me through what you saw: residential flat roof construction that looked fine from the outside until someone pulled back a membrane edge and found the damage that had been building since framing week. That's the story behind nearly every flat roof failure I've investigated in Queens-and the pattern is always the same. The sequence broke down early, and every layer that came after just covered the problem up.
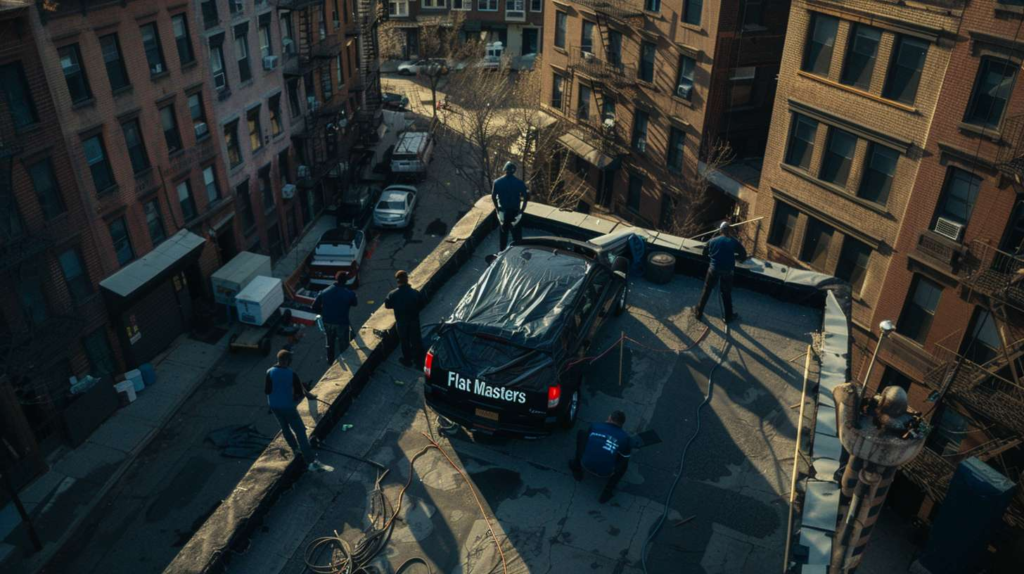
Before anyone talks membrane, has the slope and drainage plan actually been verified? That question separates jobs that hold for thirty years from jobs that need emergency calls by year three. Drainage logic, framing intent, and edge conditions have to be confirmed before waterproofing becomes a meaningful conversation-because a membrane can only do so much when what's underneath it was never right. I'm Malik Brennan, with 22 years guiding residential flat roof construction on Queens additions and new low-slope home sections where sequence matters more than promises, and the way I see every project is as a series of phases, handoffs, and failure points-each one either setting up the next phase or quietly sabotaging it.
Sequence is the system when you are building a flat roof on a home
The roof starts succeeding before the membrane ever arrives
Membrane and flashing work is precision finishing-it is not a correction mechanism. No membrane system reliably rescues poor slope, a badly fastened deck, wrong edge geometry, or unresolved wall and parapet coordination. If those problems exist when roofing materials arrive, they get sealed in, not solved.
Structure and slope are the first handoff, and they decide how forgiving the rest of the job will be
Step one is structure, and everything after that inherits its quality. Framing sets the bearing capacity, the intended falls, the location of every drain, scupper, and overflow point-and the clearance at every wall and parapet where flashing will eventually have to perform. If the drainage path doesn't physically exist in the framing, it cannot be wished into existence by the membrane installer. This phase has to close cleanly before any deck material lands on it.
Here's the blunt truth: roofing is the finish line, not the rescue team. I remember a windy April morning in Bayside when a homeowner called me after a framing crew had already decked a new rear addition. He had a bad feeling about the slope-smart instinct. I walked the roof along the 214th Street side of that property, checked the layout board by board, and found the sequence had already gone sideways before a single roofing material had shown up. The drainage plan was weak, one edge condition was set up to fight the membrane install, and everyone on the job kept acting like waterproofing could save framing mistakes. That job is exactly why I'm strict about flat roof residential construction being a sequence, not a pile of trades showing up whenever they feel like it.
Building a flat roof is like running an operation-if supplies, timing, and handoffs are wrong, the mission fails before the last step. Queens rear additions are a perfect example. Tight lots, party walls, neighboring cornices at odd heights, and low-slope sections that butt right up against siding or existing brick-those conditions demand early coordination, not last-minute improvisation. The parapet heights, the wall tie-in elevations, the edge metal geometry: all of that has to be known before the deck goes down, not argued about after the membrane crew is already scheduled.
| Phase | What Must Be Right | Next Handoff Depends On It | What Goes Wrong If Skipped |
|---|---|---|---|
| Structure / Framing | Correct bearing, intended slope built in, drain locations fixed, parapet heights set | Deck installation can only follow what framing provides | Poor drainage path locked in permanently; membrane cannot correct it |
| Slope / Drainage Layout | Minimum ¼" per foot confirmed, low points at drain locations, no flat or reverse-pitched areas | Deck fastening pattern and tapered insulation plan depend on verified falls | Standing water, membrane stress, and premature failure at seams and flashings |
| Deck Installation | Correct substrate material, fastening schedule met, joints staggered, surface dry and flat | Temporary dry-in and insulation/substrate layers require a sound, stable base | Fastener pop-through, deck movement, and membrane telegraphing over bad joints |
| Temporary Weather Protection | Open deck area secured, materials staged and covered, responsibility assigned to a named trade | Insulation and roofing substrate must arrive dry; wet materials cannot be covered | Saturated deck or insulation, mold risk, and full tear-out to restore dry conditions |
| Edge / Wall Detail Prep | Edge metal geometry confirmed, parapet coping height set, wall tie-in elevations agreed on by all trades | Membrane termination and flashing details cannot be fabricated without confirmed edge conditions | Field-improvised flashing at walls and edges-the most common source of long-term leaks |
| Roofing Substrate Readiness | Insulation layers flat and secured, coverboard in place if required, surface clean and ready to receive membrane | Membrane installation is the final phase-it should have nothing left to solve structurally | Membrane adhesion failures, bridging at joints, and warranty voids from improper substrate |
-
▸
Drainage direction confirmed - positive slope to every drain, scupper, or overflow point verified by measurement, not assumption -
▸
Low points identified - every area where water will concentrate marked and matched to a drainage exit -
▸
Deck fastening and layout checked - fastener pattern meets spec, joints staggered, no soft spots or movement -
▸
Parapet or wall heights verified - minimum flashing heights achievable at every wall condition before substrate goes down -
▸
Openings coordinated - pipe penetrations, HVAC curbs, and any roof access points located and framed before roofing substrate is placed -
▸
Weather protection plan in place - named responsibility, materials staged, and cover method confirmed before the deck is left open overnight
Weather control and temporary dry-in are not optional side tasks during domestic flat roof construction
Short storms expose weak sequencing instantly
I remember that weather app being very confident and very wrong. One humid July afternoon in Middle Village, I was running a domestic flat roof construction project and the owner genuinely couldn't understand why I was so focused on temporary dry-in when the forecast showed only a small chance of rain. I explained it once. By 4:30 p.m. we got hit with one of those short Queens storms that blows in sideways off the Belt and leaves chaos behind in about twenty minutes. Because we had staged materials in order and secured the open area correctly, nothing got soaked, the deck stayed dry, and we were back on schedule the next morning like the storm hadn't happened. The owner stopped questioning the dry-in planning after that.
My position is simple: if the sequence is sloppy, the roof will be too. Staging, dry-in, and weather-readiness aren't conveniences for the crew-they're what protect the build sequence itself when the day stops cooperating. And here's an insider detail worth writing down: ask who owns the dry-in responsibility at each phase change. If nobody can answer that clearly, the sequence isn't actually under control, no matter how good the materials are. Fuzzy accountability at handoffs is how small weather events turn into expensive teardowns.
| Factor | Planned Dry-In Approach | Reactive "Cover It If It Rains" Approach |
|---|---|---|
| Material Staging | Staged in install order, covered, off the deck surface, ready for fast deployment | Staged for convenience, often unprotected until someone notices weather changing |
| Weather Response Speed | Immediate and pre-planned; crew knows exactly what to do without a decision meeting | Slow; reactive decisions made under pressure, often after exposure has already happened |
| Deck & Insulation Protection | Open areas secured before end of workday regardless of forecast confidence | Left exposed based on forecast; one wrong call saturates materials that must then be removed |
| Trade Accountability | Named responsibility at every phase change; no ambiguity about who owns protection | Assumed responsibility; when damage happens, every trade points at another |
| Schedule Resilience | Short weather events cause minimal disruption; recovery is measured in hours | One storm can push the schedule by days if wet materials must dry or be replaced |
| Rework Risk | Near zero; protected sequence delivers dry, consistent conditions at every phase | High; wet insulation or deck requires full removal, adding cost and time to the job |
- ✕ Deck exposed with storm approaching and no protection plan in place
- ✕ Wrong slope confirmed at drain path after deck is installed
- ✕ Open edge unsecured at end of workday
- ✕ Wet insulation or substrate confirmed under any condition
- ✕ Temporary protection missing at an active phase change
- → Trim detail coordination between roofing and siding trades
- → Final membrane color or product specification confirmation
- → Accessory and drain hardware scheduling
- → Maintenance plan and owner walkthrough scheduling
- → Non-critical finish sequencing between trades
Interfaces calm down when the order of operations becomes visible to everyone
Parapets, wall tie-ins, and edges need a sequence, not an argument
Step one is structure, and everything after that inherits its quality-and when that principle gets applied to cross-trade coordination, it's the thing that actually stops arguments cold. I had a project in Ridgewood, cold November day, where the architect, the homeowner, and the siding contractor were all talking past each other about parapet height and wall tie-in elevations. Nobody was wrong exactly-they just had no shared picture of the sequence. I ended up standing on a stack of polyiso insulation pointing at each interface like a referee at a confused huddle. Once I laid out the flat roof house construction sequence in plain steps-structure, deck, substrate prep, edge details, membrane, terminations-and showed where each trade's work sat in that order, the entire conversation calmed down inside about ten minutes. People argue less when the order of operations becomes visible. That's not a theory; that's every complicated Queens job I've ever run at Flat Masters.
Framing to Decking
▾
Before the first deck panel goes down, slope direction and drain location must be confirmed by measurement-not assumed from the drawings. Parapet height, edge geometry, and any penetration locations should be physically marked so the decking crew is working from verified conditions, not estimates.
Decking to Roofing
▾
The deck must be confirmed dry, properly fastened, and free of soft spots before insulation or coverboard is placed-this handoff should be a formal check, not a walk-by. Temporary dry-in responsibility transfers at this point, and the roofing trade needs to know the edge metal spec and substrate plan before materials are ordered.
Roofing to Siding / Parapet Termination Work
▾
Membrane termination heights at walls must be agreed on before siding or cladding work starts-this is the most common source of disputes on residential additions and the most preventable. Coping cap details, counterflashing receiver locations, and any through-wall conditions need to be resolved between the roofing and siding trades before either one is considered complete.
