How to Install Flat Roof: 5 Essential Steps for Success
Look, I've been installing flat roofs across Queens for over two decades, and I can tell you that how to install a flat roof properly isn't something you want to DIY unless you really know what you're doing. The cost of a professional flat roof installation typically runs $8-15 per square foot for materials and labor combined, but trust me - trying to save money on installation usually costs you way more down the road.
Just last month on 43rd Avenue in Elmhurst, we had to tear off a "DIY special" that leaked within six months. The homeowner thought he could handle it himself after watching some YouTube videos. Ended up costing him triple what our original quote would have been.
Understanding Flat Roof Installation Basics
Here's the thing about flat roofing - it's not actually flat. We build in a minimum 1/4 inch per foot slope for proper drainage. I can't tell you how many times I've seen standing water issues because someone didn't understand this basic principle. Water is the enemy of any flat roof system, whether you're dealing with EPDM rubber, TPO, or modified bitumen.
When we talk about how to install flat roofing, we're really talking about creating a complete waterproof system that includes the deck, insulation, membrane, and proper flashing details. Miss any one of these components, and you're asking for trouble.
Step 1: Proper Deck Preparation and Inspection
The foundation of any successful flat roof installation starts with the deck. We typically work with 5/8" plywood or OSB sheathing, though I prefer plywood for its superior moisture resistance. Before we install anything, I personally walk every square foot of that deck looking for loose fasteners, gaps, or structural issues.
Carlos, my lead installer, always jokes that I'm obsessive about deck prep, but here's what I tell him - you can't put a $15,000 roof system over a $500 deck problem and expect it to last. The deck needs to be structurally sound, properly fastened, and bone dry before we start. Any soft spots or deteriorated areas get replaced immediately.
We also check the existing slope at this stage using a 4-foot level and measuring tape. If we find areas that don't drain properly, we'll use tapered insulation or even build up sections with additional framing to ensure proper water flow.
Step 2: Insulation Installation
Most building codes in New York require R-30 minimum for flat roofs, but I typically recommend going higher - maybe R-38 or R-49 if the budget allows. We use rigid foam insulation boards, usually polyisocyanurate, which gives us excellent R-value per inch and creates a stable base for the membrane.
The insulation gets mechanically fastened with special roofing screws and plates. I see a lot of contractors trying to save time by using fewer fasteners, but that's penny-wise and pound-foolish. Wind uplift is serious business here in Queens - we get some nasty storms coming off the Atlantic.
When we install insulation, we stagger the joints and fill any gaps with expanding foam. Air movement under the membrane will cause all kinds of problems down the line, including billowing and premature failure.
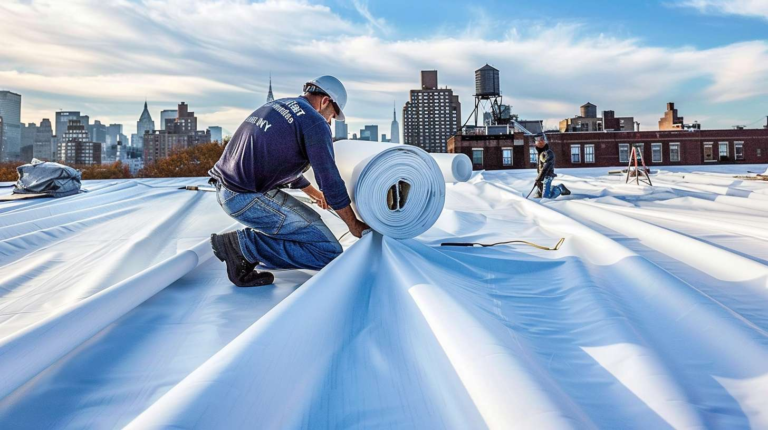
Step 3: Installing the Flat Roof Membrane
This is where how to install a flat roof gets really technical. The membrane choice depends on your budget, building requirements, and personal preference. EPDM rubber runs about $3-7 per square foot installed, TPO is similar, and modified bitumen typically costs $4-8 per square foot.
For EPDM installation, we roll out the membrane and let it relax for at least 30 minutes before we start adhering it. Temperature matters here - we won't install EPDM if it's below 45°F or above 85°F. The adhesive just doesn't perform properly outside that range.
TPO gets either mechanically fastened or fully adhered, depending on the application. The seams get hot-air welded, which creates a stronger bond than the original material. I always test every seam with a probe to make sure we have a complete weld.
Modified bitumen is my personal favorite for Queens installations because it handles our freeze-thaw cycles so well. We torch it down in two layers - a base sheet and a cap sheet. The torch work requires real skill and proper safety equipment. I've seen too many fires from inexperienced guys trying to rush this process.
Step 4: Flashing and Detail Work
Here's where most DIY jobs fall apart completely. Flashing around penetrations, parapet walls, and roof edges is absolutely critical. Water finds every single weakness, and it only takes one small gap to cause thousands in damage.
We use a combination of membrane material, metal flashing, and compatible sealants to create watertight details. Every penetration gets a custom-fabricated flashing collar. Pipe boots, HVAC units, skylights - they all require different approaches.
The parapet wall flashing is probably the most complex detail we deal with. The membrane has to come up the wall at least 8 inches, get properly adhered, then we install counterflashing that gets embedded into the masonry and sealed with polyurethane caulk.
Step 5: Final Inspection and Quality Control
Before we consider any job complete, we do a thorough water test. We flood test low areas and spray test all the flashing details. I know it sounds excessive, but finding a leak during installation costs about $50 to fix. Finding it six months later during a winter storm costs $2,000.
We also check all the mechanical fasteners to make sure they're properly sealed and haven't backed out. Wind uplift testing shows that improperly fastened membranes can fail catastrophically during severe weather events.
Common Mistakes to Avoid
Look, I don't care what other contractors say about "easy" flat roof installation - there's nothing easy about it when you do it right. The biggest mistake I see is rushing the process. Each step needs proper cure time, proper temperatures, and proper attention to detail.
Another huge mistake is mixing incompatible materials. You can't use just any sealant with EPDM, and you can't use standard roofing cement with TPO. The chemistry matters, and using the wrong products will cause adhesion failures.
And please, for the love of all that's holy, don't try to install a flat roof in bad weather. I've seen guys trying to torch down modified bitumen in the rain. It doesn't work, it's dangerous, and it guarantees callbacks.
Why Professional Installation Matters
After installing over 3,000 flat roofs in Queens, Brooklyn, and the Bronx, I can tell you that the difference between a good installation and a great one often comes down to experience and attention to detail that you just can't get from a weekend crash course.
We carry full licensing and insurance - my contractor's license is 704521 if you want to verify. More importantly, we guarantee our work and we're still here to stand behind it. When that storm hits at 2 AM on a Sunday, you want to know you can call someone who'll actually answer.
The investment in professional installation typically pays for itself within the first few years through energy savings and avoided repairs. A properly installed flat roof should last 20-30 years with minimal maintenance.
If you're dealing with a flat roof project in Queens and want it done right the first time, give us a call at Flat Masters NY. We've been keeping Queens dry since 2003, and we're not planning to stop anytime soon.
