That Flat Roof Is Just Wasted Space Right Now - Here's How to Change That
Spoiler: your flat roof terrace conversion succeeds or fails at structure, drainage, and code - long before you ever open a single patio furniture catalog. Think of it like a lab experiment: you've got a hypothesis (gorgeous rooftop terrace), materials (joists, membrane, pavers, people), a failure point (skipping steps), and a result that's either a great outdoor space or a very expensive leak. Get the sequence right, and the terrace happens. Skip steps, and gravity writes the complaint letter.
Structure Decides Whether the Idea Lives or Dies
Start with the joists, not the Pinterest board. A flat roof terrace conversion is an engineering-and-water-management project first and a lifestyle upgrade second - and the sooner that lands, the better this goes for everyone. The hypothesis is seductive: unused roof becomes outdoor living space. But the test is what kills bad ideas early. Live load, dead load, guardrail attachment points, and parapet conditions all have to be evaluated before anyone picks a paver color. And here's the thing - I'm Rosa Mendez, and after 22 years specializing in turning Queens flat roofs into usable terrace spaces without sacrificing drainage or membrane life, I can tell you that old rowhouse roofs in this borough vary so wildly in assembly and age that guesswork isn't a strategy. A building on 108th Street in Corona might have original 1940s timber joists; two blocks over might be a 1980s addition with different framing entirely. There's no one-size-fits-all load assumption here.
No → Schedule a professional inspection first. Design talk is premature.
Yes → Move to Step 2.
Yes → Repair and investigate before any design phase begins.
No → Move to Step 3.
No → Stop. Get a licensed engineer or qualified roofer to review before going further.
Yes → Move to Step 4.
No → Redesign scope or reconsider occupancy use entirely.
Yes → Proceed to drainage and membrane protection planning.
Placing furniture, planters, pavers, pergolas, grills, or tenants on a flat roof before completing a structural review, code review, and membrane protection plan is how minor issues become major interior damage.
"Buy chairs first, ask questions later" is not a renovation strategy - it's how people end up with a ruined ceiling, a voided warranty, and a roof that now needs replacing instead of converting. Don't be that story.
Drainage and Waterproofing Are the Real Terrace Surface
What stays underneath the pretty part
Blunt truth: if water has nowhere elegant to go, it will go somewhere ugly. A terrace sits on top of a roof system - it does not replace the need for one. I still remember a sticky July evening in Astoria when a couple brought folding chairs up onto their bare flat roof and said, "See? We already use it." Ten minutes later, after a quick hose test, water started creeping toward the rear drain clogged with maple seeds, and I told them, "You don't have a terrace. You have a future complaint letter from gravity." They laughed. But that was the day they understood that converting a flat roof to a terrace starts below the pavers. Pedestal deck tiles and porcelain pavers look great - they are not waterproofing. The membrane underneath is doing all the actual work, and if the drains can't handle controlled water flow, the terrace makes everything worse.
Where Queens roofs usually tell on themselves
On 37th Avenue, this is where people usually get ahead of themselves. Queens buildings are a genuine mix - rowhouses, two-families, mid-century apartment additions - and their roofs reflect decades of patchwork repairs, add-on assemblies, and drain configurations that made sense to someone in 1973 but don't make immediate sense today. Internal drains positioned near rear parapets, scuppers that channel to a neighbor's shared wall line, awkward penetrations from old HVAC units - these aren't deal-breakers, but they absolutely reshape what a terrace layout can look like and where money needs to go first. Tight lots in Woodhaven or Maspeth mean you might have two inches of slope working against a drain that hasn't been properly rodded in six years. That's the kind of detail that either saves or ruins a terrace project.
Now, before we skip three steps and make a mess of the experiment: if the membrane is tired, the terrace waits.
| Layer / Issue | What It Actually Does | Common Failure Point | Why It Matters Before Finishes |
|---|---|---|---|
| Waterproof Membrane | Primary barrier between roof deck and building interior | Punctures from dragged furniture, aging seams, uncovered penetrations | Every finish layer goes on top of this - if it fails, everything above fails with it |
| Roof Drains / Scuppers | Removes water from the roof surface before it ponds | Clogged by debris, buried under pavers without access clearance | Terrace layout must preserve drain accessibility or ponding is guaranteed |
| Slope / Positive Drainage | Directs water toward drains and off the surface | Flat or reverse-sloped sections that pool water under deck systems | Pedestal systems can compensate, but only if slope is mapped first |
| Protection Board / Separation Layer | Shields membrane from abrasion and point loads | Skipped entirely to save cost, leaving membrane exposed to foot traffic and furniture | Without it, pavers or pedestals can abrade the membrane over seasonal movement |
| Flashing at Parapets and Penetrations | Seals transitions between membrane and vertical surfaces | Cracked, lifted, or poorly tied-in flashing is the most common hidden leak source | Guardrail and railing attachment must avoid compromising flashing integrity |
| Insulation Layer | Maintains thermal performance and supports the membrane assembly | Compression or moisture saturation from long-term leak exposure weakens the deck | Wet insulation is invisible from above and creates soft spots that feel fine until they don't |
Code, Access, and Safety Change the Scope Fast
What do I ask a Queens homeowner first? Intended use, who's accessing the roof, and whether they're expecting a true occupied terrace or occasional maintenance access only - because those two things are not the same conversation at the DOB. A private seating area for the top-floor owner is different from a roof deck accessible to multiple tenants. That distinction drives guardrail height requirements, stair or hatch specifications, egress planning, and occupancy assumptions that can reshape your budget fast. Add a privacy screen and string lighting and you've introduced structural attachment questions and electrical coordination. None of that is a reason to abandon the idea - it's just a reason to know the full scope before you commit.
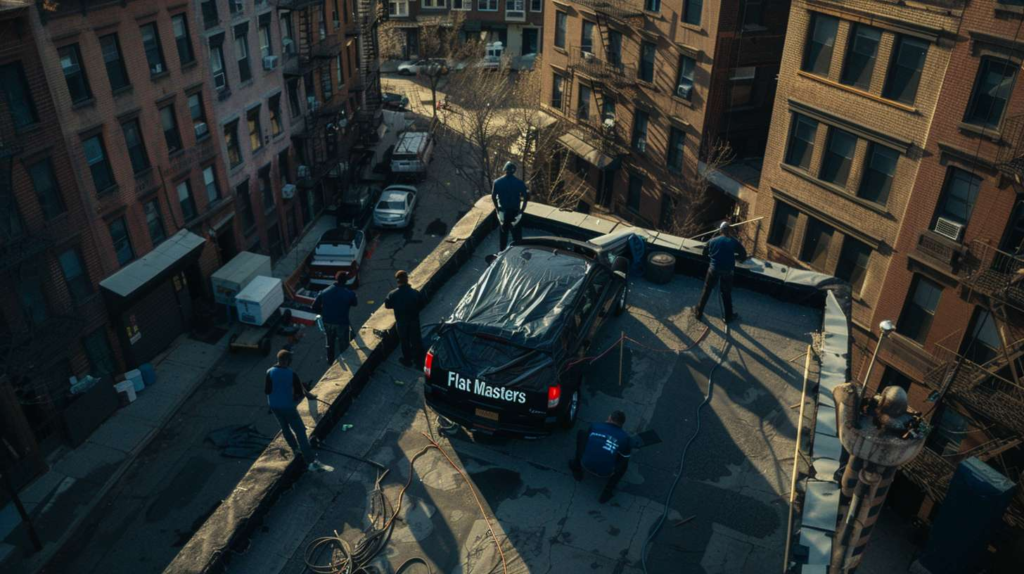
I've stood on too many roofs at 7 a.m. to sugarcoat this. A Sunnyside client once called me at 6:40 in the morning because her upstairs tenant had started dragging patio chairs across a roof they were absolutely not supposed to occupy. No walkway pads, no guardrails, no structural review - just pure confidence and a nice day. By 8:15 I was up there with coffee in one hand and a tape measure in the other, walking through exactly why how to turn a flat roof into a terrace is not "buy chairs first, ask questions later." That line has followed me for years, and not because it's funny - because a lot of people genuinely need to hear it before it costs them. And here's an insider tip worth writing down: when you talk to a contractor, ask them specifically how drains will remain reachable after pavers, railings, and furniture are all in. If they can't answer that cleanly and immediately, they're not sequencing the job correctly.
Sequence the Project Like a Lab, Not a Shopping Trip
The order that saves money
A flat roof is like a school lab table - useful only if you respect what it can and can't handle. Every terrace project has a correct order, and it doesn't start with pavers. It starts with inspection: what's up there, how old is it, and what's the current condition of the membrane, flashing, and drains. Then you investigate for moisture or weak spots - not just visually, but with probing or test cuts if anything feels soft. Then structure gets reviewed for what load it can carry. Then drainage and membrane protection get planned before any finish surface is selected. Then code, access, and guardrail requirements get mapped out. Only after all of that do you pick the deck tile color. That sequence isn't bureaucracy. It's what separates a project that works from one that gets torn apart two years later.
The shortcuts that usually backfire
One Saturday morning after a spring rain in Ridgewood, I was inspecting a roof for a retired transit worker who wanted string lights, planters, the whole movie-scene setup. I stepped onto one corner and felt that soft little give under the membrane that every roofer hates - the kind that makes your stomach drop just slightly before you keep your face neutral. We cut a test section and found moisture damage around a patched penetration that had been quietly sitting there for years, slowly affecting the insulation below. He looked at me and said, "Good thing you ruined my fantasy early." And honestly, yes - much cheaper that way. That's not me being harsh; that's me saying I'd genuinely rather kill a bad idea in week one than let a homeowner spend real money on railings and decking over a compromised roof. Flat Masters has been doing this work in Queens long enough to know that the most expensive mistake isn't the repair - it's the renovation you put on top of a problem you didn't know was there.
| Convert Now | Wait and Coordinate With Future Roof Replacement |
|---|---|
| ✅ Start using the space now - no need to wait for a future replacement cycle | ✅ New membrane and terrace system designed together from the start |
| ✅ Terrace protection system can actually extend current membrane life | ✅ Avoids tearing up a new terrace system to replace a failing membrane underneath |
| ✅ Drainage and structural issues identified now before they become bigger repairs | ✅ Cleaner permitting scope - one project, one contractor, one sequence |
| ⚠️ May uncover hidden damage that expands scope and budget unexpectedly | ⚠️ Roof may have years left - waiting delays the benefit unnecessarily |
| ⚠️ If roof is near end of life, terrace investment may need to be redone sooner than expected | ⚠️ Continued exposure and informal use of the roof in the meantime still carries risk |
| ⚠️ Permit and code scope still applies - no shortcuts even on an existing roof | ⚠️ Requires discipline to not informally use the roof while waiting |
Budget for the Hidden Parts Before the Fun Parts
Here's where a lot of Queens homeowners get surprised: they budget for pavers and furniture and come in under on everything else, then discover that the inspection flagged drainage corrections, the membrane needs replacing before any finish system goes on, the guardrails require a permit that expands the scope, and suddenly the "simple terrace project" has a different number attached to it. The finishes are the least expensive part of a well-sequenced flat roof terrace conversion - it's the investigation, repairs, protection layers, and code-driven items that carry the real weight. And none of that is bad news if you know it going in. It's only a crisis when you find it halfway through and the pavers are already on a truck.
If you want a realistic answer about whether you can convert a flat roof to terrace space in Queens, Flat Masters can inspect the roof, walk you through the actual failure points, and map the correct sequence before you spend a dollar on the wrong stage. Call us and let's start with what's actually up there - not what you're hoping is up there.
