Fixing a Flat Roof Leak the Right Way Takes More Than a Tin of Sealant
I'm going to give you the two-sentence version first. The place where water shows up inside your building is often not the place on the roof that actually failed - so fixing a flat roof leak starts with tracing the path, not guessing at the drip.
Why the Drip Indoors Rarely Marks the Real Failure
Six feet away is normal on a flat roof. The ceiling stain that sent you onto Google at midnight is frequently offset from the actual failure - a split seam, a flashing gap, a clogged drain transition, or a puncture you'd only find by walking the right section of the membrane. Water doesn't care about your floor plan.
What people assume is that the leak is directly above the stain. What the roof is actually doing is moving water laterally - along membrane laps, along the insulation facer, down deck ribs, or through wall intersections - until gravity finds the lowest point of least resistance and drops it on your ceiling. Water is honest - it always tells you where the system failed. Every stain, every seam split, every blister is evidence in a cause-and-effect experiment. The job is reading the evidence, not guessing with a tube of hardware-store goo and hoping for the best.
Start here: Where is the interior stain showing?
Inspect base flashing corners, coping terminations, and any line-set or HVAC penetrations running through the parapet wall. These termination points fail before the field membrane does.
Inspect field seams, punctures, blisters, ponding zones, and drain bowl transitions. Open laps and fishmouths in the field membrane are common culprits on older roofs.
Prioritize wall and flashing transitions first. Wind forces water upward into gaps that gravity alone won't reach - parapet caps, equipment curbs, and wall counterflashing are the usual suspects.
This pattern strongly suggests wet insulation and moisture migration. You're likely not dealing with one fresh point of entry - you're dealing with a saturated system that releases slowly. Tracing one hole won't solve it.
- It traps water under the patch. Applying sealant over a wet or compromised membrane seals moisture in, which accelerates deterioration of the substrate and insulation below.
- You're sealing the wrong location. If the stain is not directly above the failure, your patch isn't touching the actual problem - it's just covering a dry area with goo.
- It hides the original failure. A messy patched surface is significantly harder for a professional to read. You may be adding to the diagnostic problem, not solving it.
Signals That Tell You What Kind of Leak You're Actually Dealing With
What Repeated Leaks Usually Point To
Here's the part people don't love hearing: if a flat roof leak keeps coming back after a repair, it almost always means the repair addressed the symptom and not the actual failure point. And after 17 years in flat roofing, Marisol Vega has seen this exact mistake all over Queens - good-faith repairs applied to the wrong location, sometimes multiple times on the same building. I remember a July Saturday in Ridgewood, standing on a three-family roof at 6:15 in the morning, already sticky-hot, where the owner had emptied almost an entire tin of silver sealant around a drain. The ceiling leak was still showing up twelve feet away in the top-floor hallway because the real problem was a split seam near a ponding zone, not the drain. That was one of those jobs where I had to explain, gently but firmly, that water doesn't care where you guessed.
Queens roofs have their own personality, and knowing that personality matters. Old modified bitumen seams that have been through thirty freeze-thaw cycles crack in very specific ways. Parapet corners on attached rowhouses in Woodhaven or Middle Village collect water and debris differently than a freestanding building would. Rooftop equipment - mini-splits, exhaust fans, line sets running through the parapet - creates penetration points that shift slightly every season. Drain bowls on aging roofs accumulate granule sediment, flex with thermal movement, and separate from the field membrane at the transition. All of these failure patterns are common in Queens. None of them announce themselves directly above your ceiling stain.
What Ponding Water Changes
Last winter in Astoria, I peeled back a patch and found trapped moisture under the membrane from an older bad repair, plus wet insulation that had been sitting saturated long enough to compress and lose its R-value completely. A restaurant owner had called me out in sleet, asking me to "just patch the bubble" before dinner service. I told him a surface smear over wet materials is not a repair - it's a delay with a short expiration date. He wasn't thrilled in the moment. Two weeks later, after we properly opened the assembly, removed the wet insulation, and rebuilt the failing detail, he called to say it was the first winter that section didn't leak. Surface patching over a wet system is like putting a bandage on an infection without cleaning the wound.
| What You Notice | What People Assume | What It More Likely Means | Typical Proper Fix |
|---|---|---|---|
| Stain only appears after wind-driven rain | There's a hole in the field membrane | Parapet flashing, coping cap, or wall transition is open | Re-flash base flashing corners, reset or replace coping |
| Stain grows over several days post-rain | The roof is still actively leaking | Wet insulation migrating moisture through the deck | Core sample or infrared scan, remove saturated insulation |
| Bubble or blister in the membrane surface | Easy patch - just cut and seal | Trapped moisture or adhesion failure underneath | Open the blister, dry substrate, compatible patch with proper overlap |
| Leak near rooftop HVAC or mini-split | The unit itself is the problem | Line-set penetration or curb flashing has opened | Re-flash curb, reseal penetration with compatible membrane collar |
| Leak near interior drain but drain is clear | The drain bowl is cracked | Field seam failure in ponding zone near the drain | Inspect and seal open laps within 6-12 feet of drain perimeter |
| Leak after first hard freeze of the season | Ice dam is the cause | Freeze-thaw split at an existing seam or flashing termination | Locate and repair split seam or flashing before next freeze cycle |
| Myth | Real Answer |
|---|---|
| The stain marks the leak. | Rarely. Water travels laterally under the membrane, along insulation, and through deck seams before it drops. The stain is the endpoint, not the source. |
| More sealant means a longer-lasting fix. | No. Applying more sealant over a failing area just raises the surface profile, traps moisture, and makes it harder to find the actual failure point later. |
| A blister is an easy patch job. | Not if there's trapped moisture underneath. Patching over a wet blister seals in the problem. The membrane needs to be opened, the substrate dried, and a compatible repair installed with proper overlap. |
| The drain is always the culprit. | Drains fail, but field seams near ponding zones fail just as often. The drain is a convenient guess because it's visible. Don't stop the inspection there. |
| Dry weather means the roof is dry underneath. | A roof can look completely dry on the surface while the insulation below holds weeks' worth of trapped moisture. Surface appearance tells you almost nothing about the condition of the assembly beneath it. |
Before You Touch Anything, Narrow the Failure Path
If you were standing next to me on that roof, I'd ask you one thing: what weather condition reliably triggers the leak first? Steady rain, wind-driven rain, melting snow, or standing water that remains long after the storm? The trigger is evidence - it changes the entire direction of the inspection. Steady rain points toward field membrane. Wind-driven rain points toward flashings and transitions. Melting snow points toward drain blockages and edge conditions. Delayed appearance points toward trapped moisture moving slowly. Know your trigger before you touch a single seam.
- Leak timing: Note exactly when the stain appears relative to rain - during, immediately after, or days later.
- Interior stain photos: Photograph the stain with something for scale. Document whether it's grown since you first noticed it.
- Exterior roof photos: From safe ground-level or window access only - do not walk a wet flat roof without proper footing. Capture any visible bubbles, open seams, or displaced flashing.
- Wind correlation: Does the leak worsen or appear only when rain is wind-driven from a specific direction? That narrows the inspection zone considerably.
- Ponding duration: Does water remain on the roof 24 or more hours after rain stops? Chronic ponding accelerates seam and membrane failure.
- Roof age and type: If you know whether the roof is modified bitumen, TPO, EPDM, or built-up, note it. Age matters - a 20-year-old modified bitumen roof behaves very differently than a 5-year-old TPO.
- Previous patch locations: Mark or photograph any areas where sealant or patches have already been applied. These spots are high-priority inspection zones.
The field membrane is the first place to look - open laps, fishmouths at seam overlaps, and punctures from foot traffic or debris. These failures let water in under steady hydrostatic pressure even without wind.
Parapet base flashings, wall transitions, counterflashing terminations, and equipment curbs are the likely failure zones. Wind forces water upward and laterally into gaps that gravity-fed rain never reaches.
Freeze-thaw cycles split seams and flashing terminations that were already compromised. Blocked drains and scuppers cause water to back up under flashings at the edges. Inspect drain covers, scupper openings, and any seam that runs parallel to the roof edge.
This pattern almost always means wet insulation or moisture migrating through the assembly. The roof may have one small point of entry, but water saturated into the insulation releases slowly through the deck long after the rain stops. Surface inspection alone won't find this - probing or infrared scanning is needed.
Proper Repair Means Fixing the Assembly, Not Just the Surface
When a Patch Is Legitimate
A tin of sealant is not a repair plan. That said, some limited repairs are genuinely valid - a small puncture on a dry, intact membrane with no substrate damage, addressed with compatible materials and proper overlap geometry, can hold for years. The word "compatible" is doing a lot of work in that sentence. Modified bitumen, TPO, EPDM, and built-up roofing all require different repair materials and methods. Apply the wrong product to any of them and you haven't fixed anything - you've just created a new failure point with a nice cosmetic appearance.
When Materials Underneath Have to Come Out
I had a retired electrician in Bayside call me after he'd patched the same spot three times himself, always right above the bedroom ceiling stain. When I got there around 4:30 in the afternoon, after a day of on-and-off rain, I traced the leak back to a base flashing issue at a parapet corner directly behind his mini-split line set - a spot he'd never looked at because the stain was nowhere near it. He laughed and said, "So I've been repairing the symptom?" and I told him yes - that is the single most common flat-roof mistake in Queens. He'd done the work honestly each time. He'd just been answering the wrong question each time.
If the roof keeps leaking after "repairs," the roof is not being stubborn - you are still looking at the symptom.
Think of the roof like a lab experiment with gravity and patience. The proper sequence is: trace the interior evidence, identify the offset failure path on the roof surface, probe seams and flashings around the suspected zone, open the membrane if trapped moisture is suspected, remove wet insulation or damaged substrate when present, rebuild the failing detail with compatible materials, and verify that drainage and watertight transitions are restored. Here's the insider tip that saves a lot of return trips: if you see an old patch edge that's curled, brittle, or mounded up, don't focus on its center. Inspect just beyond its edge, because the real opening is almost always at the boundary of the previous repair - not underneath it. And one more opinion I'll give you plainly: Marisol does not like miracle leak coatings for active leak diagnosis. They're oversold for situations where the actual failure hasn't been identified yet, and they regularly hide the evidence you need to find the real problem. Use them if they're the right product for a confirmed, dry, stable surface. Don't pour them over a mystery.
Photograph stain location, note proximity to exterior walls or roof features, document when it appears and whether it grows. This is your starting data.
Based on interior stain location and leak trigger, walk the corresponding roof zones - not just the spot directly above the stain. Check flashing corners, seam laps, and penetrations upstream.
Use a probe tool or hands-on pressure test on suspect seams. Look for open laps, lifted flashing edges, and drain bowl separation. A water test can confirm the failure zone before opening anything.
If blistering, slow stain growth, or delayed leak appearance suggests a saturated assembly, the membrane needs to be opened and the substrate assessed - not surface-patched.
Wet insulation will not dry out under a sealed membrane. It has to come out. Leaving it in place and patching over it is a warranty for a repeat call within two seasons.
Use materials compatible with the existing membrane system. Confirm that water can drain off the repaired section without ponding at the repair edges. Check all flashing terminations in the work zone before calling it done.
Questions Queens Owners Ask When the Leak Keeps Coming Back
The goal here isn't to scare anyone away from a repair - it's to help you avoid running the same wrong repair three times on the same roof section. Queens building stock has its own reality: attached two- and three-family homes, mixed-use buildings with ground-floor retail, flat roofs crowded with HVAC equipment, exhaust fans, and satellite hardware. These roofs are busy, and busy roofs have more penetrations, more flashing terminations, and more places for water to find a way in. Ask the right questions before you start.
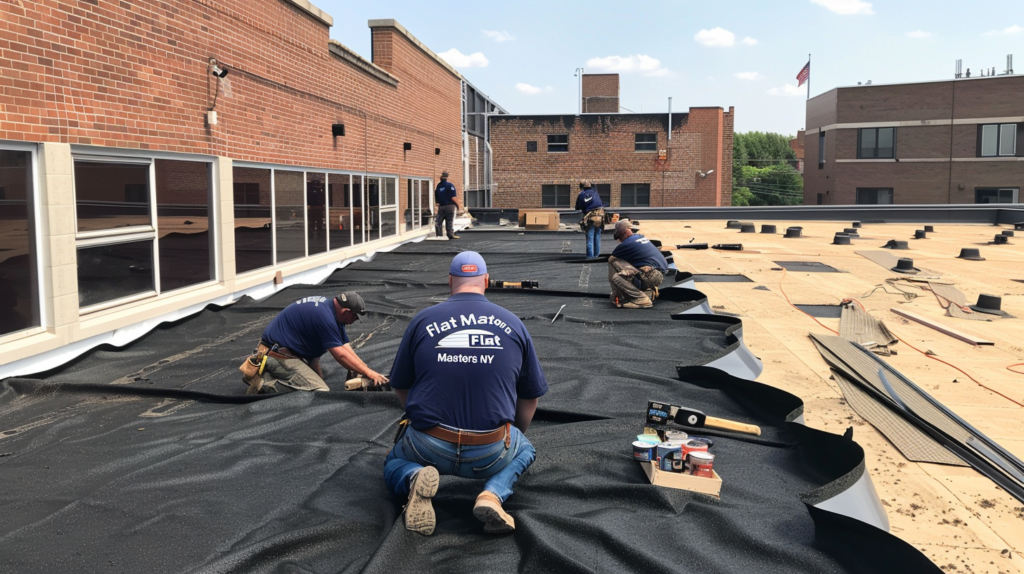
If a Queens flat roof leak keeps returning no matter what you throw at it, Flat Masters can trace the real failure, repair the roofing system correctly, and put an end to the cycle of patching the symptom. Give us a call - let's find out what the roof is actually telling you.
- Marisol Vega, Flat Masters, Queens, NY
