How to Lay Felt on a Flat Roof: Your Complete DIY Guide
Look, I'm going to be straight with you - laying felt on a flat roof isn't rocket science, but it's not something you want to mess around with either. After 22 years working flat roofs across Queens, from Astoria to Jamaica, I've seen enough DIY disasters to know when to encourage homeowners and when to tell them to call a professional. This is one of those jobs that sits right on the fence.
What You Need to Know Before Starting
First things first - we're talking about roofing felt, not the craft store stuff your kids use for school projects. Professional roofing felt comes in different weights: 15-pound and 30-pound are the most common. For flat roofs in Queens, I always recommend 30-pound felt because of our weather patterns. The salt air from Flushing Bay and the East River, combined with those brutal winter freeze-thaw cycles, will eat through lighter material faster than you'd think.
Here's something most DIY guides won't tell you: the technique for laying felt on a flat roof is completely different from a pitched roof. On a sloped roof, gravity helps water shed off. On a flat roof (which isn't actually flat - it should have a slight slope of at least 1/4 inch per foot), you're dealing with ponding water, thermal expansion, and completely different stress patterns.
Tools and Materials You'll Actually Need
Don't believe those simple tool lists you see online. Here's what I carry in my truck for felt installation:
- 30-pound roofing felt (buy 10% extra - trust me on this)
- Roofing cement or cold-process adhesive
- Galvanized roofing nails (1-inch minimum)
- Utility knife with plenty of fresh blades
- Chalk line
- Measuring tape
- Broom or brush for cleaning
- Roofing hammer
- Trowel for spreading cement
- Safety equipment (non-slip shoes, harness if needed)
One thing I learned the hard way early in my career - cheap roofing cement is expensive in the long run. We get our materials from Beacon Building Products on Northern Boulevard, and they'll tell you the same thing. Spend the extra $20 on quality cement. Your roof will thank you in five years when your neighbor's cheap job is failing.
The Step-by-Step Process
Start by cleaning the roof deck thoroughly. I mean thoroughly. Every piece of debris, every nail that's sticking up, every rough spot needs attention. Last month on a job in Elmhurst, the homeowner swore the deck was clean, but we found three loose nails and a chunk of old flashing that would've torn the felt within a week.
Roll out your first piece of felt parallel to the longest edge of the roof. This is where most DIYers mess up - they start wherever feels convenient. Don't do that. Plan your layout so you minimize seams and avoid having seams in areas where water might collect.
Here's the critical part about overlaps: you need a minimum 2-inch overlap on side laps and 6 inches on end laps. But here in Queens, with our weather, I recommend 3 inches on sides and 8 inches on ends. Why? Because thermal expansion and contraction will work those seams constantly. A 2-inch overlap that's perfect in July might gap in January when everything contracts.
The Installation Technique That Actually Works
Start at the lowest point of the roof and work upward. This ensures proper water shedding even if your slope isn't perfect. Roll out about 10 feet of felt at a time - don't try to do the whole roll at once. You'll end up with wrinkles and bubbles that you can't fix.
Nail the felt every 6 inches along the edges and every 12 inches in the field. Some contractors will tell you to space nails wider, but they're not dealing with Queens weather. We get wind gusts off the water that will find every weak spot in your installation.
Apply roofing cement under the overlaps. Not just at the edges - under the entire overlap area. Spread it with a trowel to get even coverage. This isn't just about waterproofing; it's about creating a monolithic membrane that moves as one piece instead of individual sheets working against each other.
Common Mistakes I See Every Week
The biggest mistake? Homeowners try to install felt when it's too cold or too hot. Felt gets brittle below 45 degrees and too pliable above 85 degrees. I've seen guys trying to install felt in July when it's 95 degrees on the roof surface, and the material just stretches and distorts. Wait for decent weather - ideally 60-80 degrees with low humidity.
Another thing - don't walk on freshly installed felt more than necessary. Every footprint is a potential weak spot. Plan your work pattern so you're not constantly walking back and forth across completed sections.
And here's something that drives me crazy: people who don't prime the deck first when conditions call for it. If your deck has been exposed to weather, or if you're installing over old adhesive residue, prime it first. The felt will adhere better and last longer.
When to Call Flat Masters NY Instead
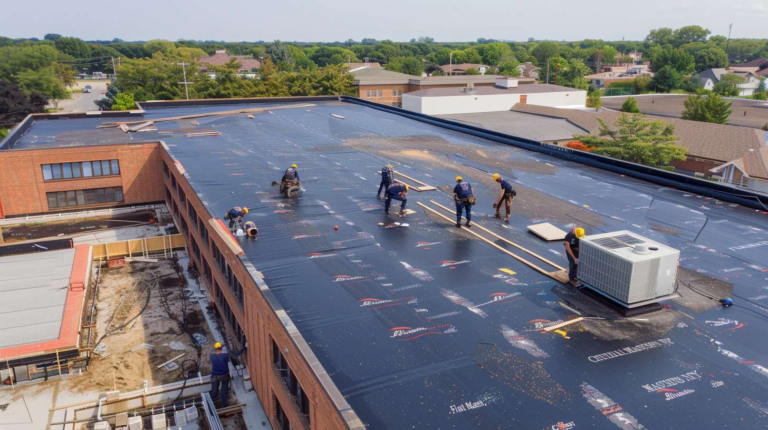
Look, I'm not trying to talk myself out of business here, but there are times when DIY makes sense and times when it doesn't. If your roof is larger than 500 square feet, has multiple levels, or has existing problems like ponding water or structural issues, call us. We're licensed (License 1047832), insured, and we've done this thousands of times.
Also, if you're not comfortable working at heights or don't have proper safety equipment, don't risk it. I've been to too many hospitals visiting guys who thought they could save a few hundred bucks and ended up with broken bones or worse.
The Real Cost Breakdown
For a typical 400 square foot flat roof in Queens, you're looking at about $200-300 in materials if you do it yourself. That includes felt, cement, nails, and miscellaneous supplies. Professional installation runs $800-1200 for the same job, depending on access and existing conditions.
But here's the thing about cost - if you mess up the installation, you might save $500 upfront but spend $2000 fixing water damage later. Just last month we had to completely redo a DIY felt job in Bayside because the homeowner didn't understand proper overlap techniques. Water got under the felt and rotted half the decking.
Queens-Specific Considerations
If you live near the water - and most of Queens does - you need to account for salt air corrosion. Use galvanized nails, not standard steel. The extra cost is minimal compared to having your fasteners rust out in two years.
Also, our building codes require permits for roofing work in most areas. A simple re-roofing usually doesn't need a permit, but if you're doing structural work or replacing more than 25% of the roof, check with the Department of Buildings first. Getting caught without proper permits can cost you way more than the permit fee.
The wind patterns around here are tricky too. If you're near the Whitestone or Queensboro bridges, you get weird wind effects that put extra stress on roof systems. Factor that into your fastening pattern.
Final Thoughts from Someone Who's Been There
Installing felt on a flat roof is definitely doable for the right person with the right situation. But it's not a weekend warrior project. Take your time, use quality materials, and don't cut corners on safety or technique.
If you decide to tackle it yourself, do us both a favor - call Flat Masters NY at (917) 994-7618 for a consultation first. We'll take a look at your specific situation and give you honest advice about whether it's a good DIY project or something you should leave to professionals. Sometimes spending 30 minutes with an expert can save you weeks of headaches.
And if you get halfway through and realize you're in over your head, don't be stubborn about it. We've rescued plenty of DIY projects, and it's usually cheaper to call for help early than to wait until something goes wrong.
