How to Design Flat Roof Drainage Systems: Expert Guide
Look, I've been designing and installing flat roof drainage systems across Queens for over two decades now, and I can tell you the number one thing that separates a roof that lasts from one that becomes a nightmare: proper drainage design. Period. Every single flat roof failure I've seen - and trust me, I've seen plenty - traces back to water that couldn't get off the roof fast enough.
Here's the thing about flat roof drainage design: it's not actually rocket science, but it requires understanding physics, local building codes, and honestly, what Queens weather throws at us year after year.
Understanding Flat Roof Drainage Fundamentals
First, let's get one thing straight - no roof is truly flat. We're talking about low-slope roofs, typically with a minimum 1/4 inch per foot slope (that's 2% grade for you technical folks). Without this slope, you're asking for ponding water, and ponding water is the enemy of every roofing membrane we install.
When I'm designing drainage for a building in Astoria or Long Island City, I'm looking at three main drainage methods:
- Interior drainage systems - drains located within the roof area
- Gutters and downspouts - perimeter drainage
- Scuppers - openings through parapet walls
Most commercial buildings we work on use interior drains because they're more reliable in our climate. The salt air from the East River can corrode gutters faster than you'd think, especially on those older buildings near the Queensboro Bridge.
Calculating Drainage Requirements
Now this is where things get technical, but stick with me. The International Building Code requires us to design for a 100-year storm event, which in Queens means handling about 7.5 inches of rainfall per hour. That sounds like a lot because it is.
For every square foot of roof area, you need to move 0.0104 gallons per minute during peak rainfall. So a 10,000 square foot warehouse roof needs to handle roughly 104 gallons per minute. My foreman Carlos always jokes that's like emptying a standard bathtub every 90 seconds - puts it in perspective.
But here's what they don't teach in textbooks: you need to account for blocked drains. I always design assuming 50% of drains might be clogged during a storm. Leaves, debris, ice - it all happens. Last winter we had three emergency calls from buildings where ice blocked their primary drains and water started backing up.
Interior Drain Design and Placement
Interior drains are my go-to for most flat roofing projects in Queens. They're protected from freezing, less visible, and frankly more reliable than perimeter systems when designed correctly.
Drain placement is critical. I typically space primary drains no more than 75 feet apart, with each drain serving a maximum of 10,000 square feet of roof area. On a typical commercial building, that means one drain per major section, with overflow drains positioned to handle water if the primary system fails.
The key is creating drainage zones. Picture your roof like a series of shallow bowls, each one sloping toward its drain. We use tapered insulation systems to create these slopes - it's more expensive upfront but prevents the ponding issues that kill roofs prematurely.
Drain sizing follows specific formulas, but in practical terms: 4-inch drains for smaller areas, 6-inch for larger sections. The drain bodies themselves need to be compatible with your roofing membrane. We use Watts, Zurn, or Smith drains depending on whether we're installing TPO, EPDM, or modified bitumen.
Overflow Systems: Your Insurance Policy
Every roof needs an overflow system. This isn't optional - it's required by code and common sense. When primary drains can't handle the water volume, overflow drains kick in at a slightly higher level.
I typically set overflow drains 2 inches above primary drain level. This gives enough water depth to activate the system without creating dangerous loading on the roof structure. On a recent project in Elmhurst, this saved the building owner thousands when a maintenance crew accidentally covered a primary drain with equipment.
Scuppers work great as overflow systems, especially on buildings with parapet walls. We cut them at the proper height and size them to handle the overflow volume. The trick is making sure they're wide enough - typically 1 square inch of opening per 100 square feet of roof area.
Slope Design and Installation Techniques
Creating proper slope on a flat roof takes planning and the right materials. We use tapered insulation systems - polyisocyanurate boards that come pre-cut to specific thicknesses. It's like building a very shallow pyramid system across your roof.
The minimum slope is 1/4 inch per foot, but I prefer 1/2 inch per foot when possible. Gives you better drainage and a safety margin. On a 50-foot section, that's about 2 inches of height difference from high point to drain.
Here's something most contractors won't tell you: the insulation layout is just as important as the slope calculation. We create cricket systems around rooftop equipment, diverting water away from curbs and toward drains. Without these crickets, water pools behind equipment and finds its way into the building.
Material Selection and Compatibility
Your drainage components need to work with your roofing membrane. This isn't mix-and-match territory. TPO roofs need TPO-compatible drain flanges. EPDM requires EPDM flanges. Modified bitumen uses different attachment methods entirely.
The drain bodies themselves should be cast iron or heavy-duty plastic. We've had good luck with Watts Series 15 drains for most applications. They're built to last and handle the thermal movement that happens on Queens rooftops.
Strainers are crucial but often overlooked. A 6-inch drain with a 4-inch strainer creates a bottleneck. The strainer should match the drain size, and we always specify dome-style strainers that shed leaves and debris naturally.
Conductor pipes - the vertical sections that carry water down through the building - need to be sized properly. A 4-inch roof drain should connect to a 4-inch conductor, minimum. Reducing the size creates backups that can overflow onto lower floors.
Common Design Mistakes to Avoid
After 20+ years installing flat roofs across Queens, I've seen every mistake possible. The biggest one? Insufficient slope. Contractors who don't understand drainage try to save money by minimizing tapered insulation. You end up with flat spots that pond water and fail within 5-7 years instead of lasting 20+.
Another huge mistake is positioning drains at structural high points instead of low points. Sounds obvious, but I can't tell you how many times I've been called to diagnose leaks on roofs where someone placed drains wherever was convenient for the plumbing, not where water naturally wants to go.
Inadequate overflow capacity kills roofs too. The building code requires overflow systems, but many contractors size them too small or position them incorrectly. Your overflow system should handle 100% of the design rainfall if all primary drains fail completely.
Maintenance Access and Cleanout Design
Design your drainage system for maintenance from day one. Drains need regular cleaning - at least twice per year in Queens because of all the debris from surrounding trees and buildings. Make sure maintenance crews can actually reach every drain safely.
We always include walkway pads leading to drainage areas. Gives maintenance crews a safe path that won't damage the membrane. These pads cost maybe $200 extra per roof but prevent thousands in damage from foot traffic over the years.
Cleanout access at grade level is essential for interior drain systems. When a drain clogs, you need to be able to snake it from inside the building. I've seen too many emergency situations where water was backing up and nobody could figure out how to access the drain line for clearing.
Building owners should understand their drainage system layout. We provide as-built drawings showing drain locations, slopes, and cleanout access points. Keep these drawings accessible - when you have a leak at 2 AM during a storm, knowing where your drains are located saves time and money.
Working with Queens Weather Patterns
Designing drainage for Queens means understanding local weather. We get heavy spring rains that can overwhelm undersized systems. Summer thunderstorms dump incredible amounts of water in short periods. Winter brings freeze-thaw cycles that can crack poorly designed systems.
Ice is a particular challenge. Interior drains are less prone to freezing, but exterior components like scuppers and downspouts can ice up completely. We design with this in mind, using larger sizes to accommodate some ice formation without complete blockage.
The salt air near the East River and Long Island Sound accelerates corrosion of metal components. We specify non-ferrous materials whenever possible - aluminum, copper, or high-quality plastics that won't deteriorate in the marine environment.
Code Compliance and Professional Installation
New York City building codes are specific about flat roof drainage requirements. The design needs to be stamped by a licensed professional engineer for most commercial applications. This isn't just bureaucracy - proper engineering prevents the catastrophic failures that make headlines.
Installation quality matters as much as design. The best drainage plan in the world fails if the membrane attachment around drains isn't watertight. We use proper flanges, sealants, and attachment methods specific to each roofing system.
Final inspections should include water testing of the drainage system before the roof is accepted. We flood each drainage zone to verify proper flow and no ponding. It's an extra step that catches problems before they become expensive failures.
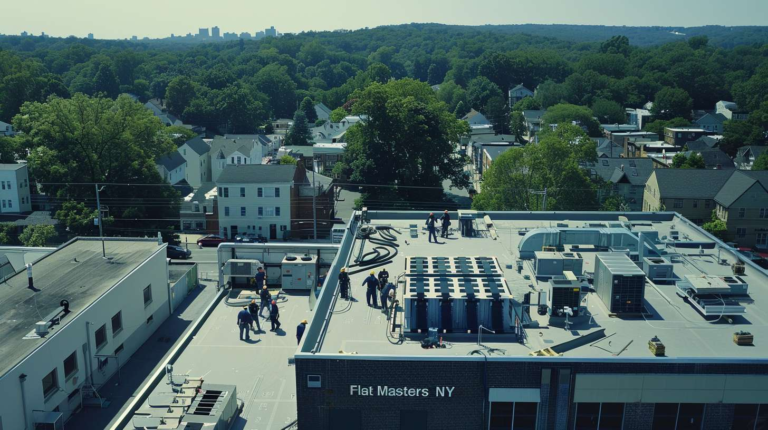
At Flat Masters NY, we've designed and installed drainage systems for everything from small commercial buildings to large industrial complexes across Queens. Every project gets the same attention to detail because proper drainage is the foundation of a long-lasting flat roof. Get the water off quickly and efficiently, and everything else becomes manageable. Ignore drainage design, and you're guaranteed problems down the road.
If you're planning a flat roof project in Queens and want drainage designed right the first time, give us a call. We'll walk your roof, analyze the conditions, and design a system that handles whatever New York weather throws at it.
