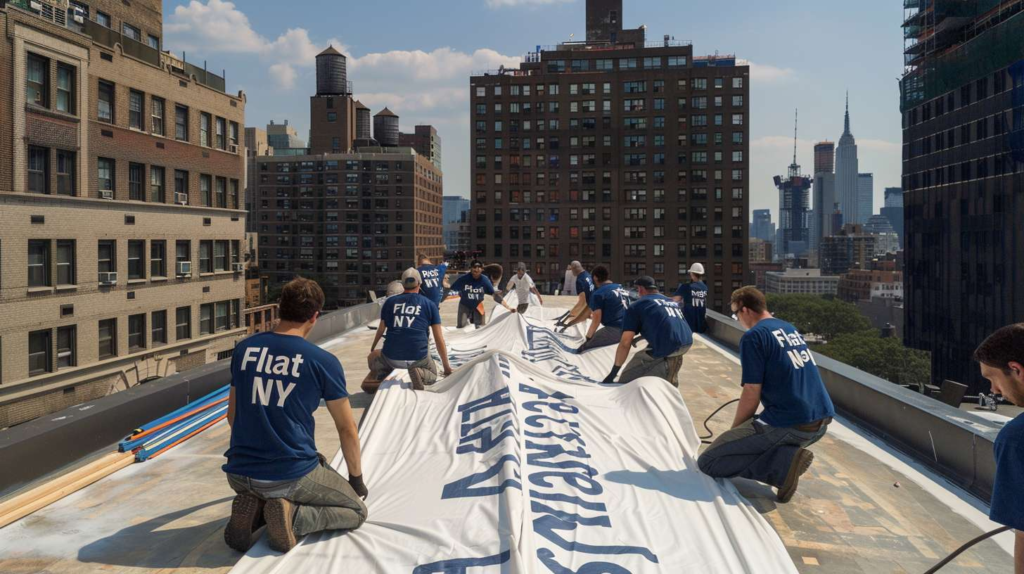
Felt Installation on a Flat Roof - Here's What Correct Looks Like vs What Doesn't
Where Proper Felt Jobs Reveal Themselves First
The window for an easy fix closes faster than most people expect. Properly installed felt doesn't fail everywhere at once - it fails first at the edges, the overlaps, and wherever moisture got trapped before the membrane ever went down, and that's exactly where you need to be looking.
Here's my blunt opinion: neat-looking doesn't mean watertight. At the seam line, that's where I look first - because as Marlene DeSoto, with 19 years in flat roofing spent rescuing failed felt work across Queens, I can tell you that visible smoothness from the ground can hide bad lap placement, trapped dampness underneath the sheet, and edge details that are one hard rain away from letting water in sideways. A roof that looks finished and a roof that's actually sealed are two different things, and water will run that experiment for you whether you're ready or not.
⚠️ Don't Mistake Appearance for Waterproofing
A roof can look newly sealed from the street and still be taking water sideways at laps, under edges, or into a damp substrate beneath the felt. The surface being flat and smooth is not evidence that the installation is watertight - it's just evidence that it looks flat and smooth.
Surface neatness is not proof of watertight installation.
| Installation Point | ✔ What Correct Looks Like | ✘ What Doesn't |
|---|---|---|
| Seam Overlap Consistency | Uniform lap width (typically 3-4 inches) maintained across the full sheet run | Laps that taper, widen, or narrow depending on who was holding the roll |
| Asphalt / Adhesive Bleed Control | Slight, even bleed at lap edge shows full adhesive contact beneath the sheet | No bleed at all (dry lap), or bleed so heavy it pooled without bonding the seam |
| Wrinkle Pattern | Flat surface with no ridges, fishmouths, or bubbles after the first heat cycle | Wrinkles, raised ridges, or blisters that appear within days of installation |
| Edge Termination | Felt tucked under or capped with metal edge at all perimeters, no open felt ends exposed | Felt ending mid-surface, raw edges exposed to wind uplift and water entry |
| Parapet Turn-Up | Felt runs up the parapet wall a minimum of 8 inches and is sealed at the termination line | Felt stopping flat at the wall base with no vertical run, or turn-up that's wrinkled and unbonded |
| Fastening Placement | Fasteners set in the middle zone of each sheet, well back from the lap edge, in consistent rows | Fasteners placed too close to the lap edge, creating water tracking paths right through the nail holes |
| Trapped Moisture After Sun Exposure | No lifting, no swelling, no pockets visible after the roof heats up mid-morning | Visible bubbles or lifted sections that appear or grow after the sun hits the surface |
Testing The Base Before Any Felt Goes Down
What A Dry, Stable Substrate Actually Means
A flat roof is like a classroom lab table: if the base isn't set right, every layer above it lies to you. Moisture left in the deck, debris caught under the sheet, soft spots in the board, uneven transitions - each one becomes a wrinkle, a bubble, or a seam that starts pulling apart six months in. In Queens, that problem runs deeper than it does on a simple detached house. Shaded roof sections wedged between taller attached buildings dry out slower after rain. Older blocks near Jamaica Avenue and Woodhaven Boulevard have decades of tree debris settled in every low corner. And parapets on multifamily buildings hold and redirect moisture in ways that catch installers off guard if they're not accounting for it before the first roll hits the deck.
One morning in Ridgewood, a roof answered the question for me. It was a damp Tuesday, around 7:15 AM, and I was standing on a three-family roof while the owner held a coffee in one hand and pointed at a seam that looked "fine." The felt had been laid over moisture the afternoon before - rushed before a weather window closed - and once the sun came up, those trapped pockets started lifting like someone was blowing through a straw underneath the sheet. The owner didn't need me to explain what went wrong. The roof was teaching the lesson by breakfast. Now let's check that against what water actually does.
Substrate Pass/Fail - Before Felt Is Applied
- ✅ Dry deck surface - no surface moisture, no evidence of recent pooling
- ❌ Loose or unfastened board edges - any movement at board joints is a fail
- ✅ Clean base - swept clear of debris, dust, and loose granules
- ❌ Soft spots present - any deck section that flexes or sponges underfoot fails
- ✅ No trapped old moisture - especially under previous patched sections or covered drains
- ❌ Loose transition points at walls or curbs - any separation at vertical transitions fails pre-install
How Water Exposes Bad Overlaps And Fastener Placement
If I asked you where the water goes after it hits this overlap, could you show me? That's the real test - because lap direction, consistent overlap width, and where fasteners land relative to the lap edge determine whether water runs off the roof or finds a channel into the building. One August evening in Astoria, just before sunset, I got called to look at a patch job a landlord's cousin had done. He'd nailed too close to the lap edge and left the overlaps inconsistent, and after one hard storm the water tracked sideways instead of running down-slope - I remember kneeling there with my flashlight thinking, this is exactly how a cheap fix becomes interior plaster damage. And honestly, that's not an exception - cheap fixes in felt roofing are usually just delayed interior repair bills that haven't arrived yet. When you're inspecting any flat roof felt installation, don't start at the leak stain on the ceiling below. Instead, trace the intended water path from the high side of the roof, across each lap, and all the way to the edge termination or drain - that's where the real story is.
✔ Correct Overlap Path
- Lap runs down-slope so upper sheet covers lower - water follows the surface and runs over the seam
- Fasteners placed well inside the sheet, protected beneath the lap of the next course
- Tight bond at the lap edge - no open channel, no lifted edge for wind or water to catch
- Water runs uninterrupted from field to edge termination or drain without pooling at any seam
✘ Incorrect Overlap Path
- Reverse lap creates a catch point - water hits the exposed lower edge of the upper sheet and enters the seam
- Fasteners too close to the lap edge create puncture points that water tracks directly through
- Open or loosely bonded channels at the lap allow water to travel sideways under the felt
- Water diverted laterally across the roof surface, entering at walls, curbs, or equipment bases instead of at the drain
| Myth | Fact |
|---|---|
| More nails always means a stronger installation | Over-fastening at the wrong locations creates more puncture points near lap edges - each nail becomes a potential water entry path if it's placed where the felt isn't covered by the next course |
| A straight-looking seam means it's sealed | A seam can run arrow-straight and still have an open lap if adhesive contact failed or the overlap width was insufficient - visual alignment has nothing to do with bond quality |
| Patching over a wet area is fine as long as the weather is warm and dry | Warm air above the deck doesn't dry the substrate underneath - felt installed over trapped moisture will blister within days once sun heats the surface and the moisture has nowhere to escape |
| Overlap size can vary a little without causing problems | Where the overlap narrows, the protected fastening zone shrinks and the bonded width drops - even a couple of inches of inconsistency gives water a shorter path to the nail line and a smaller bonded area to resist it |
| Leaks always show up directly below the defect | Water entering at a lap or edge can travel laterally across the substrate for several feet before dropping through - the ceiling stain is often two to four feet away from the actual entry point |
When Wrinkles, Bubbles, And Edge Failures Start Sending A Message
Signs That Need Repair Now Versus Signs That Need Full Replacement Review
Bad felt work usually isn't dramatic at first - that's the problem. It starts as a small blister near a parapet, a lifted lap edge at one corner, a fishmouth at a seam you almost don't notice unless you're looking close. Those small defects don't announce themselves with a ceiling drip right away. They work quietly through one winter, collect debris in the lifted seam, and by the second season they've gone from "worth monitoring" to "you needed to call six months ago."
A wrinkle is not cosmetic if it changes where water pauses.
A co-op board in Forest Hills once asked me why their newer flat roof felt installation was already wrinkling when the old one had lasted years. When I pulled back a section near the parapet, the answer was right there - uneven substrate prep and sloppy turn-ups at the wall line where the felt hadn't been properly bonded against the vertical surface. I told them the roof wasn't failing because felt is bad. It was failing because the installation skipped the boring parts that do all the real work. That kind of problem is genuinely common on Queens buildings - rooftop HVAC equipment, multiple penetrations, parapets that hold and redirect water in ways a simple residential pitch never would. Each one of those details requires its own proper termination, and every skipped turn-up or rushed transition around a curb becomes exactly where the next leak finds its way in.
🔵 Blister or Bubble in the Felt Surface
A blister almost always points to moisture trapped between the felt and the substrate at installation. The roof deck wasn't fully dry when the felt went down, and once the sun heats the surface, that trapped moisture has nowhere to go except up. A roofer should first check whether the bubble is isolated or part of a pattern - isolated blisters can sometimes be addressed without full replacement, but a pattern of them across the field means the whole base layer is compromised.
🔵 Wrinkle at a Lap
A wrinkle at a lap usually means the felt wasn't laid flat under tension before fastening, or the substrate had a low spot right at the seam line. The concern isn't the wrinkle itself - it's that wrinkled laps don't bond flat, which leaves a small open channel along the ridge of the wrinkle. A roofer should check whether the lap edge is still bonded on both sides of the wrinkle, and whether water can track along it toward a drain or wall.
🔵 Lifted Edge at a Parapet
A lifted parapet turn-up almost always traces back to inadequate bonding at the vertical transition - either not enough adhesive, a turn-up that was too short to begin with, or felt that was installed cold and never properly conformed to the wall surface. Once that edge lifts, wind drives rain directly behind the turn-up and down the wall face. The roofer's first inspection should confirm how far back the lifting extends and whether the wall beneath shows moisture staining.
🔵 Ceiling Stain but No Visible Roof Opening
Water entering at a lap, edge, or parapet can travel sideways across the substrate for several feet before finding a gap to drop through. The stain on the ceiling below is rarely directly under the entry point. A roofer should trace water flow from the high side of the roof toward the drain or edge, checking each lap and termination along that path - not just the area of roof directly above the interior stain.
Questions To Ask Before You Approve Any Felt Roof Work In Queens
Ask your contractor to walk you through their process - dry substrate confirmation, lap layout, edge termination, and parapet tie-ins - and pay attention to whether the answers are specific or circular. A contractor who actually knows how to install roofing felt on a flat roof can tell you exactly how they verify the deck is dry before the first roll goes down, how overlaps are measured and kept consistent across the entire field, and where fasteners land relative to the lap edge. If the answer to any of those is "we just do it right" or "that's standard," push harder. At Flat Masters, we answer those questions before a customer has to ask them.
Before You Approve Any Felt Roof Work - Ask These 7 Questions
- "How do you confirm the substrate is dry before the felt goes down - what's your actual check?"
- "How are overlap widths measured, and how do you keep them consistent across the whole field?"
- "Where exactly do your fasteners go relative to the lap edge, and why?"
- "Walk me through how you handle parapet turn-ups - how high, and how do you terminate them?"
- "After installation, do you go back and recheck the drains and scuppers to confirm nothing shifted or was covered?"
- "What would make you stop work rather than cover over something - what's your actual threshold?"
- "Can I see in-progress photos of edge work and seams - not just the finished roof?"
Common Questions About Flat Roof Felt Installation in Queens
Can new felt be installed over old felt?
It depends entirely on the condition of the old felt. If the existing layer is flat, fully bonded, dry, and free of blisters or soft spots, a second layer can sometimes go over it. But if the old felt has wrinkles, open seams, or trapped moisture, covering it just buries those problems - and they will come back through the new layer faster than you expect. An honest inspection of the existing felt is non-negotiable before that decision gets made.
Why does new felt bubble so quickly after installation?
New felt that bubbles within days almost always went down over a substrate that wasn't fully dry. The sun heats the surface, moisture trapped beneath converts to vapor pressure, and the felt lifts. It's not a material failure - it's a substrate preparation failure. The fix isn't patching the bubbles; it's pulling the affected section and properly drying the deck before reinstalling.
Are wrinkles always a leak risk?
Not every wrinkle is an immediate leak, but every wrinkle changes how water moves across that section of roof. If the wrinkle is in the field of the sheet and doesn't affect a lap or edge termination, it may be low risk in the short term. If it's at a lap, near a drain, or along a parapet turn-up, it's a problem that needs attention - because that wrinkle is creating a ridge that water will pause at, collect behind, and eventually find a way under.
How do I know if I need a repair or a full replacement review?
A repair makes sense when the defect is isolated - a single open seam, one lifted edge, a small section of poorly bonded felt - and the surrounding installation is solid and the substrate is dry. A full replacement review is warranted when defects are spread across the field, when the substrate shows signs of long-term moisture exposure, or when multiple repairs have already been done on the same roof without resolving the leak. If Flat Masters inspects your roof and finds the problems are systemic rather than isolated, we'll tell you that directly.
