Installing a Window in a Flat Roof Changes the Space Below More Than You'd Expect
You need someone to tell you the honest thing first: a flat roof window changes light quality, heat movement, and how a room feels before you even register that there's a hole in the roof above you. It shifts shadow patterns, it redirects warm air, and depending on placement, it can make a ceiling feel generous or glaring - and that's before we even get to what's happening up top with the membrane, the curb, and the drainage.
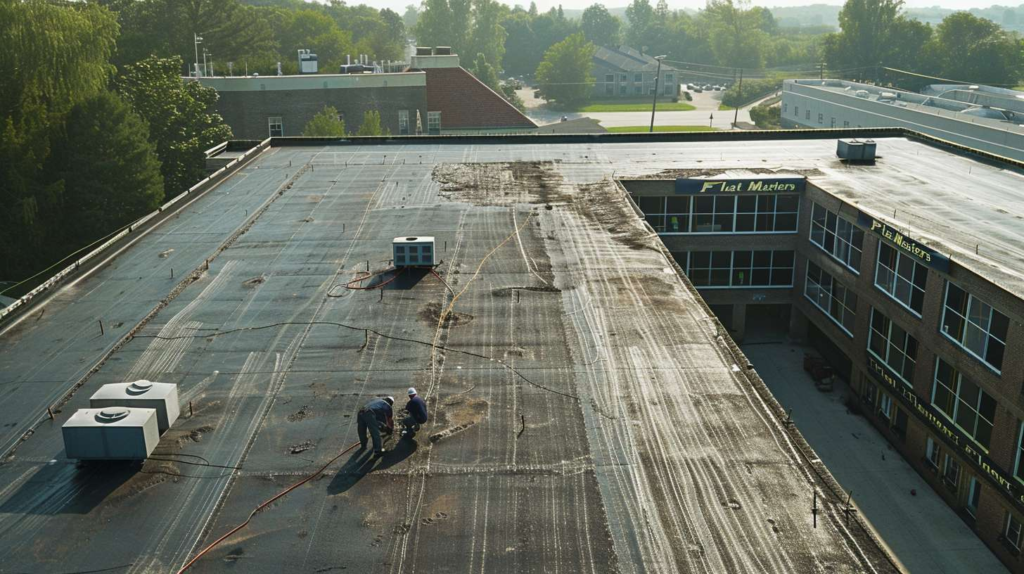
This article is about the full picture of Window Installation on Flat Roof projects in Queens, NY - not just the glass, not just the look, but the entire roof-system logic that makes the difference between a room that breathes and a repair call six months later.
Why the room feels different before you notice the roof work
Here's my blunt opinion: more daylight is not automatically better daylight. A flat roof window placed wrong can turn a pleasant top-floor room into a glare trap by 10 a.m. or a heat collector by 2 p.m. Before the homeowner notices whether the trim looks clean, the room is already telling them something - where light is landing, whether it's soft or harsh, where rain is thinking the next time a storm rolls through. That read matters more than the product spec sheet does. I say this not to complicate things, but because the room is always the first report card on whether the roof work was done right.
I remember one August afternoon in Ridgewood, around 3:15, the top-floor tenant kept saying the new roof window made the room feel bigger, and she was right - but the real shock was how the stale heat finally had somewhere to go. We had just finished the flat roof window installation, and when I stepped back downstairs, even the hallway outside her unit felt less trapped. The change wasn't purely visual. It was the ceiling depth, the ventilation path, the way air could now move vertically instead of just sitting. That's what a well-placed, properly installed flat roof window actually does - it alters the thermal and spatial behavior of a space in ways that catch people off guard.
Quick Facts - What Homeowners Notice After Flat Roof Window Installation
☀️ Light Spread
Overhead daylight from a flat roof window is broader and more diffused than a vertical window. Shadow patterns across walls and floors shift throughout the day in ways residents don't anticipate.
🌡️ Heat Movement
Warm air collects near ceilings. A venting flat roof window gives it an exit. A fixed unit with poor placement can instead trap or amplify heat - the difference comes down to specification and position, not just the glass itself.
📐 Room Perception
Ceilings feel taller. Corners feel less compressed. The visual connection to sky changes how people move through a space - and that effect is immediate, not gradual.
⚠️ Leak Risk
Performance lives or dies on curb height, slope, flashing integration, and membrane tie-in - not the quality of the glass unit alone. The glass is the last thing to blame when leaks happen.
Myth vs. Fact - Common Assumptions About Flat Roof Windows in Queens
| Myth | Fact |
|---|---|
| "Any window brand works on a flat roof." | Flat roof windows require specific curb-mount or deck-mount designs. Standard vertical-wall units are not compatible and will fail under standing water conditions common on Queens flat roofs. |
| "A flat roof window will always leak eventually." | When installed with proper curb height, correct membrane tie-in, and compatible flashing, a flat roof window can perform for decades without leaking. Leaks trace to installation errors, not the product category. |
| "Bigger glass means more usable light." | A larger opening increases glare and heat gain as much as it increases daylight. In older Queens row houses with shallow shafts, oversized units create discomfort rather than improve it. |
| "Installation is a weekend DIY job." | Flat roof window installation is a roofing system alteration, not a trim carpentry task. It requires drainage analysis, structural reinforcement, membrane integration, and insulation detailing that video tutorials routinely skip. |
| "The shaft just needs drywall to look finished." | An uninsulated or poorly air-sealed shaft causes condensation, frost, and moisture damage inside the ceiling - all of which get blamed on the window when the real culprit is the surrounding assembly. |
Placement decisions that control glare, drainage, and comfort
What do I ask first when someone wants a roof window?
At 8 a.m. on a Queens roof, the first thing I look at is where water wants to sit. Not where the drain is marked, not where the membrane looks cleanest - where water is actually thinking about pooling when nobody's watching. I'm Rosa Velez, and I've been reading flat roofs in Queens for 19 years with a specialty in daylighting on older row buildings, and placement always starts with roof behavior, not product brochures. In neighborhoods like Astoria, Ridgewood, and Sunnyside, you're often dealing with century-old framing, parapet shadows that affect condensation patterns, ponding tendencies near old drain retrofits, and rooflines that slope in directions the original builder didn't bother to document. The row-house format means your neighbors' parapets can create wind eddies, shade pockets, and debris collection spots that change where water lingers. None of that shows up in a brochure comparison chart.
So the first questions I ask are practical ones: Where does water sit after rain - is there a low spot near where you want the opening? Where does direct sun hit hardest, and what time of day will that land in the room below? How deep will the ceiling shaft be, and is that depth enough to diffuse light rather than funnel glare? What's the function of the room - is it a workspace, a bedroom, a studio? And does the homeowner want a fixed unit for pure light, or a venting unit that can move warm air? Those answers narrow the location down faster than any product catalog will. The window is almost the last decision, not the first.
Before you pick a window size, ask yourself whether you're improving the room or just cutting a hole in the wrong place.
Placement Factors for Flat Roof Window Installation
| Factor | What Rosa checks on the roof | What it changes inside | Common Queens complication |
|---|---|---|---|
| Drainage path | Standing water zones, drain proximity, slope direction | Determines whether curb placement will be safe from ponding pressure | Old drains retrofitted off-center on row-house roofs with minimal slope |
| Sun angle and timing | East/west orientation, parapet shadow arc by time of day | Determines glare risk, heat load, and what hours the space is usable | Adjacent buildings in Sunnyside and Astoria block or redirect sun unexpectedly |
| Shaft depth | Roof deck to finished ceiling distance, joist depth | Shallow shafts funnel harsh light; deep shafts diffuse and soften it | Ridgewood row houses often have low floor-to-ceiling heights on top floors |
| Framing condition | Joist spacing, direction, presence of doubled headers | Dictates opening size limits and whether structural reinforcement is needed | Century-old framing with irregular spacing requires field verification before sizing |
| Membrane type and age | TPO, EPDM, modified bitumen - and how many years of life remain | Affects which flashing system is compatible and whether tie-in is reliable | Patchwork membranes from multiple reroofing layers complicate tie-in sequencing |
Decision Tree - Should This Flat Roof Window Go Here At All?
▶ START: Is this location being considered for a flat roof window?
Does water pond in this area after rain?
→ YES: Relocate the opening or correct drainage before any installation happens. Curb placement in a ponding zone will fail regardless of flashing quality.
→ NO: Continue ↓
Is the room below already suffering from glare or overheating?
→ YES: Consider a glazing spec change (low-E coating, tinted glass) and shift the opening position away from peak sun exposure before proceeding.
→ NO: Continue ↓
Is the shaft depth reasonable enough to deliver useful, diffused daylight?
→ NO: Redesign the opening size or location. A shaft that's too shallow turns overhead light into a harsh spotlight, not a comfortable glow.
→ YES: ✅ Proceed to curb height selection, membrane tie-in planning, and flashing system design.
How a proper flat roof window installation actually unfolds
The part DIY guides skip
I had a Sunnyside customer tell me, "It's just a window," and that sentence cost us twenty extra minutes. He was a retired saxophone player, wanted light over his practice corner, and we were standing on his roof just after sunrise - maybe 6:40 - mapping out where the curb would go. The minute we opened the roof and started tracing the placement, I had to explain that window installation on flat roof work is never just "drop in the unit." This is a roof-system alteration. Below us, light, heat, glare, and ceiling depth were already arguing with each other before we made a single cut. The shaft angle, the curb position relative to the east-facing parapet, the distance to his drain - all of it was in negotiation at once. The window was the last decision we'd make, not the first.
Now pause there, because this is where the video-tutorial version of this project goes sideways. One February morning in Astoria, I got called to look at a DIY job where somebody had watched two videos on how to install a flat roof window and decided that was enough. There was frost on the inside drywall. Not a little condensation - actual frost forming on the shaft walls in cold weather. The owner kept pointing at the glass unit, certain the product was defective. But the glass was fine. The shaft wasn't insulated correctly, the vapor barrier was missing, and the surrounding assembly had been put together in the wrong sequence. Everything around the window had failed, and the window was taking the blame. That's almost always how it goes when the installation skips the system thinking.
The insider truth - and I tell every customer this - is that the cleanest-looking interior finish can hide the worst exterior sequencing imaginable. A shaft that's been drywalled beautifully tells you nothing about whether the curb height is correct, whether the membrane was tied in before the flashing or after, whether the insulation is continuous across the deck edge, or whether the flashing system is even compatible with the existing membrane type. Don't judge this job by how the ceiling looks from the couch. Judge it by what happened on the roof, in what order, and with what materials - because that's what controls whether you're comfortable in five years or filing a water-damage claim.
Professional Flat Roof Windows Installation - Step by Step
⚠️ Why DIY Flat Roof Window Installs Fail
- Cutting the opening without drainage planning first - if water sits near the cut, it'll find the edge of the membrane before long.
- Using residential wall-window techniques on a flat roof - vertical-wall flashing methods do not translate. Water behavior is completely different when there's no pitch to carry it away.
- Skipping curb height requirements - a low curb on a flat roof isn't a minor shortcut. It's the reason water enters the shaft during any significant rain event.
- Mixing incompatible flashing materials - EPDM, TPO, and modified bitumen each require specific compatible products. Mixing them creates adhesion failure and warranty voids.
- Leaving the shaft under-insulated - this is how frost forms on interior drywall in February. The glass unit isn't cold; the uninsulated shaft around it is conducting heat out of the building.
The Part DIY Guides Skip - What Has to Work Together Besides the Glass Unit
Signs the idea is smart, and signs it needs a reset
Blunt truth - if the flashing is an afterthought, the whole idea is already in trouble. And flashing becomes an afterthought when someone picks the window before reading the roof. The best candidates for flat roof window installation are rooms genuinely starved for top-light: interior spaces that get no direct window exposure, dark top-floor bedrooms in Ridgewood brownstones, or a studio corner where north-facing walls aren't cutting it. Those situations benefit enormously. The bad candidates are just as clear: chronic ponding zones, patchwork membranes that are three patches past their useful life, or homeowners expecting the dramatic skylight effect without any heat-control planning. Adding a large fixed unit to a south-facing flat roof in Queens without low-E glazing and a heat-load plan turns a room into a greenhouse by July.
When a Flat Roof Window Is Worth Pursuing
| ✅ Good Signs | 🚩 Red Flags |
|---|---|
| The room has no exterior wall windows and genuinely needs overhead light. | There's existing ponding water near the desired placement - even seasonal ponding. |
| Roof drainage is clean, functional, and well away from the proposed opening. | The membrane is patchworked, near end of life, or made up of mixed material generations. |
| The membrane is intact, in good condition, and compatible with flashing integration. | The homeowner wants maximum glass size without any heat-gain or glare conversation. |
| The shaft depth allows for light diffusion rather than direct spotlight effects. | There are existing interior stains or moisture indicators on the ceiling near the proposed area. |
| The homeowner is open to a venting unit for heat management, not just fixed glass for looks. | The structural framing is unknown, deteriorated, or hasn't been verified before the project started. |
| Roof age leaves meaningful service life remaining after installation - no replacement is imminent. | The project is being driven by a "quick renovation" timeline that doesn't allow proper system sequencing. |
When to Schedule an Evaluation Before Moving Forward
Questions worth asking before you approve the cut
A flat roof window behaves a little like a ceiling speaker: placement matters more than people expect, and what seems like a minor position adjustment changes the entire experience below. Homeowners who ask good questions before signing off on the cut almost always end up with better installations - not because they learned to do the work themselves, but because they forced the conversation about drainage, membrane compatibility, shaft depth, and insulation continuity before anyone picked up a saw. Think in terms of system compatibility, not just product appearance. The glass is the easy part. Everything it connects to is where the job earns its outcome.
✅ Before You Call - What to Verify for Flat Roof Window Installation in Queens
- Roof age: Know approximately how old the current membrane is and whether a full replacement might be coming soon anyway.
- Membrane type: TPO, EPDM, or modified bitumen - the installer needs to know this before selecting compatible flashing materials.
- Leak history: Have there been any water intrusions on this roof in the past five years? Existing weak points need to be addressed before a new penetration is added.
- Room use below: A bedroom, a studio, and a bathroom all have different light, heat, and ventilation needs - and that affects which unit and which position is right.
- Fixed vs. venting preference: A venting unit costs more but changes the thermal performance of the room. Worth deciding before you get quotes.
- Structural plans: On older row houses - especially along certain blocks near Metropolitan Avenue in Ridgewood - a structural review may be needed before the opening size is finalized.
- Insulation and shaft air-sealing: Confirm upfront that your installer will handle shaft insulation and interior air-sealing, not just the roof-side work. These are often scoped out and then regretted later.
Homeowner Questions - Flat Roof Window Installation
If you want someone to help you read where rain is thinking before you approve a cut - to look at the roof and the room together and tell you honestly whether this is the right move and the right location - Flat Masters is ready to do that evaluation with you.
Call us for a flat roof window assessment in Queens, NY, and we'll start where the water starts - on the roof - before anything else gets decided.
- Rosa Velez, Flat Masters
