A Flat Dormer Adds Space Without Adding Drama - Here's What the Build Involves
What a Flat Dormer Really Changes Above and Below the Roofline
Compare the two estimates side by side - and nine times out of ten, the homeowner is weighing window styles, siding trim, and exterior finishes while the roof geometry underneath is already making the real decisions. A flat dormer isn't primarily a box you bolt onto a roofline. It's a drainage reroute, a structural load shift, and an interior headroom negotiation that happens to also look like a box when you're standing on the sidewalk. The exterior shape is the last thing that matters.
A flat dormer roof is a system of edges, seams, and slope corrections - and every one of those transitions is a place where water either moves confidently toward a drain or sits and thinks about where to go next. Once you add insulation depth, rafter framing, and a finished ceiling layer, the flat roof dormer inside shrinks noticeably from what the drawings suggested. So that gives us the real issue: most dormer conversations start at the window and should start at the drain.
Why the Drainage Geometry Decides Whether the Dormer Behaves
At the front edge of the roof, the truth usually shows up first.
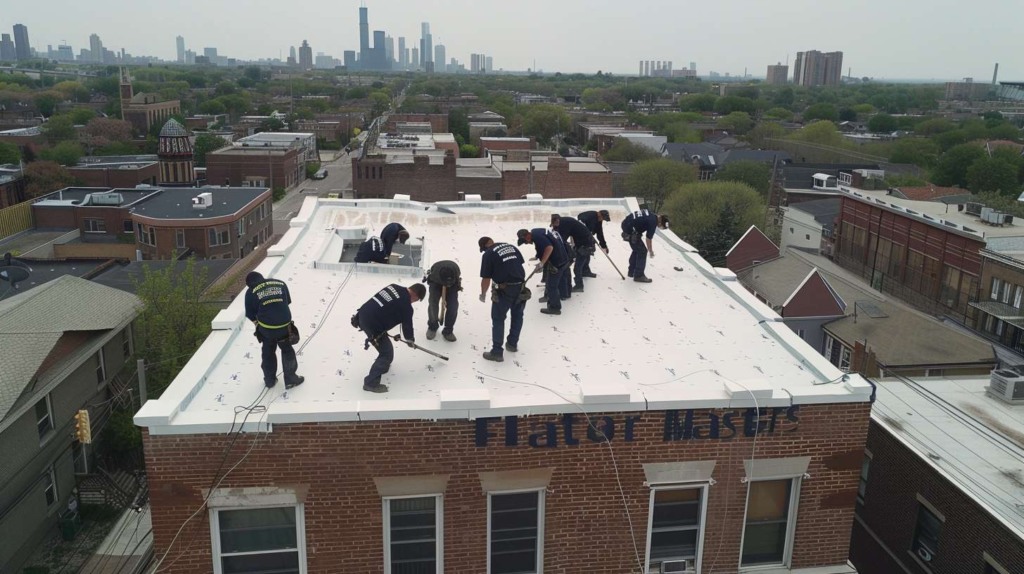
I remember standing on a house in Maspeth at 6:40 in the morning, coffee balanced on an upside-down bucket, looking at a brand-new flat dormer roof that had ponding before the plumber's van even arrived. The homeowner kept insisting the leak was probably the window - it never is just the window. The real issue was that the framer had left a dead-flat section with nowhere for the water to go. That job is the reason I now talk about slope before I talk about finishes, and it's the same reason Marta Zielińska, with 19 years in flat roofing and a specialty in drainage problem-solving on Queens roof systems, asks to see the drain locations on day one. The front edge of a flat dormer roof is where tapered corrections, scupper alignments, and membrane transitions all converge - and that convergence will either be planned or it will be discovered during the next rainstorm.
Water follows geometry. It doesn't care about the siding color or the window brand - it follows lines, corners, and low points whether the crew respected those paths or not. In Queens, attached homes along streets like 69th Avenue in Maspeth or dense blocks in Ridgewood create additional wrinkles: parapets that redirect water unpredictably, neighboring rooflines that limit your drainage options, and tight sightlines that make access for repairs genuinely difficult after the fact. A dormer on a flat roof that doesn't account for all of those conditions isn't unfinished - it's just not finished failing yet. Sort the geometry first, and everything else becomes straightforward.
| Roof Condition | What the Builder Must Rework | What Can Go Wrong If Skipped | Best Practice |
|---|---|---|---|
| Dead-flat existing surface | Tapered insulation or framing to create positive slope | Standing water at dormer base, membrane fatigue | Minimum ¼" per foot slope toward drain |
| Drain or scupper offset from dormer | Redirect drainage path without creating new low points | Ponding between new and old sections | Map all low points before framing begins |
| Existing membrane in mixed condition | Decide strip-and-replace vs. overlay before tying in dormer | New dormer fails because old membrane fails beneath it | Inspect existing layers before any framing |
| Parapet walls on one or more sides | Integrate dormer flashing with parapet cap and counterflashing | Water enters at parapet-dormer junction | Layered counterflashing, not caulk |
| Dormer wall-to-roof transition | Base flashing, step flashing, and wall tie-in in correct sequence | Leak at the most complex and hardest-to-repair junction | Sequence flashing before any cladding is installed |
Dead-flat sections at the dormer face are not a minor detail - they're a leak waiting on a calendar. Mixed materials meeting at a single corner without layered flashing transitions, or relying on caulk to seal what should be integrated counterflashing, are among the most predictable failure points on any flat dormer roof.
If you see ponding on a newly built flat dormer right after rain, that is not a cosmetic break-in issue. It's a drainage geometry problem, and it doesn't self-correct. Address it before the membrane and interior finishes are complete - not after drywall goes in.
Inside the Room, the Ceiling Line Tells the Truth
I learned this on a sweaty Ridgewood afternoon...
One August afternoon in Ridgewood, during that sticky weather where even the tape measure feels tired, I walked a couple through what the flat roof dormer inside would actually feel like when finished. They were focused on the exterior - window size, trim details - but once I showed them how insulation thickness, rafter depth, and the finished ceiling layer changed the actual headroom they'd be living under, the whole conversation shifted. The gain in vertical space was real, but they'd been expecting a full standing room that would've required either a taller framed face or thinner insulation than their heating bill could afford. We redesigned the dormer face that same evening, sketching it out on a scrap of underlayment on the tailgate, and the result was a better room because we caught the ceiling line problem before the framing crew arrived.
Renderings are notoriously generous with ceilings - and honestly, that's a feature of the software, not a bug they're in a hurry to fix. The flat roof dormer inside will feel different from the exterior drawings because floor-to-ceiling measurements don't account for the knee-wall zones at the perimeter, where the dormer face meets the original roof slope. HVAC runs and vent chases can steal another two or three inches in spots that weren't flagged on the plan. The insider tip that's worth repeating: don't measure total square footage added - measure usable standing area and the finished ceiling line at the center of the room, because that's what determines whether the space functions the way you pictured it.
If water has to think, the room below eventually pays for it.
Finished ceiling drop from structure and insulation
Where knee-wall or low-edge zones still remain
How window height changes furniture placement
Why HVAC and vent routing can steal inches you thought you had
Before You Approve the Build, Ask These Uncomfortable Questions
What do I ask a homeowner before anything else? Whether this dormer is solving a headroom problem, a layout problem, a resale problem, or just a "the room looks small" problem - because each of those has a different right answer and a different budget tolerance. Then I ask whether the existing flat roof has enough life left to be built onto without the new dormer inheriting old problems wrapped in new materials. And then I ask whether they're paying for proper transition detailing or for cosmetic speed. Blunt truth: a flat dormer can be neat or cheap, but rarely both. The checklist below is the fastest way to figure out which conversation you're actually in before you pick up the phone.
Is a flat dormer a bad idea on a flat roof house?
How much slope should a flat dormer roof really have?
Will the room feel much bigger inside?
Can a new dormer be tied into an older flat roof safely?
What detail leaks first when the work is rushed?
Where Rushed Dormers Fail in Queens and What a Clean Build Sequence Looks Like
Here's my unpopular opinion: the pretty part is the easy part.
I had a Sunday emergency call in Astoria after a thunderstorm where a dormer on a flat roof had been built fast and flashed like an afterthought. The owner's father met me at the hatch in house slippers, and within five minutes I found three different materials - EPDM, modified bitumen, and something that looked like it came off a hardware store shelf - meeting at one corner like strangers forced into the same elevator. That's a condition you see regularly in Queens: varied reroof layers from different decades, patchwork repairs done by whoever was available at the time, and tight access on attached homes in Astoria, Ridgewood, and Maspeth that made it easy for each crew to do the minimum at the edges and move on. The leak wasn't at the window. It was at the most complex junction on the roof, where nobody had planned a flashing sequence because everyone assumed somebody else had.
A bad dormer is like putting a shoebox on a dinner tray and wondering why everything slides.
A clean build has a logic to it that you can follow like boxes and arrows on a sketch - and every water path has an obvious, unambiguous direction from the first day. You start by inspecting the existing roof and framing for condition and load capacity. Then you map all drainage paths and low points before touching a single rafter. You frame the dormer with slope intention built in, not corrected for afterward. Substrate and tapered correction go in next, establishing the geometry that water will follow for the next twenty years. Then membrane and wall flashing are executed in sequence - base flashing before cladding, counterflashing before trim, every layer overlapping in the direction water travels. Windows, siding, and interior finishes come last, and only after the waterproofing has been walked and confirmed. If that sequence gets compressed or reordered, you're not building a dormer - you're building a future leak map. If you'd like someone to look at your existing roof and tell you honestly whether it can handle a dormer without creating that map, give Flat Masters a call and we'll start with the roof, not the renderings.
| Myth | Fact |
|---|---|
| "Flat means perfectly level" | A flat dormer roof must maintain positive drainage slope - minimum ¼" per foot. Dead-level is a ponding problem, not a design feature. |
| "Leaks mostly come from the dormer window" | The wall-to-roof transition and material corners fail far more often than the window itself. Windows get blamed because the water shows up inside near them - not because they're the source. |
| "Inside space is easy to predict from exterior drawings" | Exterior drawings don't show insulation depth, rafter thickness, finish layers, or HVAC routing. The finished ceiling line and usable standing area are always smaller than the exterior elevation suggests. |
| "Any roofer or framer can sort out the transitions later" | Flashing transitions have to be planned and executed in sequence during the build - not corrected afterward. "We'll figure it out at the end" is how corners get caulked instead of properly flashed. |
| "New siding makes the dormer look finished so the hard part is done" | New siding covers the exterior - it doesn't validate the waterproofing underneath it. A dormer can look completely finished and still have a flashing gap that won't reveal itself until the next heavy rain. |
A flat dormer done right is a genuinely useful addition to a Queens home - more headroom, better light, real usable space, and a roof that doesn't require an apology every time it rains. The difference between that outcome and the one that ends with a Sunday emergency call comes down to whether the geometry was respected from the start. If you want a straightforward evaluation of whether your existing flat roof can handle a dormer without creating problems you'll be chasing for years, call Flat Masters - we start with the roof, and the rest of the conversation follows from there.
