The Drainage System Is What Keeps a Flat Roof From Becoming a Pond
Why Drainage Details Decide Whether a Flat Roof Behaves
Let's talk money for a moment, because the expensive truth is this: a flat roof almost never fails because it's flat - it fails because drainage details were treated like an afterthought, something to figure out after the membrane was already spec'd and the proposal was already signed. The goal here is to show you, in plain physical terms, how interior drains, scuppers, slope continuity, and overflow details actually decide whether a Queens roof drains clean or turns into a reflecting pool by Tuesday afternoon.
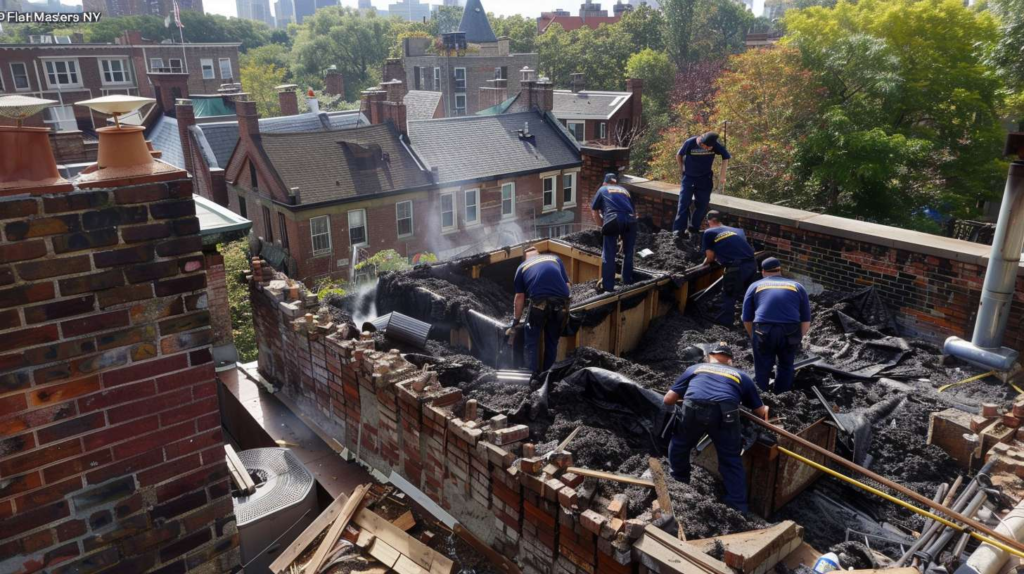
On a 20-by-60 Queens roof, I start with the drain location before I talk about anything pretty. Membrane choice matters, but it doesn't steer water anywhere - gravity does. I remember one August afternoon in Elmhurst, around 3:15, standing on a bakery roof near the intersection of Baxter and Whitney with the owner fanning herself with an invoice while a shallow pond sat there quietly reflecting the exhaust fans. Two roofers had already blamed the membrane, but the real issue was a clogged interior drain bowl sitting lower than a sloppy patch ring that had been added during a repair. I poured one bucket of water uphill of the drain and watched it hesitate, then drift sideways toward a seam blister. That was the whole story. Water is obedient. The flat roof drainage system details were not designed honestly, and the water said so out loud with every rain.
MYTH VS. FACT: Flat Roof Drainage System Details
| The Myth |
The Real Answer |
| If the roof membrane is new, drainage problems are basically solved. |
A new membrane waterproofs the surface - it does not move water anywhere. Ponding will still occur if slope is absent, the drain sump is raised by a patch, or the leader is clogged. The membrane and the drainage system are two separate jobs. |
| A visible drain means the roof has enough drainage. |
Seeing the strainer proves only that a drain body exists. It says nothing about whether the insulation tapers toward it, whether the bowl sits at the correct elevation, or whether the leader below is clear. Visibility is not function. |
| Scuppers and interior drains do the same job. |
They serve different roles and elevations. Interior drains handle primary collection at the field of the roof. Scuppers are set into the parapet and typically act as primary drainage on simple low-slope roofs or as emergency overflow on interior-drain systems - the elevation difference between those two uses is critical. |
| Minor ponding is only cosmetic. |
Standing water adds load, accelerates membrane degradation through UV reflection and thermal cycling, invites algae growth that masks leak points, and - on Queens buildings with aging deck substrates - works into any existing weakness. "Minor" ponding is a slow structural problem. |
| Emergency overflow is optional on small commercial roofs. |
Building codes require overflow drainage whenever interior drains are used as the primary system. On a small Queens storefront roof, a blocked primary drain during a heavy summer storm without an overflow scupper or secondary drain can mean water loading the deck beyond its design limit - fast. |
Quick Facts: What Controls Runoff on a Low-Slope Roof
Primary Path
Tapered slope directing water to a drain or scupper - without it, water parks wherever it lands.
Critical Low Point
The drain sump must sit below the field plane - raised even slightly by a patch ring, and water bypasses it entirely.
Backup Path
An overflow scupper or secondary drain set at a higher elevation - the safety valve when the primary drain fails.
Failure Trigger
A blocked bowl, discontinuous taper, or a raised patch ring - any one of these three can strand water on an otherwise serviceable roof.
Mapping the Water Path Before You Blame the Membrane
Here's the part people don't enjoy hearing: water backing up around a drain usually means the path to the drain is broken, not just the drain itself. On Queens mixed-use buildings - the kind with a retail storefront below, a rear apartment addition tacked on sometime in the '80s, parapet walls at three different heights, and insulation repairs layered over decades of previous patches - the slope geometry can look completely different from what any original drawing shows. I've pulled back membrane on a Ridgewood six-family to find insulation transitions interrupted by an old repair that was just shimmed flat rather than re-tapered. The super kept pointing at the strainer saying it was right there, visible, clean even. What he couldn't see was that the water had no clean grade to follow and was pooling six feet away from the drain before finding any path at all. After freezing rain one January morning, that flat spot had turned into a skating rink around the sump, and the drain being "there" hadn't helped a bit.
Interior drain detail
I once watched rainwater ignore a brand-new drain because the slope was lying. This is exactly the kind of detail that, as Marisol Vega, with 19 years of flat roofing experience and a specialty in diagnosing recurring ponding on older Queens buildings, has seen again and again: a freshly installed drain body with a clean clamping ring and a bright new strainer, sitting proud of the surrounding membrane by just enough that water reaches it, circles it, and finds the low spot three feet away instead. A complete interior drainage flat roof detail isn't just a drain body. It's the sump depression below the field plane, the clamping ring seated tight against the membrane without lifting the deck, the strainer sitting clear and elevated enough not to clog with a handful of debris, the insulation tapered continuously from the field toward the bowl, and the leader connection below verified open. Every one of those elements has to be right. Miss one and the drain becomes decoration.
Scupper and overflow detail
A flat roof scupper detail is not trim work. It's a controlled exit through the parapet wall, and every dimension of it is doing a specific job. The opening width and height determine how much volume can exit in a given time - too narrow and water backs up in a storm. The boxed throat of the scupper has to be flashed and lined so water moves through without touching bare masonry. The conductor head at the exterior catches the discharge and routes it to the downspout cleanly, keeping it off facade brick that - on older Queens row buildings - does not handle chronic wet-dry cycling gracefully. And the overflow scupper elevation is set deliberately above the primary drainage level: it should only activate when something has gone wrong below. If your overflow scupper is running water during a moderate rain, that's not your drainage working - that's your drainage telling you the primary path is compromised.
Click to Inspect the Detail Pieces
▶ Interior Drain Detail - Component Breakdown
- Drain bowl: Cast iron or PVC body set into the deck assembly - must be anchored without rocking or shifting over time
- Sump depression: The bowl must sit below the surrounding field plane so the lowest point on the roof is at the drain, not beside it
- Clamping ring: Compresses the membrane between the ring and the drain body - must be torqued evenly; over-tightening cuts the membrane, under-tightening leaks
- Strainer: Dome or flat grate that sits clear of the bowl surface; if debris buries it, the drain effectively doesn't exist
- Leader connection: The vertical pipe below the bowl must be clear, properly sized, and confirmed open before calling the drain functional
- Insulation taper: Tapered insulation panels direct water toward the drain bowl - any interruption (old patch, re-decked section) kills the slope path
- Membrane tie-in: Membrane layers into the clamping ring plane without bridging or fishmouths that later allow water migration under the field sheet
▶ Scupper Detail - Component Breakdown
- Opening size: Width and height must meet drainage capacity requirements - undersized openings throttle flow and cause backup during peak rain events
- Boxed scupper throat: Sheet metal box liner set through the parapet wall opening, sealed against water infiltrating the masonry from either side
- Conductor head: Exterior metal catch basin at the scupper outlet that collects discharge and directs it into the downspout without splashback
- Downspout relation: Downspout must be sized to handle the scupper's output volume; undersized downspouts back up into the conductor head and defeat the system
- Membrane flashing: Membrane runs into and through the scupper liner continuously - no exposed terminations at the parapet face
- Parapet metal edge: Coping or counter-flashing at the parapet integrates with the scupper throat so the detail sheds water rather than collecting it
- Overflow elevation: On systems with interior drains, overflow scuppers are set 2" above the primary drain elevation - this is the intentional threshold, not a coincidence
Primary vs. Backup: How Drainage Components Differ
| Drainage Component |
Main Job |
Where It Sits |
Most Common Detail Failure |
| Interior Drain |
Collect and remove primary runoff from the roof field through an internal leader |
Set at the lowest point(s) of the field plane, typically one per drainage zone |
Raised patch ring lifts the bowl above field plane; insulation taper interrupted by repairs |
| Primary Scupper |
Direct drainage on simple low-slope roofs without interior leaders; discharge through the parapet |
Set at or near field elevation in the parapet wall, sized for full flow capacity |
Undersized throat opening; membrane flashing terminates short of the liner; blocked conductor head |
| Overflow Scupper |
Emergency safety valve when the primary system is blocked or overwhelmed - visible warning sign |
Set 2" above primary drain elevation in the parapet - should rarely or never flow during normal rain |
Set too high to activate before structural load risk; treated as primary drainage when interior drain fails |
| Secondary Drain |
Redundant interior collection point; activates if primary drain is blocked |
Same zone as primary drain but on a separate leader; set slightly higher than primary sump |
Installed on the same leader line as the primary drain, defeating its redundancy entirely |
Can You Predict Where the Water Goes in Ten Seconds?
If I handed you a hose and told you where this water goes, could you answer me in ten seconds? Stand at the center of the roof and point to the primary drain, then trace the overflow path, then identify any low spot that sits between the field and the drain opening. If you can do all three without hesitation, the drainage design is honest. If you find yourself shrugging, looking for a slope that might be there, or noticing that the drain seems low but there's also that one depressed corner by the parapet - well. If the route isn't obvious to the eye, it probably isn't obvious to the water either.
Decision Tree: Drainage Design Problem or Maintenance Blockage?
START: Water remains 48+ hours after rain?
NO
Drainage is likely performing. Monitor after next heavy rain event and re-evaluate if ponding returns or worsens seasonally.
→ Routine Maintenance Monitoring
YES - Is the pond centered at or near the drain?
YES - Pond is at the drain
- Check bowl for debris blockage
- Check for raised patch ring lifting drain above field
- Check leader below for crush or clog
→ Likely Maintenance Correction
NO - Pond is away from drain
- Check insulation taper continuity
- Check for repair interrupting slope
- Check for sagging deck substrate
- Check for misplaced or undersized drain
→ Likely Detail Redesign Required
⚠ Is water blasting hard from a scupper during storms?
Determine whether the scupper is designed as the primary drainage or is acting as emergency overflow because the interior drain is underperforming or blocked.
Scupper = Primary → Check sizing and flashing detail
Scupper = Emergency Overflow → Interior drain blocked → Detail Redesign
Field Checks That Reveal an Honest Roof Plan
What to verify before calling
A roof does not care what the proposal promised. What shows up after rain is the real performance review. Her gentle but firm opinion - and she'll say it plainly - is that too many repairs treat water staining as a membrane problem when the geometry is the actual culprit. The field tells you the truth if you read it right: look for tide-line staining on parapet faces where water drained sideways instead of down; look for standing rings of debris around bowl locations that show water reached the drain but slowed there; look for patched areas that sit slightly proud of the surrounding field (that's a dam). Here's a practical tip worth doing after any moderate rain - photograph where debris settles and where the last thin sheet of water lingers before it evaporates. Those sediment lines and slow-dry zones mark the real flow path faster than any assumption will. - Marisol Vega, Flat Masters
What should never be ignored
Think of it like a classroom lab: if the setup is wrong, the result was decided before we began. Recurring ponding is not bad luck - it is the predictable outcome of a slope or drain detail that was never right, or was right once and got compromised by a repair. At about 6:40 in the evening in Astoria, I once stood with a restaurant owner during a hard summer storm and watched water shoot out of a scupper hard enough to splash the neighboring building's facade. He thought it meant the drainage was working great. I had to explain that the primary interior drain was partially blocked, so the scupper was acting as emergency overflow - not the main plan. That discharge during an ordinary summer storm was not reassurance; it was a warning light. When emergency overflow activates under moderate rain, the primary system has already failed. That's not a cleaning issue. That's a design conversation.
Before You Call: What to Check First
For Queens property owners and building supers requesting a drainage diagnosis
-
1
Does water remain on the roof more than 48 hours after rain? If yes, document the location and approximate depth - this is your baseline for the diagnosis conversation.
-
2
Is the interior drain strainer visible, or is it buried under debris or membrane material? A buried strainer is effectively a blocked drain - note whether it was recently cleaned or has been untouched for a season or more.
-
3
Have the overflow scuppers discharged recently during a normal rain event? If overflow is running regularly, the primary drainage is not doing its job and that conversation needs to happen now, not next season.
-
4
Does any repair patch sit higher than the surrounding membrane field? Even a quarter-inch elevation change can redirect water away from the drain - run your palm across recent patches to feel for proud edges.
-
5
Are there active leaks appearing near drain leaders, parapet walls, or scupper throats? These locations are where flashing details meet the drainage system - leaks there often indicate a detail failure, not a field membrane failure.
-
6
Can you take photos during or immediately after rain? Images showing active ponding, overflow discharge, or debris patterns tell a clearer story than any dry-roof walkthrough ever will.
⚠ Do Not Mistake Emergency Overflow Activity for Healthy Drainage
Water discharging forcefully from a scupper during a storm can feel like proof the system is working. In many cases on Queens mixed-use and row buildings, it means the opposite: the primary interior drain is underperforming or blocked, and the scupper has become the only exit point - a job it was never sized to handle alone.
In winter, this becomes a serious risk. A partially blocked sump area that holds water after rain can freeze overnight, expanding against the drain clamping ring and cracking the membrane tie-in - a repair that costs far more than the cleaning that would have prevented it.
On Queens row buildings and mixed-use facades, repeated scupper overflow also drives splashback onto brick and mortar that wasn't designed for constant saturation. You'll see the staining long before you see the spalling - but both are coming if the drainage detail isn't corrected.
Questions Owners Ask When the Roof Keeps Ponding in Queens
Water is honest. It doesn't hold grudges, doesn't make excuses, and doesn't care what the last contractor told you. Every ponding pattern on every Queens flat roof is just gravity reporting what the drainage detail got wrong. The questions below come up on almost every job - and the answers are always more specific than people expect.
Q: What is an interior drainage flat roof detail supposed to include?
A complete interior drainage flat roof detail includes the drain body (bowl), a sump depression below the field plane, a properly torqued clamping ring compressing the membrane, a clear strainer with adequate clearance, a confirmed-open leader below, continuously tapered insulation directing water to the bowl, and a clean membrane tie-in at the ring. All of those components together make a functioning drain. Any one of them missing means the drain is only partially functional - and water will find that gap.
Q: How is a flat roof drain detail different from just installing a drain body?
Installing a drain body is the hardware part. A flat roof roof drain detail is the complete system: how the insulation is sloped toward that body, how the membrane integrates with the clamping ring, how the sump elevation relates to the surrounding field, and how the leader below is connected and verified. Plenty of roofs in Queens have drain bodies that work perfectly as hardware and fail completely as drainage details because the slope, the ring, or the leader was never correct.
Q: When does a flat roof scupper detail count as primary drainage versus overflow?
A scupper is primary drainage when it's the designed first exit for runoff - common on simple low-slope roofs without interior leaders. It becomes an overflow scupper when it's intentionally set 2" or more above the primary drain elevation to activate only when the primary system is blocked or overwhelmed. The difference is in elevation and intent. If your scupper runs water in a light rain, it's functioning as primary. If it only runs in heavy storms, it's overflow - and if it's running regularly in moderate rain, something below it isn't working.
Q: Can tapered insulation alone fix ponding?
Tapered insulation creates slope - which is a necessary part of the drainage solution - but it can't fix everything on its own. If the drain sump is sitting proud due to a previous patch, the taper delivers water to a dam. If the leader below the drain is blocked, the taper fills the bowl and the water has nowhere to go. Tapered insulation works when the drain detail beneath it is also correct. One without the other produces limited results.
Q: How do I know whether my roof needs cleaning, repair, or redesign of the drainage layout?
Cleaning makes sense when ponding is new, the drain location is correct, and debris is the obvious cause. Repair makes sense when a specific detail has failed - a cracked clamping ring, a broken leader joint, a lifted patch near the bowl. Redesign is the answer when ponding is recurring despite repeated cleaning and repair, when the drain is simply in the wrong location relative to how the deck actually slopes, or when multiple past repairs have created a geometry that water can no longer navigate. A bucket test and post-rain photo documentation will usually tell you which category you're in before any contractor arrives.
If your Queens flat roof is showing repeat ponding, overflow discharge during moderate rain, or drain details that just don't add up, call Flat Masters for a drainage-focused roof evaluation. We'll read what the water is already telling you - and give you a straight answer on whether this is a cleaning issue, a repair, or a layout problem that needs to be fixed properly.
Flat Masters - Queens, NY | Flat Roof Drainage Diagnosis & Repair