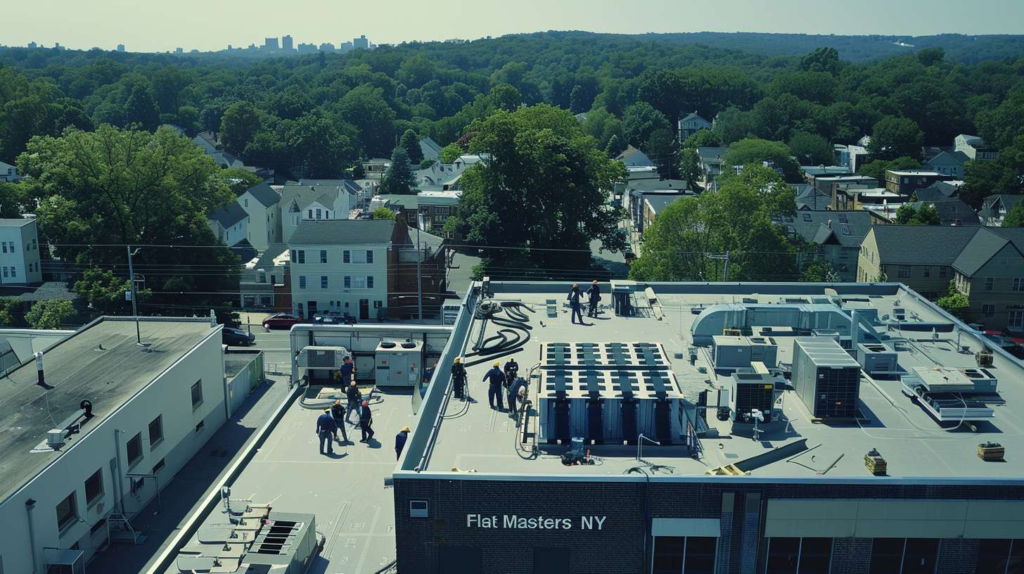
Building a Flat Roof for an Extension? Here's What the Build Really Involves
Before anyone argues about membrane brands or insulation thickness, a flat roof extension succeeds or fails on three things: structure, drainage fall, and edge detailing - and all three have to be designed together, not bolted on as separate thoughts. This is a plain-English walkthrough of what extension flat roof construction actually involves for Queens homeowners, layer by layer, from the framing up.
Structure decides whether the roof has a chance
First thing I look at in Queens is the span, not the shiny top layer. Flat roof extension construction is decided at the joist level - sizing, spacing, bearing points, deck stiffness, and how the new roof frame connects back to the existing house wall. Think of it like a stage production: the membrane is the visible set everybody sees from the sidewalk, but the framing is the rigging nobody applauds. Pull one pin in the rigging and the whole show ends badly. Getting the structure right means one clean load path, consistent joist depths, and decking that doesn't flex when you walk it - because everything else in the build hangs off that.
I remember being on a rear flat roof extension construction job in Woodside at 6:40 in the morning, coffee still too hot to drink, when I stepped onto fresh decking and felt one panel give half an inch under my boot. The homeowner was proud because the addition had "passed framing inspection," but the joist spacing was all over the place and one bearing end was shimmed with scraps like somebody was leveling a washing machine. That was the conversation where I had to explain that how to build a flat roof extension properly starts way before membrane - it starts with whether the structure beneath behaves like one roof or six competing opinions. The fix wasn't complicated, but it wasn't cheap either: consistent spacing, real bearing, fastened decking that felt dead-solid underfoot before waterproofing entered the conversation.
The Build Sequence Before Membrane Installation
-
1
Verify span, load path, and connection to existing wall
Confirm joist sizing for the clear span, check that loads transfer cleanly to the bearing structure, and nail down exactly how the new frame ties into the existing masonry or stud wall. -
2
Set joists and bearing correctly
Consistent spacing, correct depth, real bearing - not shimmed, not improvised. Framing that behaves as one assembly, not a collection of adjustments. -
3
Establish drainage fall in the structure or with a taper plan
Decide whether fall comes from the frame itself or from tapered insulation - and document that decision before a single sheet of decking goes down. -
4
Install decking with the correct fastening pattern
OSB or plywood laid tight, fastened per the spec, with no bounce and no hollow spots. If it moves underfoot, it's not done. -
5
Place vapor and insulation layers in the correct order for the assembly type
Warm roof, cold roof, or hybrid - each has a required layer order. Getting this backwards is how you get condensation in a brand-new build. -
6
Finish perimeter edges and penetrations before field membrane completion
Edge metal, upstands, drip profiles, and all penetration flashings get detailed before the field membrane is fully lapped and terminated. Edges are not an afterthought.
| Roof Layer | Job It Performs | What Goes Wrong When Rushed | What the Homeowner May Notice Later |
|---|---|---|---|
| Structural deck (OSB/plywood) | Transfers loads to joists; provides the substrate everything above it relies on | Under-fastened panels flex, joints open, and the membrane above cracks at seams | Visible ripples or ridges in the membrane; soft spots underfoot |
| Vapor control layer | Prevents warm interior air from hitting cold surfaces and condensing inside the build-up | Placed in the wrong position for the assembly type, trapping moisture between layers | Staining, damp patches, or mold on the interior ceiling - often months after completion |
| Rigid insulation board | Controls heat loss and, in a warm roof, keeps the deck above the dew point | Gaps at joints create thermal bridging; inadequate thickness fails energy and condensation targets | High heating bills; condensation damage appearing in winter months |
| Falls / taper layer | Directs water positively toward outlets; prevents ponding | Level or slightly reverse-pitched deck leaves water sitting, accelerating membrane degradation | Pools of standing water visible after rain; premature membrane failure at low spots |
| Waterproofing membrane (EPDM, TPO, GRP, torch-on) | The weather barrier - the visible layer that takes all the credit and most of the blame | Poorly terminated at edges and penetrations; applied over a substrate that isn't ready | Water ingress at edges, around outlets, or wherever detailing was skipped |
Drainage planning comes before anybody says 'flat'
Where the water is supposed to go
What's the roof actually draining to - that's the question I ask before anything else. "Flat" roof doesn't mean level roof, and treating it that way is where half the ponding problems in Queens start. The minimum fall most specs call for is 1:80, but I'd rather build to 1:40 wherever the geometry allows. For small rear extensions - the kind you see all over Ridgewood, Maspeth, and Queens Village - tight lot lines often rule out a free-draining gutter edge on three sides, which forces a real conversation about scupper placement or internal outlet routes before framing even begins. The fall direction has to be decided at the structure stage, not patched in with uneven taper boards after the deck is already nailed down.
If the water has nowhere graceful to leave, what exactly are you building?
Choosing a Drainage Approach for a Flat Roof Extension
Simplest solution. Confirm gutter capacity and that runoff doesn't discharge onto a neighbor's property - a real concern on rowhouse blocks near Atlantic Avenue.
⚠ Warning: "Close Enough to Level" Is a Maintenance Bill Waiting to Happen
- Level decking traps water. Even a quarter-inch of standing water shortens membrane life and adds structural load over time.
- Dead-end drainage. If the outlet location wasn't confirmed before framing, water has no designed exit path - it finds its own.
- Outlets buried behind future trim. Once the fascia and interior ceiling go in, access for clearing a blocked drain is often gone. Plan maintenance access before it's needed.
- Membrane thickness is not a fix for ponding. A thicker membrane over a level deck still ponds. The fall has to be in the structure or the taper, not compensated by the waterproofing layer.
A few years back I got called out to Queens Village after an August thunderstorm by a schoolteacher who said her new extension only leaked "when rain comes sideways." That phrase stuck with me. When I opened the perimeter on that timber frame flat roof extension, the field membrane was fine - it was a badly detailed upstand where the new roof met the existing house wall. The flashing had no real termination; it was just turned back and hoped for. I ended up standing under a patio umbrella with her husband, sketching the whole assembly on the back of a takeout menu so they could see why water always finds the lazy detail. Sounds reasonable to chase the leak across the middle of the roof. But the most common failure point on a flat roof extension isn't the field - it's the transition. Every time.
Layer order is where good-looking jobs quietly fail
Back on that Astoria job at sundown, the problem announced itself before I even opened the ceiling. Nice family, brand-new recessed lights, fresh paint - the kitchen bump-out looked done from the sidewalk. But standing inside, the ceiling had that cold, slightly clammy feeling you only get when moisture is moving somewhere it shouldn't. The vapor control layer had been placed in the wrong position for the assembly type - buried below the insulation on what was effectively a warm-roof build - and when evening temperatures dropped the roof, condensation had nowhere to go except back into the ceiling cavity. The roof had been assembled backwards. It looked finished. It was not a roof.
I'll say this bluntly: a flat roof doesn't forgive wishful thinking. On a small extension, the most common assembly is a timber frame deck with rigid insulation above the deck and membrane on top - a warm roof configuration that keeps the deck above the dew point. Hybrid builds that run insulation partly above and partly between joists create thermal weak spots at every joist, and recessed light penetrations or soil stack exits through the deck make vapor continuity even harder to maintain. As I've seen over 17 years in Queens, Darnell "Dell" Mercer mostly gets called in after the pretty part is already done - and nine times out of ten, the problem isn't the membrane, it's the assembly sequence that got cut short because somebody was trying to close the job before the weekend.
Here's how I explain it to homeowners: the membrane is the actor - gets all the attention, takes all the blame. The insulation is the understudy - critical, but invisible until something goes wrong. The structural deck and vapor layer are the stagehands quietly keeping the whole show from collapsing at 2 a.m. Nobody notices them until they're gone. And honestly, the insider tip I give every Queens homeowner before they sign a contract: ask the contractor to sketch the roof section from interior ceiling to outer edge metal, by hand, on paper, before work starts. If they can't draw it, they don't know the sequence. If they don't know the sequence, you're funding someone else's education.
| The Myth | The Real Answer |
|---|---|
| Flat means level | A flat roof has to drain. Minimum fall is typically 1:80, and 1:40 is better. Level is a ponding problem built in from day one. |
| Membrane thickness fixes ponding | A thicker membrane over a level deck still holds water. The fall has to be in the structure or the taper plan - the membrane can't fix geometry. |
| A passed framing inspection means the roof structure is fine | A framing inspection checks code compliance, not drainage fall, not deck stiffness under load, and not how the structure connects to the existing house. Those details are the contractor's responsibility - not the inspector's. |
| New extension leaks are usually from the middle of the roof | Most leaks start at the perimeter - wall abutments, upstands, edge metal, penetrations. The field membrane is the last place to look, not the first. |
| Timber frame automatically means warm and dry | A timber frame flat roof extension is warm and dry when it's correctly assembled - right vapor strategy, right insulation position, right sequencing. The frame is neutral. It's the build-up that determines performance. |
Perimeter details are the bill that comes due later
Edges, upstands, penetrations, and tie-ins
Here's the part people pay for twice: bad edges. The flat roof extension construction failure list is almost entirely a perimeter list - wall abutments where the upstand is too short, parapets where the coping isn't dressed to drain, fascias where the drip edge doesn't actually clear the wall below, skylight curbs that were sealed with mastic instead of proper flashing, outlet openings that were trimmed over, and wherever the new roof meets old brick or siding without a proper termination bar. None of that is cosmetic trim. Every one of those details is where water tests the script first, and water is a patient, methodical tester. Get the edges right from the beginning, or plan to revisit them - usually at the worst possible time of year.
Critical Edge Details to Specify Before Work Starts
Minimum 150mm above finished membrane level. Shorter than that and wind-driven rain finds its way in - as every sideways-rain story in this borough can confirm.
Mechanically fixed termination bar into solid substrate, not just mastic-turned-and-hoped. Define this before any membrane arrives on site.
Specified to match the membrane system and provide a positive drip away from the fascia. Not a generic angle iron cut to fit on the day.
Water off the edge needs to clear the wall below. On brick-faced extensions, a poorly positioned drip path stains the façade and eventually works into the mortar joints.
Sized for the roof area and regional rainfall intensity, with a secondary overflow scupper positioned above the primary to handle blockage events.
Every pipe, conduit, drain outlet, and light fitting that passes through the deck needs a specified flashing detail - not an improvised collar on the day of installation.
New roof meeting old brick, stucco, or vinyl siding each requires a different approach. Who owns that detail - and how it gets made watertight - has to be agreed before work starts.
Primary outlets block. Plan the overflow path now so that when it does happen, water exits the roof rather than backing up into the structure.
Questions Queens Homeowners Ask Before Approving a Flat Roof Extension Build
Before you approve the build, pin down these documents and decisions
A roof build is a lot like a stage platform - nobody applauds the bracing until it fails. Before you approve any flat roof extension construction in Queens, there are seven things worth locking down in writing: a section drawing showing the roof build-up layer by layer; the drainage direction confirmed on a plan; outlet and scupper locations physically marked; the full roof build-up listed by material name (not just "insulation board"); an edge detail sketch covering at least the wall abutment and gutter or scupper termination; a count of every penetration and how each gets flashed; and a written confirmation of who is responsible for pulling permits and scheduling inspections. That's not an unreasonable ask. Any contractor who's done this before can produce most of it in a day. If those documents aren't available before the build starts, you don't have a plan - you have an optimistic estimate.
Before You Hire: Flat Roof Extension Checklist for Queens Homeowners
- 1Structural drawings or span confirmation in writing. Joist size, spacing, and bearing point confirmed - not assumed from the framing crew's verbal say-so.
- 2Drainage path marked on a plan. Fall direction, fall rate, and where water exits the roof - agreed before any framing starts.
- 3Outlet or scupper location physically shown. Not estimated - drawn on a plan with dimensions, including overflow provision.
- 4Roof build-up listed by layer name. Deck material, vapor control product, insulation type and thickness, and membrane system - named, not described generically as "flat roof materials."
- 5Edge detail sketch included. At minimum: the wall abutment upstand detail and the gutter/scupper termination. Drawn, not just described verbally on site.
- 6Penetration count identified. Every outlet, pipe, conduit, and light fitting that passes through the deck counted and assigned a flashing specification before work starts.
- 7Permit and inspection responsibility stated in writing. Who pulls the permit, who schedules inspections, and who is present for them - confirmed before the contract is signed.
If a contractor cannot walk you through the assembly layer by layer before the build starts, call Flat Masters - before that extension gets closed in and the real conversation becomes a lot more expensive.
