How to Put a Fall on a Flat Roof: Expert Installation Guide
Look, I've been installing fall systems on flat roofs across Queens for over two decades, and I can't tell you how many times I've had to fix drainage problems that could've been avoided with proper falls from the start. Installing fall systems typically costs between $8-15 per square foot depending on the method you choose, but trust me - it's way cheaper than dealing with ponding water and membrane failure down the line.
Here's the thing about flat roofs in New York - they're never actually flat. Building codes require a minimum slope of 1/4 inch per foot, and for good reason. Without proper drainage, you're looking at ice dams in winter, membrane deterioration, and structural issues that'll cost you thousands.
Understanding Fall Systems and Why They're Critical
When we talk about how to put a fall on a flat roof, we're really discussing creating controlled drainage paths that direct water to your drains, scuppers, or gutters. In Queens, with our heavy spring rains and winter freeze-thaw cycles, this isn't optional - it's survival for your roof system.
There are three main methods for creating fall on a flat roof:
- Structural falls - Built into the deck during construction ($12-18/sq ft)
- Insulation tapers - Created with tapered insulation boards ($8-12/sq ft)
- Lightweight concrete - Poured and screeded to slope ($10-15/sq ft)
Most of our jobs in Astoria and Long Island City use tapered insulation because it's cost-effective and doesn't add significant structural load to older buildings.
Planning Your Drainage Layout
Before you even think about materials, you need a proper drainage plan. Last month on Northern Boulevard, we had to completely redo a job because the original contractor didn't account for the building's actual high and low points. The water was flowing uphill - not exactly what you want in a drainage system.
Start by identifying your drain locations. In Queens, most commercial buildings have interior drains, but I've seen everything from ancient cast iron to modern PVC systems. Your fall pattern needs to create valleys that funnel water to these collection points.
Here's what I do on every job: I use a transit level to map the existing roof surface, noting any structural high or low spots. Then I create a drainage plan that works with the building's natural tendencies, not against them.
Installing Fall Systems with Tapered Insulation
This is where most contractors in our area mess up - they think installing tapered insulation is just laying down boards. Wrong. You need precision and understanding of how water behaves.
First, we remove the existing membrane and insulation down to the deck. In older Queens buildings, this often reveals surprises - we found a 1940s wood deck last week that needed structural repairs before we could proceed.
The key to proper insulation tapers is understanding cricket construction. You can't just slope everything toward the drains - you need to create ridges and valleys that handle water flow during heavy downpours. I've seen 3-inch rainfalls in Forest Hills that would overwhelm poorly designed systems.
We typically use polyisocyanurate boards for the base layer, then add the tapered pieces. The minimum slope is 1/4 inch per foot, but I prefer 1/2 inch when possible. More slope means faster drainage and less chance of membrane problems.
Creating Falls with Lightweight Concrete
Sometimes tapered insulation won't work - usually on older buildings with irregular deck surfaces or when you need significant slope changes. That's when we turn to lightweight concrete screeds.
This method requires more skill and equipment. We use perlite or vermiculite concrete mixed on-site, then screed it to the desired slopes using string lines and laser levels. The work has to be done in sections, and timing is critical - you can't let sections dry at different rates or you'll get cracking.
But here's something most contractors won't tell you: lightweight concrete falls require proper curing before you can install the membrane. In our humid Queens summers, this can take 7-10 days. Rush this step and you're asking for membrane adhesion problems.
Working with Existing Structural Conditions
Every building in Queens has its quirks. Those pre-war apartment buildings in Elmhurst? The roof decks often have a crown in the middle from settling. Modern commercial buildings might have HVAC units that create drainage challenges.
When creating fall systems, you have to work with what's there. Sometimes that means creating multiple drainage areas instead of trying to slope everything to one drain. Other times it means adding overflow drains to handle extreme weather events.
I remember a job in Flushing where the building had settled so much that the existing drains were 3 inches higher than the surrounding roof. We had to create a complex cricket system with secondary drains to make it work properly.
Common Installation Mistakes
After twenty years of fixing other people's work, I can spot these problems from across the roof:
Insufficient slope - Code minimum isn't always enough. In areas prone to debris accumulation, you need more fall to maintain drainage.
Reverse slopes - This happens when installers don't check their work with levels. Water flowing toward walls instead of drains causes major problems.
Valley problems - Valleys between drains need to be properly designed and sloped. Too often I see water collecting in these areas during heavy rains.
Material Considerations for Queens Weather
Our weather here is tough on roofing systems. Freeze-thaw cycles, heavy snow loads, summer heat - your fall system needs to handle it all without losing its slope or developing gaps.
For tapered insulation, I stick with closed-cell products that won't absorb water. Polyisocyanurate works well, but make sure the tapered pieces are properly manufactured - some cheap imports have inconsistent density that leads to compression problems.
Lightweight concrete needs proper admixtures for our climate. We add air-entraining agents for freeze-thaw resistance and fiber reinforcement to prevent cracking. The extra cost is worth it when you're not coming back in two years to fix cracks.
Professional Installation vs. DIY Considerations
Look, I'm not going to lie to you - this isn't a weekend DIY project. Creating proper falls requires equipment most homeowners don't have and knowledge that comes from experience. One mistake in slope calculation and you're dealing with ponding water that can destroy your entire roof system.
The liability issues alone should make you think twice. In New York, improper drainage that leads to water damage can result in expensive lawsuits. Plus, most membrane warranties require professional installation of the substrate.
If you're determined to tackle this yourself, at least hire a professional for the planning and layout. We'll map your slopes and provide detailed drawings for about $500-800, which is cheap insurance against expensive mistakes.
Maintenance and Long-term Performance
Even perfectly installed falls need maintenance. Drains clog, membranes develop minor issues, and building settlement can affect drainage over time. I recommend annual inspections, especially after major storms.
Watch for ponding water that lasts more than 48 hours after rain. This usually indicates either clogged drains or slope problems that need attention. Small issues become expensive problems if you ignore them.
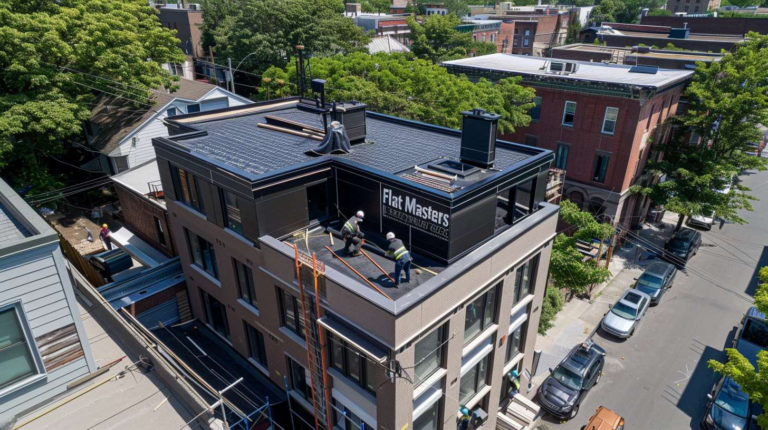
At Flat Masters NY, we've been solving drainage problems across Queens since 2001. Whether you need a complete fall system installation or repairs to existing slopes, we have the experience and equipment to do it right the first time. Our licensed team understands local building codes and weather challenges, and we guarantee our work.
Don't let poor drainage destroy your investment. Call us at (917) 994-7618 for a free consultation and slope analysis. We'll show you exactly what your roof needs and provide detailed estimates for any work required.
