Flat Roof Gutters Need to Be Set Up Differently - Here's What Works
If someone said it's not urgent, they haven't stood on a Queens flat roof after a July storm and watched water sit exactly where it shouldn't. Flat roofs do not shed water evenly toward the edge the way a pitched roof does - drainage points have to be created on purpose, mapped deliberately, before a single gutter bracket goes up. Think of it like a classroom experiment: give water no defined path, and the outcome isn't a mystery. It's just physics doing what physics does.
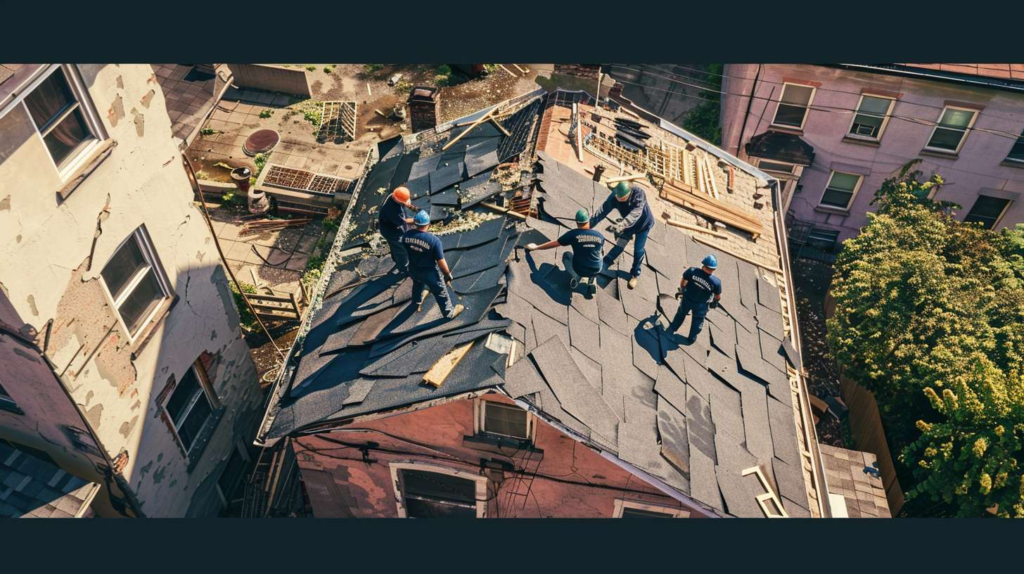
On a 22-foot Queens row-house roof, the middle tells the truth. That's where water collects, where the membrane sags first, where years of patching have built up subtle humps and depressions that redirect flow in ways no one planned for. People searching "how to install gutters on a flat roof" often start with the wrong question - they assume the edge catches everything, when the real problem is that water may never reach the edge cleanly at all. I'm Rosa Mendel, and with 27 years in flat roofing and a specialty in correcting drainage mistakes on older Queens row buildings, I've traced enough invisible water paths to know that the gutter is almost never the original problem.
Why Standard Gutter Logic Fails on Flat Roofs
| Myth | Real Answer |
|---|---|
| A bigger gutter fixes pooling | Gutter size is irrelevant if the water never reaches the outlet. Pooling is a drainage point problem, not a gutter capacity problem. Create the correct collection point first. |
| Flat roofs drain to every edge equally | They don't. Water follows low spots, settlement lines, and old seams. Controlled slope - through taper insulation or crickets - has to be built in; it doesn't happen by default. |
| If the fascia is straight, the setup is fine | A level fascia tells you nothing about where water is actually traveling on the roof surface. Outlet design and drip edge alignment require a separate assessment entirely. |
| One long gutter run is simpler and better | Long runs without enough outlets create overflow at concentrated points during heavy storms. Outlet spacing has to match the actual volume arriving at each section of the edge. |
| If water reaches the edge, the job is done | Reaching the edge isn't the finish line. Splash-back, capillary curl under the membrane, and overflow during clogged-outlet events can all cause serious damage after the water "arrives." |
Creating Collection Points Before You Hang Anything
Where Outlet Locations Belong
Here's the part people get wrong. The sequence matters - and it doesn't start with the gutter. You survey the low spots first, map the actual water path, choose scupper or downspout outlet locations based on that map, and then size and position the gutter to receive water at those exact points. I remember a gray Tuesday in late March on a two-family in Maspeth, around 7:15 in the morning, when the owner swore the new gutter was "plenty big." I poured one bucket of water near the middle of that flat roof and watched it sit there like a student refusing to answer a question. The gutter wasn't the issue - there was no real collection point and no thought for pitch, so the roof edge was being asked to do a job nobody had set it up to do. That same pattern shows up constantly on Queens two-family and row-house roofs: slight center sag from decades of settlement, patched membranes with subtle ridges that redirect flow, parapet interruptions that block natural run-off, and rear-yard grades that make overflow unpredictable.
What Queens Roof Shapes Usually Hide
Where do you think the water is actually going? Toward the low spots, along old seams, down whatever settlement lines the building has developed over the last fifty or sixty years, and toward whichever edge happens to have a true outlet. No, not because the gutter is weak; because the roof is asking it to do the wrong job. The gutter is just the receiver - and right now the ball is landing somewhere else entirely.
A flat roof without a defined collection point doesn't have a gutter problem. It has a drainage design problem.
-
1
Flood-test or hose-test the roof surface to identify true low points - not assumed ones. Watch where water sits after two minutes. Mark those spots.
-
2
Map the water path and dead zones. Note seams, patched areas, and parapet interruptions. These tell you where the water wants to go, not where you assume it goes.
-
3
Decide scupper or downspout count based on run length and water volume arriving at each outlet location - not just by eyeballing the fascia.
-
4
Confirm drip edge clearance and fascia condition before ordering gutter material. A rotted fascia or missing drip apron changes the entire edge detail plan.
-
5
Set gutter pitch toward outlets at the correct slope - usually 1/16 to 1/8 inch per foot - so water doesn't stall anywhere along the run.
-
6
Plan an overflow route for heavy Queens storms. Know exactly where water exits during a clogged-outlet event before that event happens - not after.
Getting the Edge Detail Right So Water Drops In Cleanly
Flat roof edges are not magic. The membrane has to terminate correctly, the drip edge has to direct water away from the fascia, the scupper lip has to align with the gutter throat, and the gutter itself has to sit at a setback that gives water a clean vertical drop. One August afternoon in Ridgewood - the heat that day was sharp enough to make the modified bitumen smell almost sweet - I was called after another crew had finished what they were calling a flat roof gutter installation. They'd tucked the gutter too tight under the drip edge. During a hard rain, water curled backward and stained the brick instead of dropping cleanly into the gutter. I stood there with the landlord, a retired transit worker, and told him the same thing I tell everyone: on a flat roof, water needs direction, not hope. That capillary curl-back is not a fluke - it's what happens every time there's no gap for a clean drop, and the staining it causes goes deep into the brick quickly.
I once watched rain stall on a roof like it was waiting for permission. That image has stayed with me because it describes what happens when edge metal, gutter position, and membrane termination aren't working together - the water just hesitates, spreads, and finds the path of least resistance, which is usually behind something rather than into something. The splash trajectory matters: when a gutter is set with visible drop clearance and a proper apron or edge metal alignment, water falls in cleanly and moves toward the outlet. And honestly, Rosa plainly prefers a setup that gives water a clean, visible fall into the gutter over one that looks tighter at the edge but traps flow and forces callbacks. A neater-looking installation that stains brick every rainstorm isn't neat - it's expensive.
Fastening gutter brackets based only on the fascia line - the way you would on a suburban sloped roof - eliminates the drop clearance that a flat roof edge requires. The consequences aren't just cosmetic.
- Ponding at the membrane edge accelerates seam failure and termination separation
- Brick staining from curl-back becomes a recurring problem that paint and sealant can't fix long-term
- Seam stress builds where water backs up under the drip edge during heavy rain
- Winter ice buildup forms at the tight edge gap, forcing the gutter away from the fascia over time
- Assuming one continuous edge catches all water is the same assumption that caused the problem in the first place
Spacing, Sizing, and Overflow Planning for Queens Storms
When One Run Becomes Too Long
A gutter on a flat roof is more like a train platform than a funnel. Water arrives from defined points - collection zones, scupper openings, directed flow paths - not from a continuous sheet sliding off an angled surface. That distinction changes how you think about outlet spacing and run length, and it matters far more than most people expect. I was on a small commercial job off Northern Boulevard, just before sunset in October, when the restaurant owner brought me coffee and asked why his back entrance near the Flushing Avenue side always flooded first. The answer was straightforward but not obvious: whoever had been installing gutters on those flat roof sections had ignored scupper spacing entirely and treated one long edge like it was a 1960s ranch house in Nassau County. We repositioned the outlet locations, changed the gutter profile to better match the concentrated flow volumes, and the next storm went where it was supposed to go instead of into his delivery area. One change in outlet spacing. That's it.
How Overflow Should Fail Safely
Sizing logic on a flat roof pulls from roof area, concentration points, and storm intensity - and Queens storms are not gentle. The borough gets hit with short, intense downpours that overwhelm undersized or misplaced outlets fast. Every flat roof gutter installation needs a thought-out overflow route, and here's the insider detail that often gets skipped: on older Queens buildings, always verify where overflow will go during a clogged-outlet event before that event happens. Water that can't exit through the gutter will find the next lowest path - and on a row house or two-family, that path is often a rear stairwell, a shared alley, or a service entrance. That's not a gutter failure at that point; that's a planning failure. Secondary protection - whether it's an overflow scupper, a secondary conductor, or a deliberately sloped relief point - needs to be part of the plan from day one, not bolted on after the first complaint call.
| Roof Condition | Recommended Setup | Why It Works | Common Failure If Ignored |
|---|---|---|---|
| Row house with slight center sag, no parapet | Taper insulation to create directed slope toward rear or front edge, then gutter with outlet at low point | Eliminates ponding zone; gives water one defined path to the gutter | Persistent mid-roof ponding, membrane delamination at seam over center sag |
| Two-family with parapet on three sides | Scuppers through parapet at low points with conductor heads feeding into exterior downspouts | Parapet walls prevent edge drainage; scuppers are the only clean exit path | Water backs up against parapet base, saturates flashing, causes interior leak at top-floor ceiling |
| Small commercial building with long front edge, no slope | Multiple outlets at correct spacing along run, gutter pitched to each outlet, overflow scupper above gutter line | Distributes load across multiple exits; overflow route prevents flooding during clogs | One overwhelmed outlet, gutter overflow, delivery entrance or sidewalk flooding during heavy rain |
| Older building with patched membrane and irregular surface | Hose test before any work; crickets or saddles to redirect flow away from dead zones before gutter placement | Patch ridges and depressions redirect flow unpredictably; test first or install blind | Gutter misses actual low points; staining and ponding continue after installation |
| Rear-yard facing edge with alley drainage complications | Downspout routed to city drain connection or splash block directed away from foundation and neighbor property line | Overflow from rear edge in Queens often has nowhere to go without a planned exit route | Rear stairwell flooding, alley pooling, foundation saturation, neighbor complaints |
Questions Homeowners Ask Before Approving the Work
If a contractor can't answer these points plainly and specifically for your building, the design isn't ready yet. That's not an insult to the contractor - it's a signal that more assessment needs to happen before any brackets go up. Flat Masters has seen what happens when that step gets skipped, and these questions are how you avoid finding out the hard way.
