Leak at the Edge of Your Flat Roof? Here's What's Happening and How to Fix It

Leak at the Edge of Your Flat Roof? Here’s What’s Happening and How to Fix It

Leak at the Edge of Your Flat Roof? Here's What's Happening and How to Fix It

I've done this long enough to know that when a flat roof leaking at the edge leaves a stain on your ceiling, that stain is almost always pointing you somewhere wrong-because the perimeter failed quietly first, while the water took its time finding a path indoors. This article breaks down where the edge missed its cue, how the water traveled, and what actually fixes it on Queens rooftops.

Why the Stain Lies While the Perimeter Fails

I've done this job in every kind of Queens weather, and the one thing I keep coming back to is this: a flat roof edge doesn't fail with a bang. It fails like a bad actor making a quiet entrance from the wrong side of the stage-nobody sees it happen, but by the time the scene plays out, water is dripping on a bedroom ceiling two rooms over. The perimeter goes first. A loose metal edge, a failed termination bar, a lifted flashing detail-any one of these lets water in offstage, and then it travels under the membrane or along the nailer before it ever shows up where you're standing with a bucket.

Flat roof with water pooling at the edge showing signs of leakage, with repair tools nearby ready for maintenance.

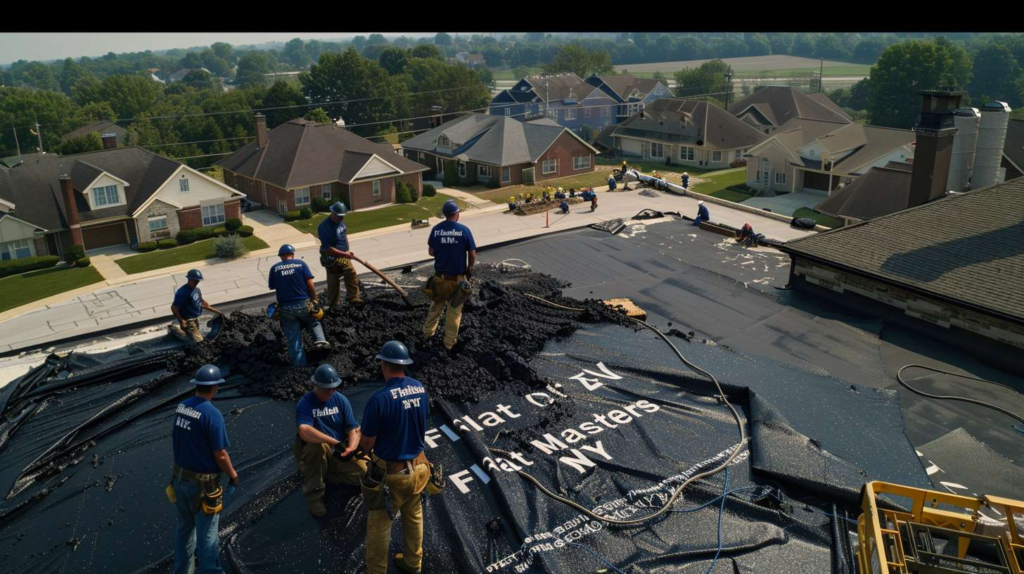
At the front edge in Queens, I look down before I look around. People always want to start with the stain, which I get-that's the visible problem. But the stain is just where water decided to clock in for the day; it doesn't tell you where it punched in. I was on a two-family in Ridgewood at 6:10 in the morning after a windy overnight rain, and the owner kept pointing to a ceiling stain near the front bedroom window. I walked the roof edge first, not the stain, because the metal gravel stop was chattering loose in the gusts. Sure enough, water had been getting under the edge flashing and traveling sideways for a while before it ever showed up indoors. That's the move every time: read the perimeter before you trust the ceiling.

MYTH VS. FACT: Edge Leak Diagnosis on Queens Flat Roofs
Myth What the Roof Is Actually Doing
The stain location is where water got in. Water travels laterally under the membrane or along roof nailers, often showing up 3-6 feet from the real entry point.
A bead of caulk will fix an edge leak. Caulk can't bridge movement gaps at metal laps or termination bars. It cracks under thermal expansion and re-opens faster than it was applied.
If there's a parapet, the parapet is always the culprit. Parapet cap failures exist, but the low edge metal, termination bar, and corner transitions fail just as often-and get overlooked because people fixate on the parapet.
If the leak appears near a window, it's a wall or window seal issue. Roof edge water travels along framing and can exit near window headers. The roof perimeter needs to be ruled out before blaming the window.
If the center field of the roof looks intact, the edge must be fine. Edge detail failures are almost always separate from field conditions. A pristine mid-roof surface says nothing about what's happening at the termination line or metal edge.

Quick Realities: Edge-Specific Leaking Issues
Most Misleading Symptom
Interior ceiling stain appearing several feet away from the actual perimeter breach.

Most Common Hidden Source
Loose metal edge or failed termination bar where the membrane ends at the roof perimeter.

Weather Trigger
Wind-driven rain-especially from the north or east on exposed front edges in Queens neighborhoods.

Best First Inspection Area
The roof edge and perimeter metal-before the ceiling stain and before the field of the roof.

Where Edge Leaks Usually Start on Queens Flat Roofs

Metal Edge and Gravel Stop Movement

Here's the part people never enjoy hearing. Edge leaks are almost never dramatic holes-they're detail failures. Missed cues in the perimeter script. I'm Marco, and I've been tracing flat roof leaks in Queens for 19 years; I'm specifically known for catching edge failures that other crews write off as skylight or wall leaks. The older mixed-use buildings in Astoria, Ridgewood, and Jackson Heights were built with minimal perimeter overhang, which means the edge metal takes a direct hit from wind. Corner positions are the worst-two planes of wind pressure meet right at the lap, and if the gravel stop or drip edge has worked its fasteners loose, you've got an open seam that breathes water every time the weather comes sideways.

Membrane Shrinkage at the Termination Line

I remember one roof on 37th Avenue in Astoria where a restaurant owner was convinced the HVAC units were leaking-the water only appeared when the AC was running hard during August heat. It turned out not to be the units at all. The edge membrane had shrunk just enough to pull back from the termination point, and the afternoon heat opened the gap a little wider each day. That's a classic summer setup on Queens commercial roofs: the middle of the membrane expands, the perimeter detail is already under tension, and something at the termination line finally gives. It looked fine until you stopped staring at the middle of the roof and actually read the edge.

If the perimeter detail missed its cue, the water does not care what room you blamed.

Edge Leak Source → What You Notice → Likely Repair Path
Edge Source What You May Notice Indoors What Shows Up on the Roof Edge Typical Repair Path
Loose gravel stop / drip edge Stain near front wall or top-floor ceiling corner Raised metal, missing or backed-out fasteners, visible gap at lap Re-fasten, seal laps, replace damaged edge metal sections
Failed termination bar Water appearing at exterior wall top or just inside it Membrane pulling away from wall, open seam at bar edge Remove bar, re-adhere membrane, install new termination bar and sealant
Parapet flashing separation Stain running down an interior wall face, not ceiling Flashing lifted or buckled at parapet base, open lap at cap transition Re-flash parapet base, secure cap, check counterflashing
Membrane shrinkage at edge Intermittent leak tied to heat or sun exposure cycles Membrane pulling back from termination point, visible gap widening Extend membrane to new termination, properly adhere and seal
Old equipment mount patch at edge Leak appears after storm, often near corner or side wall Patched area hidden under coating, soft or bubbled to the touch Remove patch, dry substrate, apply proper membrane repair and edge seal
Split membrane at outside corner Stain appearing near corner of building, sometimes both walls Cracking or open split where membrane wraps the outside corner Install pre-formed corner piece, adhere and seal all transitions

Open the Edge Details: Perimeter Points That Fail First
Failed Termination Bar and Fasteners
The termination bar is a flat metal strip that presses the top edge of the membrane against the wall or parapet. When its fasteners back out-which happens gradually from thermal movement and wind vibration-the bar lifts, the membrane unseats, and you get an open channel right at the wall-to-roof transition. Wind-driven rain finds that channel immediately.
Lifted Flashing at Parapet Transition
Where the roof membrane meets the parapet wall, there's a base flashing that runs up the wall face. Heat causes the membrane to expand and contract daily. Over time, that movement pulls the flashing base away from the wall, especially on south- and west-facing parapets that take the most sun exposure. Once that bond breaks, water sits behind the flashing instead of running off.
Patched Holes from Old Mounts or Signs
Old satellite dishes, sign brackets, and antenna mounts leave fastener penetrations close to or right at the edge. The patches applied when those mounts were removed are almost always undersized and laid over an uneven substrate. Heat and wind work them loose from the edges first, and they start trapping water underneath rather than shedding it.
Split Membrane at Outside Corners
Outside corners are stress concentration points. The membrane wraps a 90-degree change in plane, which means it's being pulled in two directions simultaneously every time the temperature swings. Without a pre-formed outside corner piece properly bonded and seamed, the membrane cracks or opens at the apex of that corner-and that crack is almost always at the perimeter, exactly where wind and rain load hit hardest.

How to Tell If You Need an Emergency Visit or a Planned Repair

If you were standing next to me, I'd ask one thing first: where did you see it after the wind picked up? That question does more diagnostic work than looking at the stain ever could. A leak that appears specifically during or right after wind-driven rain, especially from a consistent direction, is almost always a perimeter issue. A leak that shows up only after prolonged standing water is more likely a field or drain problem. Timing and wind direction together tell you where to look; a single wet spot after one storm tells you almost nothing on its own.

Blunt truth: the edge is where a lot of "mystery leaks" stop being mysterious. I got a call one drizzly Sunday from a landlord in Jackson Heights who told me three different contractors had blamed the parapet. I did a slow lap and found a sloppy old patch at the roof edge-leftover from a satellite mount removal years back, half-buried under silver coating that had been rolled over it like a cover-up. When I lifted that patch, trapped water came out like somebody missed a cue and rushed the entire stage at once. Here's the insider read on that: old silver coatings and patchwork at the perimeter can hide the real seam failure completely. Don't trust the shine. Probe the transitions and terminations directly-press on them, check for soft spots, look for bubbling-because the coating will look fine right up until it doesn't.

⚠ Call Now - Urgent
  • Active dripping during or after wind-driven rain
  • Bubbling or sagging ceiling near an exterior wall
  • Loose or flapping edge metal visible from street level
  • Water entering near electrical runs or panels
📅 Schedule Soon - Can Wait
  • Old stain with no recent moisture and dry ceiling now
  • Minor discoloration after a storm, no active drip
  • Edge wear or coating cracks found during routine maintenance
  • Cosmetic surface cracking with no confirmed active leak

Is This Probably an Edge Leak? - Decision Flow
START: Does the leak appear during or right after wind-driven rain or sideways rain?

YES → Check whether the stain is near an exterior wall, window line, or building corner.

Any loose metal at the edge, coating splits, or old perimeter patching visible?

YES → Likely edge leak - schedule perimeter inspection

Note: Even if the stain appears several feet inward from the wall, it can still be edge-related. Water travels.

NO → Does the leak occur only when rooftop equipment (AC, HVAC) is running?

YES → Likely equipment curb or condensate issue - inspect curbs and drain lines first

STILL UNSURE → Start at the perimeter anyway. Edge failures are under-diagnosed and a full perimeter read costs nothing on a site visit.

What Not to Do Before Someone Repairs the Edge Correctly

Temporary Moves That Buy Time Without Pretending to Solve It

A flat roof edge is like a badly timed actor-miss one cue and the whole scene gets messy. When I see someone's already been up there with a caulk gun, smearing sealant across metal laps and calling it a repair, I know right away the real problem is still running its lines backstage. Random caulk at an edge joint doesn't stop movement-and edge metal moves constantly with temperature. Roof cement smeared over a lifted flashing is just a costume change; the breach is still open underneath. Coating over a movement point is the same thing with a shinier finish. And honestly, "just caulking the edge" isn't a repair plan-it's a delay tactic that sometimes makes actual diagnosis harder because now you've got material hiding the original failure line.

That said, there's a limited and honest role for temporary protection while you wait for a proper inspection. If water is getting into the building, protect the interior-buckets, plastic sheeting on valuables, whatever stops secondary damage. Document when the leak appears, whether wind was involved, and which direction the rain was coming from. That information is genuinely useful when the roofer shows up. What you don't want is hidden moisture quietly spreading into the wood nailer at the roof edge, the wall top, or the fascia area-because by the time that's wet enough to notice, you've got a bigger repair conversation than you started with.

⚠ Warning: Why Edge Caulking and Coating Coverups Make Diagnosis Harder
  • Smearing sealant over metal laps bridges the joint temporarily but can't hold through thermal movement-when it cracks, the gap is now under a layer of hardened sealant that traps water instead of shedding it.
  • Burying open seams under aluminum coating makes the roof look sealed from the surface, but the coating is not a membrane. Water enters through the seam and is now contained under the coating, accelerating substrate damage invisibly.
  • Ignoring loose fasteners at the perimeter because "the coating looks fine" allows the edge metal to continue moving and widening the gap at the lap-until the next wind event pulls it open further than any sealant can cover.

Before You Call: What to Note About Edge-Specific Leaking Issues
  1. When the leak appeared - time of day, how long after rain started, whether it was a first occurrence or a repeat.
  2. Whether wind was involved - direction if you noticed it, and whether the leak only happens with wind-driven rain versus steady downpours.
  3. Which room it shows up in - exterior wall side or interior, ceiling or wall face, corner or center of room.
  4. Photos of the ceiling stain - including any discoloration pattern or active drip point.
  5. Photos of the exterior roof edge if safely visible from a window, adjacent rooftop, or fire escape - look for raised metal, loose flashing, or visible gaps.
  6. Any history of patching, satellite dish removal, sign mounting, or recent coating work - especially anything applied within the last five years near the edge.

Common Questions: Flat Roof Leaking at Edge
Can an edge leak show up far from the wall?
Yes-and this is the most common reason edge leaks get misdiagnosed. Water enters at the perimeter, travels under the membrane or along the nailer, and exits wherever it finds a low point or a gap in the ceiling assembly. A stain three to six feet from the exterior wall is still very much on the table as an edge leak until the perimeter has been fully inspected.
Is it the parapet or the metal edge?
Could be either, and sometimes both. Parapet cap and base flashing failures are common, but so are gravel stop, drip edge, and termination bar failures on the low edge. The parapet gets blamed most often because it's visible and obvious. The low metal edge gets overlooked because people don't always realize how much work that detail is doing. A complete perimeter inspection checks both.
Can you fix only the leaking section or does the whole roof edge need work?
Sectional repairs are absolutely done and often the right call-especially when one specific detail failed and the rest of the perimeter is in solid shape. That said, if the edge metal is aging uniformly or the termination bar has issues in multiple areas, spot-fixing one section while leaving others at the same risk level means you'll be having this conversation again next season. A good inspection tells you whether this is a single-point failure or a perimeter-wide pattern.
Will a coating stop an edge leak for good?
Not if there's movement at the edge detail. Coatings work well on field surfaces where the substrate is stable, but they're not designed to bridge active movement joints at metal edges or termination transitions. Applied over an edge that moves thermally, a coating will crack and delaminate at that joint within a season or two. The underlying detail needs to be properly mechanically secured and sealed before a coating adds any meaningful protection at the perimeter.

If the leak keeps showing up after wind or along an exterior wall, stop guessing and call Flat Masters to inspect the roof edge before a small perimeter failure quietly turns into soaked decking and interior damage that costs three times more to fix.

Faq’s

Flat Roofing FAQs: Everything Queens, NY Homeowners Need to Know

How much does flat roof edge leak repair actually cost?
Most edge leak repairs in Queens run $450-$2,800 depending on damage extent. Minor sealing costs $450-$850, while major reconstruction can reach $4,500. Emergency repairs cost 1.5x normal rates. The real issue? Damage usually extends further than visible, so final costs often exceed initial estimates.
Don’t attempt DIY repairs on edge leaks – they’re complex and mistakes make problems worse. Edge work involves membrane transitions, flashing, and waterproofing that require professional expertise. Poor repairs often lead to bigger, more expensive problems down the road.
Edge leaks only get worse and more expensive over time. Water damage spreads to roof decking, interior walls, and structural elements. A $600 repair today could become a $3,200+ problem within months. Plus, delayed repairs often require emergency service at premium rates.
Simple edge sealing takes 4-6 hours, while moderate reconstruction needs 1-2 days. Major overhauls can take 3-5 days depending on weather and damage extent. Emergency tarp jobs happen same-day, with permanent repairs scheduled next business day when possible.
Call immediately if you see water stains near roof edges, soft ceiling spots, or moisture along exterior walls. Dark membrane staining, open flashing joints, or white chalky residue on parapet walls are clear warning signs requiring professional inspection and repair.

Ask Question

Or

Spanish-Style Flat Roofs Look Effortless - Here's What Goes Into Making Them

14 min read

Flat Roof Rafter Sizing in NYC - Engineered to Carry the Load

5 min read

Water Through the Top Floor Ceiling? Your Flat Roof Is the First Place to Look

17 min read

Flat Roof Joists Carry Everything Above Them - Here's How They Should Be Laid

12 min read

Flat Glass Roof Lights Bring in More Light Than a Window - Here's What to Know

13 min read

Getting Edges and Corners Right Is What Separates a Good Felt Job From a Leaking One

14 min read

How Is a Flat Roof Actually Built? Here's the Complete Build Process Explained

17 min read

A Professional Flat Roof Seal Can Add Years of Life Without Major Disruption

14 min read

Good Water Drainage Is What Separates a Flat Roof That Lasts From One That Doesn't

13 min read

Professional Flat Roof Rainwater Outlets Installation & Repair

5 min read

Base Sheet Goes Down First - and Getting It Right Matters More Than Most Know

13 min read

Professional Residential Flat Roof Waterproofing Services

7 min read

Residential Flat Roof Repair in NYC - Fast Assessment, Real Fix

9 min read

What's the Average Flat Roof Replacement Expense in Your Area?

7 min read

Flat Roof Maintenance Tips from NYC's Most Trusted Roofers

7 min read

The Drainage Outlet Is the Single Most Important Point on a Flat Roof - Here's Why

14 min read

That Vent Pipe Through Your Flat Roof Is Probably Where the Water's Getting In

14 min read

What's the Flat Roof Average Pricing for Your Home Project?

5 min read

Professional Flat Roof Protection Board Installation Services

7 min read

How to Roof a Flat Roof House: 5 Essential Steps for Success

8 min read

What's the Average Flat Top Roof Replacement Cost in Your Area?

5 min read

Flat Roof Refurbishment in NYC - Give Your Roof a New Lease on Life

10 min read

Professional Budget Flat Roof Carport Installation Services

7 min read

Flat Tar Roof - Installation and Repair by NYC Licensed Pros

6 min read

Residential Flat Roof Materials - Installed by NYC Specialists

6 min read
blue circle

Get a FREE Roofing Quote Today!

Schedule Free Inspection