Installing a Deck on a Flat Roof Takes More Planning Than Just Laying Boards
Good news: before you install decking on a flat roof, you don't start by picking out composite boards or pricing railings - you start by understanding whether the roof underneath can still do its job once the deck is sitting on top of it. Flat roof decking installation only works when the structure is designed to keep draining, stay inspectable, and carry the added load without destroying the membrane below. Get that part wrong, and Queens weather will explain the error in the most expensive way possible.
Map the roof layers before a single board is ordered
Start at the drain, not the decking. The first real decision isn't what the surface looks like - it's whether this roof can function as both a roof and a deck platform without sacrificing either job. That means drainage paths, structural load capacity, membrane condition, and future repair access all have to be mapped before layout even starts. Think of it like a hand-sketched cross-section: deck boards sit on top, then pedestals or sleepers, then a protection layer, then the membrane, then insulation, then the structural deck, and finally the building frame below. Every shortcut at the top of that stack punishes the layer underneath it - and the invoice for fixing the bottom always costs more than saving time at the top.
People get fixated on the surface finish while the hidden layers carry the consequence, and that's where projects go sideways fast. Marta Sadowski - 19 years in flat roofing with a specialty in roof-under-deck failures across Queens - puts it plainly mid-inspection every time: the best-looking rooftop deck is completely worthless if nobody can reach the seams below it without a crowbar and a full demo crew. Her opinion isn't an aesthetic preference; it's a structural one. A beautiful Ipe deck over an uninspectable membrane is just a delayed ceiling repair waiting to happen.
| Checkpoint | What to Verify | Why It Matters | If Skipped |
|---|---|---|---|
| Drainage Pattern | Water reaches drains within 48 hours of rain; no ponding zones | Deck framing will interrupt flow lines and trap water permanently | Chronic ponding destroys membrane adhesion and insulation below |
| Load Capacity | Structural deck and joists can handle deck weight plus live load | Flat roofs aren't automatically rated for heavy occupancy decks | Deflection, cracking, or membrane rupture under point loads |
| Membrane Condition | No soft spots, blistering, open seams, or prior patches hiding damage | A failing membrane becomes unfixable once a deck is framed over it | Interior leaks traced to sources that can't be reached without demolition |
| Access Path for Repairs | Drains, corners, seams, and penetrations can be reached without removing the whole deck | Membrane repairs happen - the deck can't make them impossible | A $400 repair becomes a $4,000 tear-back because nothing's removable |
| Guardrail & Penetration Plan | Post bases, utility runs, and railing anchors won't puncture the membrane | Every penetration is a potential leak - each one needs a proper flashing detail | Unflashed penetrations fail silently until water appears somewhere else entirely |
⚠ Don't Treat This Like Covering a Patio Slab
Decking a flat roof is not the same as laying pavers on concrete. A flat roof membrane traps water, hides punctures, and fails silently. Once framing blocks drain access, any water that gets underneath stays there - destroying insulation, weakening adhesion, and feeding interior leaks through paths you can't see until serious damage has already happened. Covering problems with boards doesn't fix them; it just makes them more expensive to diagnose later.
Drainage failures show up long before the deck looks wrong
Where Queens roofs usually collect trouble
On a Queens roof, the low spot always tells on you. Even a quarter-inch of accumulated ponding becomes a serious structural and membrane issue once sleepers, frames, or low-profile pedestals interrupt the flow lines that were keeping water moving toward the drains. Older multifamily roofs in Astoria, Jackson Heights, and Ridgewood are especially vulnerable - many of them have awkward drain placement from 1960s construction, patched insulation from three different owners, and inherited slope problems that no previous contractor bothered to correct because the membrane was still technically holding. I remember being on a two-family in Astoria at 6:40 in the morning, fog still sitting low over the neighboring roofs near 31st Street, and the owner proudly showed me the deck his cousin had built straight over the membrane. By 7:15, we'd already found three blocked drains, one sleeper pinching ponded water against a parapet, and soft insulation that squished under my boot like a wet sponge. That was the morning I told him the deck wasn't the problem by itself - the real problem was pretending the roof below didn't still need to act like a roof.
Knowing how to fix decking on a flat roof conceptually starts here: not by shimming random gaps or swapping boards, but by restoring water paths, protecting the membrane from contact damage, and lifting the assembly enough that drains can be inspected and cleared. The fix isn't cosmetic. It's a sequence - drainage first, membrane next, support system third, surface last. Now the part people try to rush.
Should You Install Decking on This Flat Roof Yet?
START: Does water reach drains within 48 hours after rain?
❌ No → Stop. Restore drainage slope and clear drains before any deck work begins.
✅ Yes → Continue to next step.
Is the membrane in good condition with no soft spots or open seams?
❌ No → Stop. Repair or replace the membrane first. Decking over a damaged membrane guarantees a future interior leak.
✅ Yes → Continue to next step.
Can the deck system leave clear access to drains and membrane seams?
❌ No → Stop. Redesign the support layout to include removable sections before framing begins.
✅ Yes → Continue to next step.
Proceed to structural load review and deck system design.
All three conditions are met. Now you can plan support systems, select materials, and move into the design and permit phase safely.
Hidden Choke Points Under Flat Roof Decking
Choose a support system that respects the membrane underneath
I've pulled up enough deck frames to know this part gets skipped. There's a real difference between resting lumber on a roof membrane and installing a support system designed to distribute load evenly and protect the surface beneath it. Here's the insider rule I give every building owner: if the support method makes future leak tracing harder than the deck installation was easy, it's the wrong method. Pressure-treated 2x4s laid directly on EPDM, random shims cut from leftover roofing scraps, odd-shaped blocks used to level a twisted frame - these are not solutions; they're postponed problems. They concentrate load on small contact points, they shift with freeze-thaw cycles, and they make any future membrane repair feel like a demolition job. The support system is the part of the roof deck that nobody photographs, and it's the part that determines whether the whole project holds up in year three.
Note: This table is a planning reference, not a product endorsement. The right choice depends on your specific roof condition, load requirements, and access needs.
| Approach | Pros | Cons |
|---|---|---|
| Direct Sleepers on Membrane | Lower material cost; straightforward to install | Traps water under full length; difficult to repair below; no drainage gap; shifts under freeze-thaw pressure |
| Elevated Sleepers on Protection Pads | Reduces membrane abrasion; spreads load better than bare lumber; affordable mid-range option | Still limits drainage unless carefully spaced; not easily adjustable for unlevel roofs; pad displacement over time |
| Adjustable Pedestals | Full drainage clearance underneath; height-adjustable for slope; cleanest inspection access; membrane stays serviceable | Higher upfront cost; requires proper base pad sizing for load distribution; installation takes more planning time |
Plan for inspection, repairs, and movement before tenants ever step outside
What owners usually ask after the deck is already built
What do I ask the owner first? How will anyone reach the drains, seams, corners, and penetrations next year - or the year after? That's not a maintenance question; it's a design question, and it has to be answered before the first board is cut. Projects that install decking on a flat roof without planned removable sections almost always produce the same call six to eighteen months later: a slow leak, an unreachable drain, and a membrane that can't be inspected without pulling the entire deck. One August afternoon in Jackson Heights, a customer kept asking why we couldn't just fix a few loose boards and leave the structure alone. Then a thunderstorm rolled in early, and water started dripping from a light fixture on the top floor before I'd even packed my laser level. I used that exact storm to show him that once decking traps access and hides slope issues, what looks like a surface repair turns into a ceiling repair fast - and a ceiling repair on a top-floor unit in a four-story walk-up is nobody's idea of a simple afternoon.
If you cannot lift sections cleanly, you did not build a deck over a roof; you built a lid over a problem.
Here's the blunt version: I was called to Ridgewood by a landlord on a windy Saturday in March because the rooftop deck felt "bouncy" during a tenant showing. When I pulled up one corner, I found pressure-treated lumber, random shims, and roofing scraps all mixed together to level a twisted frame - like someone assembled a picnic table on a trampoline. I still remember telling him, "The good news is the boards are reusable; the bad news is none of this should be trusted by a person holding a drink." Queens freeze-thaw cycles are not gentle. Foot traffic, wind uplift, and repeated expansion and contraction will expose every shortcut in a mixed-material frame within two winters. Access panels, removable edge sections, and clearly mapped service routes aren't optional upgrades - they're what separates a deck that ages cleanly from one that becomes a liability at the worst possible time.
Correct Sequence for Flat Roof Decking Installation
Walk the entire roof. Confirm structural capacity, identify ponding zones, map the natural drainage direction, and document drain locations relative to any proposed deck layout.
Address all soft spots, open seams, blistering, and prior patch work before any decking system goes down. A compromised membrane under a deck is not a deferred problem - it's a guaranteed future failure.
Mark every drain, scupper, penetration, and seam run on a layout drawing. Design the deck grid around these - not the other way around. Removable panel locations must be confirmed at this stage.
Select a support method that maintains drainage clearance, protects the membrane from contact and point loads, and allows the assembly to be lifted without membrane disturbance. Document your choice with load calculations.
Build in serviceable sections from day one. Every drain, every corner, and every penetration needs a panel that lifts cleanly. Label service access locations so anyone doing maintenance in five years can find them without guessing.
Run water across the deck surface and confirm it reaches drains without obstruction. Lift every removable section and verify clean access. This is the test that proves the installation respects the roof underneath it.
Before You Call for a Roof Deck Installation Quote - Confirm These 7 Things
- Roof age and installation year - older roofs often have hidden condition issues that affect what's possible
- Known leaks or interior water damage - if there's been water in the building, the source needs to be confirmed before any deck work starts
- Drain locations and type - interior drains, scuppers, or combination? Know where they are and whether they're clear
- Existing drawings or permits - original roof plans, structural drawings, or prior permit history help a lot during assessment
- Intended deck use - residential lounge space, tenant access, commercial rooftop, and utility access all have different load and code implications
- Planned railings or utility runs - any penetrations, electrical, or gas lines need to be identified before layout so flashing can be planned correctly
- Whether sections must be removable - if there's any chance the membrane or drains will need service, build removability into the design from the beginning
Answer the practical questions owners ask when they mean can this be done safely
A flat roof under a deck is like a good winter coat under a tight backpack - it still has to breathe, shed water, and do its job. The answer to "can this be done?" is yes, but only when the roof stays inspectable, drainable, and protected once the deck is sitting on top of it. That's not a legal disclaimer. That's the condition under which the whole thing actually works long-term. The deck is the visible part of the project; the roof is the part that determines whether the building stays dry. Both have to function, or neither works.
Owner Questions About Installing a Deck on a Flat Roof
Inspection Schedule: Flat Roof Under Decking
| When | What to Inspect | Why It Matters |
|---|---|---|
| After Major Storms | Clear debris from drains and scuppers; lift edge panels to check for water backup; confirm pedestal/sleeper positions haven't shifted | Heavy rain and wind can block drains and shift support assemblies in a single event - catching it early prevents ponding damage |
| Every Spring | Lift all access panels; inspect membrane for winter wear, cracking, or movement at seams and penetrations; test drain flow with water | Freeze-thaw cycles cause the most membrane stress - spring is when that damage becomes visible and repairable before the rainy season |
| Every Fall | Clear all leaf and debris accumulation; inspect flashing at parapets and penetrations; verify pedestal and sleeper stability across the full deck field | Debris trapped under edge sections holds moisture through winter, accelerating base flashing deterioration |
| Before Winter | Confirm drains are fully clear and unobstructed; check membrane wear at high-traffic access points; note any soft spots or depressions | Standing water that freezes under a deck expands against the membrane and framing - a clear, dry roof going into winter prevents the worst outcomes |
| Anytime Movement or Soft Spots Appear | Immediately lift panels near the affected area; check for saturated insulation, displaced supports, or membrane punctures below the deck field | A bouncy or soft section is the roof telling you something has already failed below - waiting turns a localized repair into a full section replacement |
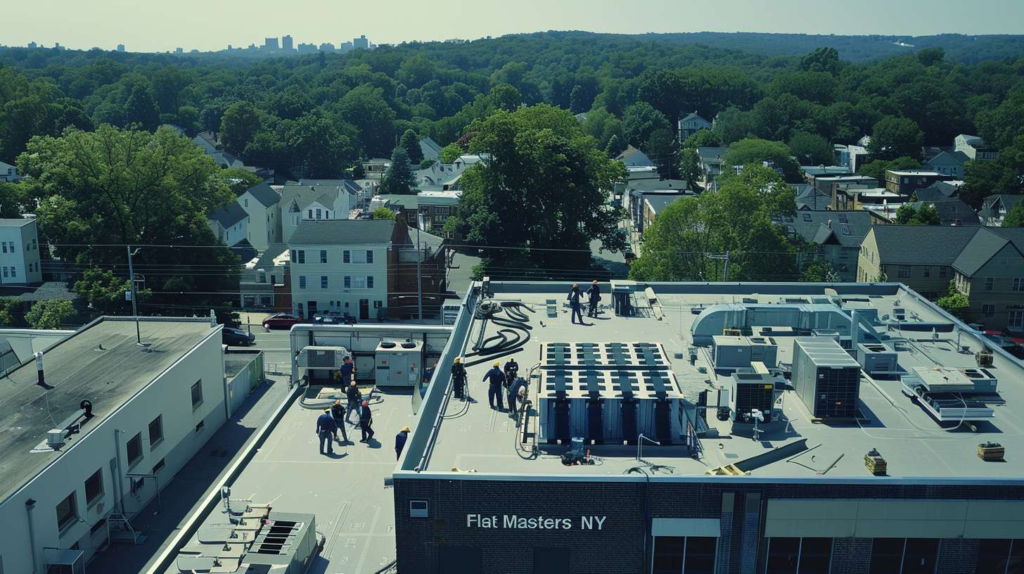
If you want a rooftop deck built without sacrificing the roof underneath it, Flat Masters can inspect the existing assembly, walk you through the layers clearly, and help you plan the installation the right way - from drainage to deck boards. Give us a call and let's start at the right place: the roof.
